If you’re searching for The Best Homemade Gravy Recipe that’s rich, silky, and full of flavor, I’ve got you covered. This gravy is my go-to for elevating anything from mashed potatoes to roasted veggies, and I promise it’s easier than you think. Once you try this, you’ll see why my family goes crazy for it every time—plus, I’ll share tips so you can nail it perfectly on your first try!
Why You’ll Love This Recipe
- Simple Ingredients: Uses pantry staples you likely already have on hand.
- Perfect Texture: Achieves that smooth, silky consistency every time without lumps.
- Customizable Flavor: Can be easily adapted with drippings or bouillon paste for an extra depth.
- Reliable Technique: I’ve tested this method repeatedly to make sure you avoid common gravy mishaps.

Ingredients You’ll Need
To make The Best Homemade Gravy Recipe, it’s key to use good-quality broth and fresh ingredients. I find that warming the broth before whisking it in helps everything come together smoothly.
- Broth or Stock: I prefer low-sodium so I can control the salt, but using drippings mixed with broth adds incredible flavor.
- Butter: Unsalted is best so you can adjust seasoning precisely.
- All-Purpose Flour: Measure loosely; packed flour can make the gravy too thick or gummy.
- Bouillon Paste (optional): Great if you want that extra boost of savory umami without drippings.
- Salt and Pepper: Essential for balancing the flavors—taste as you go!
Variations
This recipe is a great base that you can tailor to your personal taste or dietary needs. I love trying out new twists to keep things fresh but still comforting.
- Use Drippings: When I roast a chicken or turkey, I save the drippings and mix them with broth to amp up the flavor naturally.
- Herb-Infused Gravy: Adding fresh thyme or rosemary while simmering gives it a fragrant, seasonal touch that’s fantastic in fall and winter.
- Vegetarian Version: Substitute vegetable broth and skip the bouillon paste if you want a fully plant-based option that still tastes satisfying.
- Thicker or Thinner: Adjust the flour or broth quantities to get your desired gravy consistency—from luscious and thick to light and pourable.
How to Make The Best Homemade Gravy Recipe
Step 1: Warm Your Broth
Start by warming your broth or stock in a saucepan or microwave until it’s steaming hot but not boiling. Keeping it warm will help the flour mixture absorb it smoothly and prevent lumps—this little trick changed my gravy game completely!
Step 2: Make the Roux
Melt butter over medium heat in a saucepan, then whisk in the flour. Cook this mixture, whisking constantly for about 4 to 5 minutes until it turns a golden brown color. This roux is your gravy’s flavor and texture foundation, so don’t rush it. You want that warm, nutty aroma before moving on.
Step 3: Add Bouillon Paste (Optional)
If you’re using bouillon paste, whisk it into the roux now. This deepens the savory taste and is especially handy when you don’t have drippings at hand. I discovered this trick when I wanted to make gravy on a weekday without roasting meat.
Step 4: Whisk in Warm Broth Slowly
Here’s the part where patience pays off! Gradually drizzle in the warm broth in about half-cup increments, whisking vigorously between additions. The mixture might look crumbly or curdled at first—don’t worry, that’s totally normal and part of the magic. Once you have all the broth incorporated, simmer and whisk for a few minutes till the gravy is smooth and thickened.
Step 5: Season and Adjust
Season with salt and pepper to taste, keeping in mind that the butter and broth already contribute some saltiness. If your gravy feels too thick, just add a splash more broth until it’s just right. I always taste at this stage because even small tweaks make a big difference.
Pro Tips for Making The Best Homemade Gravy Recipe
- Warm Ingredients Matter: Warming the broth before adding helps prevent lumps and speeds up thickening.
- Constant Whisking: Keep whisking steadily when adding broth to avoid those stubborn lumps we all dread.
- Golden Roux: Cooking the flour and butter mixture until it’s golden—not too pale or dark—gives the perfect flavor base.
- Taste As You Go: Salt and seasoning level can vary widely depending on your broth and butter, so keep tasting throughout.
How to Serve The Best Homemade Gravy Recipe
Garnishes
I like to add a sprinkle of fresh chopped parsley or thyme leaves right before serving. It not only makes the gravy look pretty but adds a fresh herby note that brightens the richness beautifully.
Side Dishes
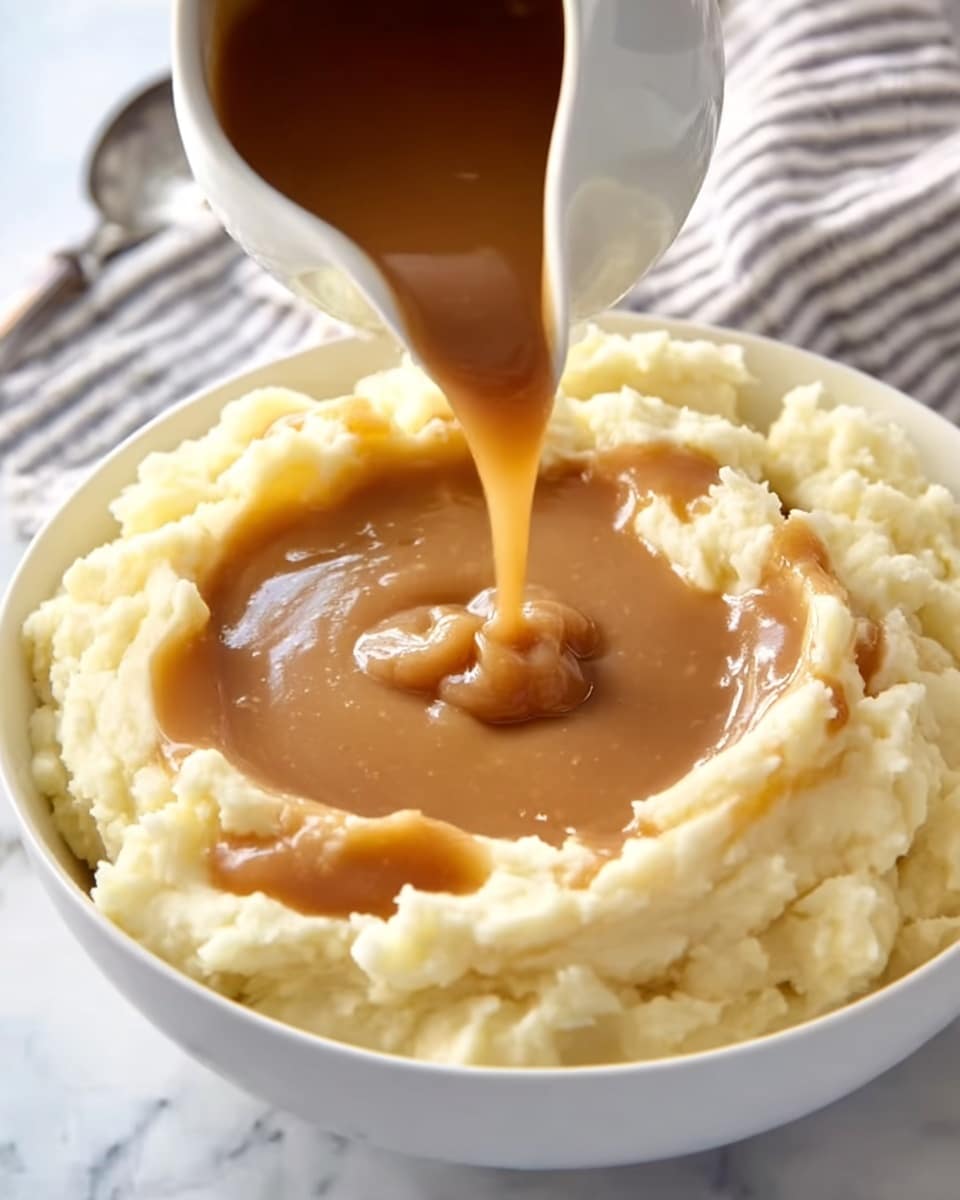
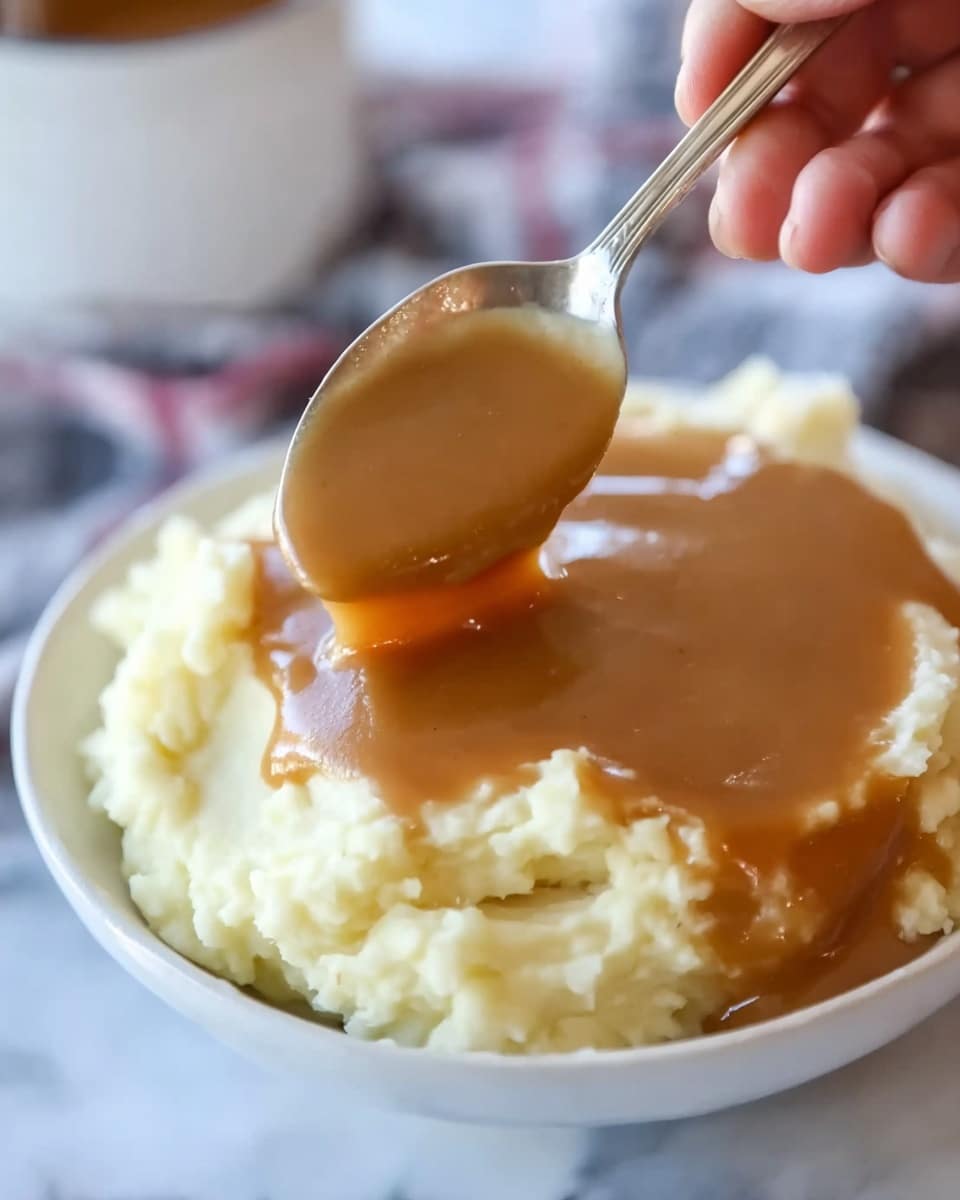
This gravy shines with classic mashed potatoes, roasted turkey, or even simple steamed veggies. My family also adores it drizzled over stuffing or baked meatloaf for a Sunday dinner classic.
Creative Ways to Present
For special occasions, I’ve poured this gravy into a beautiful gravy boat with fresh herbs on the side—everyone loves scooping it themselves at the table! You can also drizzle it artistically over individual plates for a restaurant-style touch.
Make Ahead and Storage
Storing Leftovers
I usually keep leftover gravy in an airtight container in the fridge for up to 3 days. Before covering, let it cool to avoid condensation that can alter texture.
Freezing
Freezing works well too! Just portion it into freezer-safe containers and thaw overnight in the fridge when you’re ready. I’ve noticed freezing can sometimes thicken it more, so adjust with a splash of broth when reheating.
Reheating
To reheat, warm the gravy gently over low heat while whisking continuously. If it’s too thick, adding a little broth or water brings back that perfect pourable consistency without losing flavor.
FAQs
-
Can I use drippings from roasted meat in this recipe?
Absolutely! Using drippings mixed with broth enhances the flavor, making your gravy taste even richer and more authentic. Just strain the drippings to remove any bits and adjust the broth amount so the total liquid is about 4 cups.
-
How do I fix gravy if it becomes lumpy?
The key is to whisk vigorously and slowly add warm broth. If lumps do form, you can strain the gravy through a fine mesh sieve or blitz it briefly with an immersion blender. Warm broth helps prevent lumps in the first place.
-
What if my gravy is too thick or too thin?
If it’s too thick, simply whisk in more warm broth a little at a time until you reach your desired consistency. If it’s too thin, keep simmering and whisking a few more minutes to reduce and thicken it up.
-
Can I make The Best Homemade Gravy Recipe ahead of time?
Yes! Make it a day ahead, cool completely, and store in the fridge. When ready, gently reheat with a splash of broth to refresh the texture. It saves so much stress on the big day!
Final Thoughts
I absolutely love how this gravy turns out—every batch feels like a little celebration of comfort food done right. When I first tried perfecting this, I struggled with lumps and overly salty results, but now it’s my family’s favorite and a recipe I trust completely. Give The Best Homemade Gravy Recipe a try, and I bet you’ll feel like a total gravy pro too!
Print
The Best Homemade Gravy Recipe
- Prep Time: 10 minutes
- Cook Time: 20 minutes
- Total Time: 30 minutes
- Yield: 12 servings (about 1/2 cup per serving)
- Category: Sauce
- Method: Stovetop
- Cuisine: American
Description
This easy and classic homemade gravy recipe yields a rich, silky smooth gravy made from a simple roux and broth or stock. Perfect for elevating your favorite roasted meats, mashed potatoes, and comfort foods with a savory and buttery sauce. The recipe includes tips for using drippings and bouillon paste for extra depth of flavor.
Ingredients
Ingredients
- 4 cups broth or stock, preferably low-sodium (see note for how to use drippings)
- 10 tablespoons butter
- 2/3 cup all-purpose flour (about 10 tablespoons, not packed)
- 1 tablespoon bouillon paste (optional – see note)
- Salt and pepper to taste
Instructions
- Warm the Broth: Warm the broth or stock in a saucepan or microwave until steaming. Keep it warm to ensure smooth incorporation into the roux later.
- Make the Roux: In a medium saucepan over medium heat, melt the butter. Add the all-purpose flour and cook while whisking constantly. Continue for 4 to 5 minutes until the roux turns a golden brown color, which builds a deep and nutty flavor base for the gravy. If using, whisk in the bouillon paste now.
- Incorporate the Broth Slowly: Whisking quickly and constantly, ladle in about 1/2 cup of the warm broth at a time. Whisk thoroughly to combine fully before adding the next ladle. Don’t worry if the mixture looks crumbly or curdled at this point; this is normal and part of the process.
- Simmer and Thicken: Once all the broth is added, bring the gravy to a gentle simmer. Continue whisking constantly for 3 to 4 minutes until it thickens to a silky smooth consistency.
- Season to Taste: Season with salt and pepper to your preference. The amount needed depends on the saltiness of your butter and broth. If the gravy is too thick, thin with additional broth to reach your desired consistency.
- Serve or Keep Warm: Serve the gravy immediately over dishes like roasted meats or mashed potatoes. If needed, keep it warm until serving, noting that the gravy will thicken further as it cools.
Notes
- For deeper flavor, you can substitute part or all of the broth with pan drippings from roasted meat.
- Bouillon paste is optional but adds an extra umami depth to the gravy.
- Do not pack the flour when measuring; use a spoon to transfer it lightly into the cup.
- Keep stirring continuously when making the roux to prevent burning and clumping.
- The gravy thickens as it cools; if reheating, gently thin it with broth or water as needed.
Nutrition
- Serving Size: 1/2 cup gravy
- Calories: 120
- Sugar: 0.03 g
- Sodium: 105 mg
- Fat: 10 g
- Saturated Fat: 6 g
- Unsaturated Fat: 4 g
- Trans Fat: 0 g
- Carbohydrates: 5 g
- Fiber: 0.2 g
- Protein: 4 g
- Cholesterol: 25 mg


