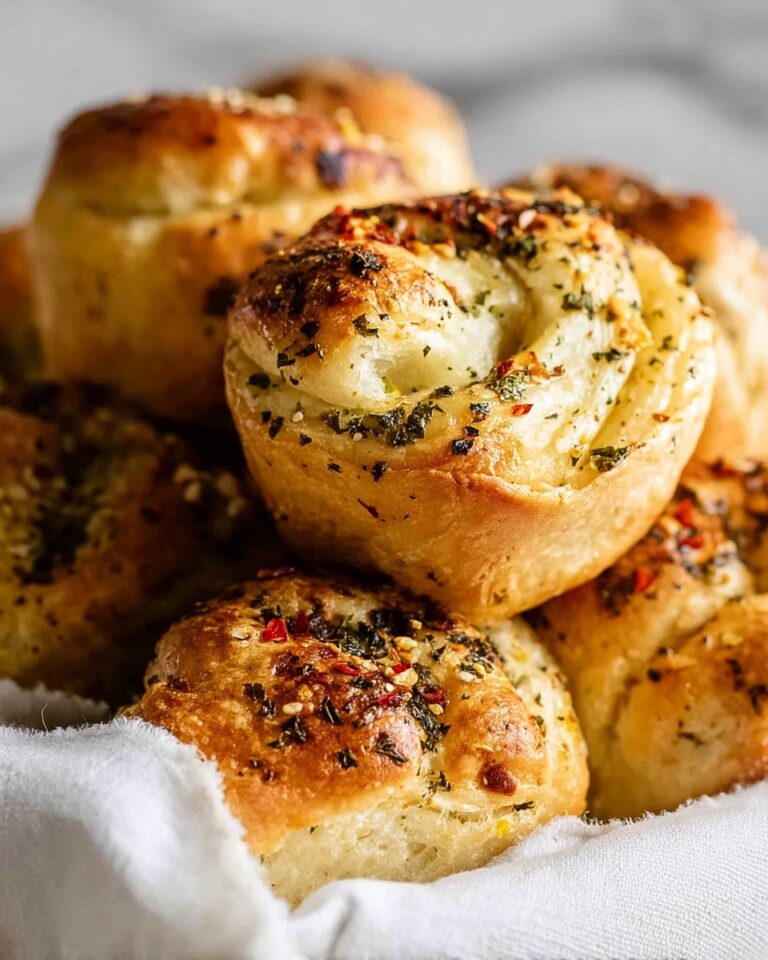
If you’re on the hunt for soft, fluffy, butter-kissed rolls that make every meal feel extra special, look no further. The BEST Homemade Dinner Rolls Recipe is truly a game-changer. Trust me, once you try these rolls fresh from your oven, you won’t want to buy store-bought again. I absolutely love how light and tender these turn out, and the simple ingredient list means you probably already have everything in your pantry!
Why You’ll Love This Recipe
- Super Easy to Make: Even if you’re new to baking bread, these rolls come together with simple steps that anyone can follow.
- Light & Fluffy Texture: Thanks to the instant yeast and fermentation time, these rolls turn out soft as a cloud every single time.
- Perfect for Any Occasion: Whether it’s a weeknight dinner or a holiday feast, these rolls always impress.
- Buttery Finish: A brush of melted butter right out of the oven elevates these rolls to irresistible.

Ingredients You’ll Need
This recipe calls for basic, pantry staples that work beautifully together to create that classic, tender dinner roll texture. When selecting ingredients, quality butter and fresh yeast really shine through in the final flavor and texture.
- All-purpose flour: The backbone of these rolls; using fresh flour is key for the best rise.
- Instant yeast: This rapid rise yeast cuts down your rising time and gives a soft crumb.
- Granulated sugar: Sweetens slightly and feeds the yeast for a light rise.
- Salt: Enhances flavor and balances the dough.
- Warm milk: Helps activate the yeast and adds tenderness; aim for around 110°F.
- Butter (softened): Adds richness and softness inside the dough.
- Egg: Adds structure and that lovely golden color.
- Melted butter: For brushing warm rolls to give them the perfect shiny, buttery finish.
Variations
I love how versatile this recipe is—you can tweak it just a bit to suit your mood or dining situation. You’re welcome to get creative or stick to the classic because, honestly, these rolls rock any way you slice them.
- Herb-Infused Rolls: I like mixing chopped rosemary or thyme into the dough for a fragrant twist that pairs amazingly with savory dinners.
- Whole Wheat Upgrade: Replace half the flour with whole wheat for a nuttier flavor and hearty texture—just add extra moisture if the dough feels dry.
- Garlic Butter Rolls: Swirl in some minced garlic with the melted butter brushed on top for a savory snack everyone requests in my house.
- Vegan Version: Swap the egg with flax egg and use plant-based milk and butter alternatives—you’ll still get great texture and flavor.
How to Make The BEST Homemade Dinner Rolls Recipe
Step 1: Mix Your Ingredients and Form the Dough
Start by combining 3 cups of flour, instant yeast, sugar, salt, warm milk, softened butter, and egg in a stand mixer bowl. I love using a stand mixer with a dough hook—it makes kneading a breeze and keeps the mess at bay. Mix on the lowest speed until the flour is mostly incorporated, then scrape down the bowl to make sure nothing’s hiding on the sides. Crank the speed to medium and beat for about 2 minutes—this helps develop the gluten for those soft, chewy rolls we all crave.
Step 2: Add Flour Gradually and Knead to Soft Dough
Now, add half a cup of flour at a time, mixing with the dough hook until each addition is fully incorporated. Repeat with another ½ cup. You might need to add a bit more flour—go slowly, because you want the dough to be slightly sticky but still pulling away from the edge of the bowl. I learned the hard way that adding too much flour here can make rolls dry, so err on the softer side. Once it forms a smooth, elastic ball of dough, it’s ready for its first rise.
Step 3: Let the Dough Rise
Transfer your dough to a lightly greased bowl and cover it with a clean kitchen towel or plastic wrap. Set it somewhere warm and cozy for 30 minutes. You’ll see it puff up nicely—not quite doubled but definitely risen. If you live somewhere chilly, I sometimes pop mine in an oven set to “proof” or just turn the oven on for a minute, then turn it off and let the dough rise inside.
Step 4: Shape the Rolls
After that first rise, punch down the dough gently—this helps create an even crumb texture. Then pinch off pieces and shape them into rolls. I usually weigh them to keep sizes consistent, about 2 ounces each, but you do you! Transfer the rolls to a greased baking dish or quarter baking sheet. Cover again and rise for another 30 minutes—you’ll notice them fluff up and fill out the pan.
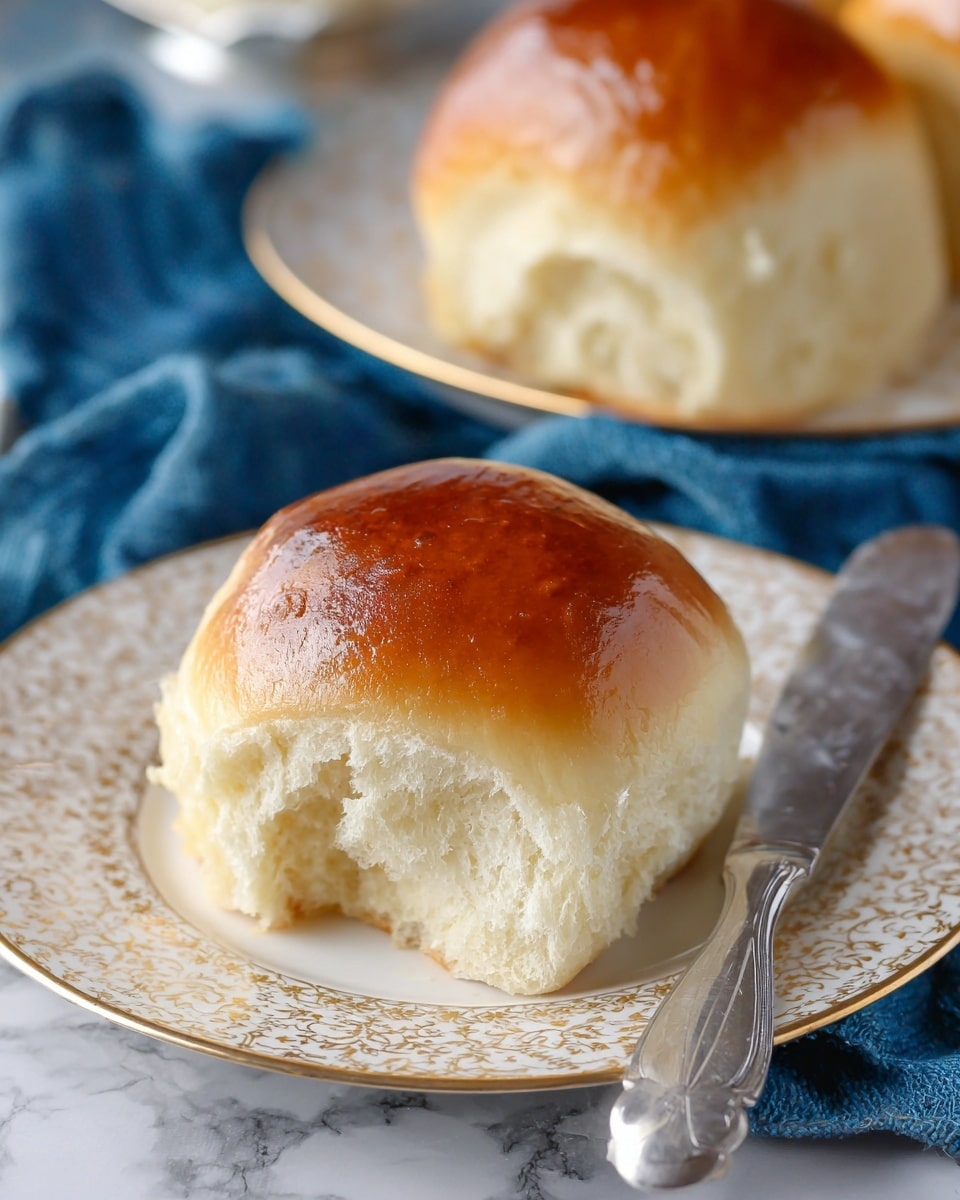
Step 5: Bake to Golden Perfection
Preheat your oven to 375°F. Bake the rolls for 12 to 15 minutes until they’re golden brown and the house smells like heaven. If you see the tops browning too fast, just tent some foil over them to prevent burning. The key here is even baking and that beautiful, inviting golden color.
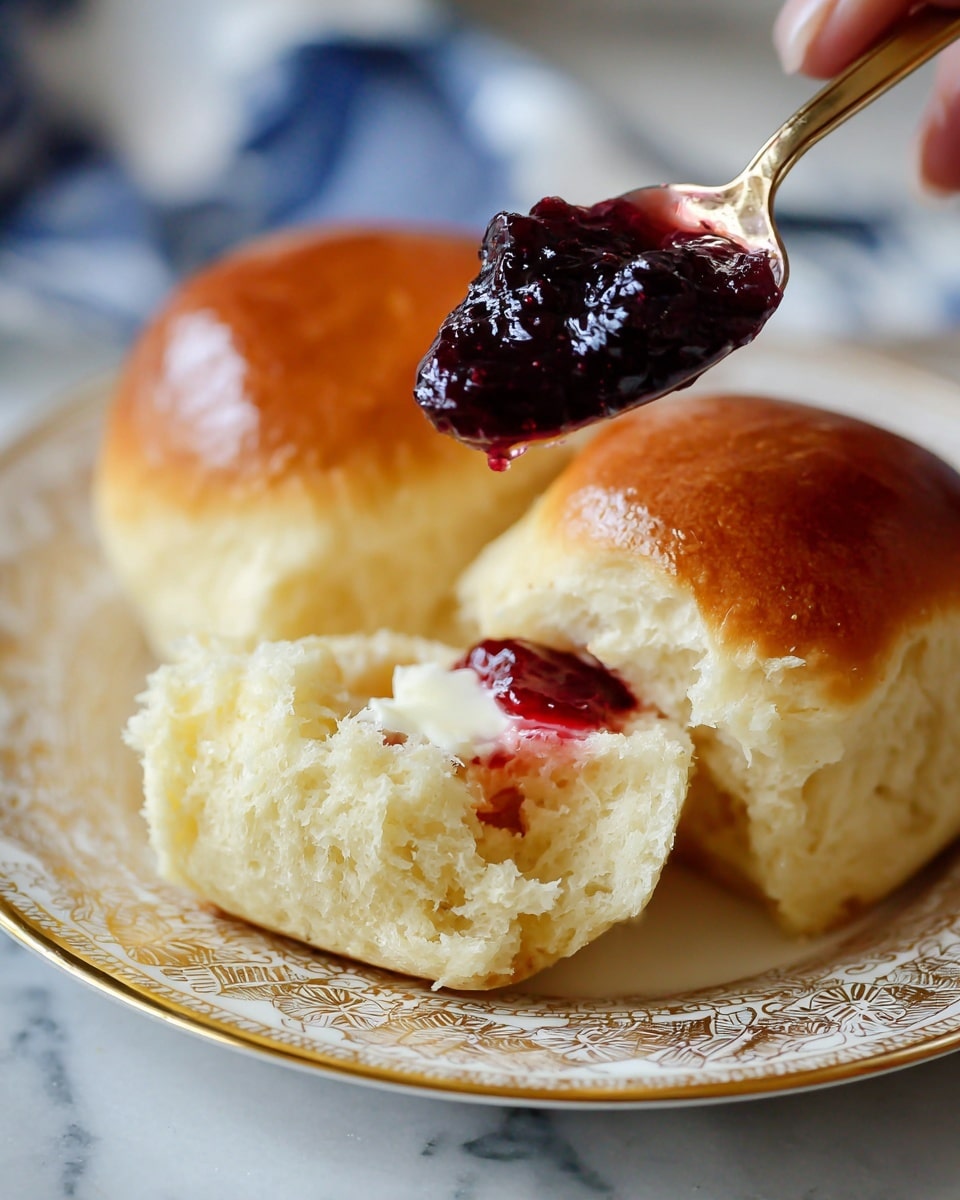
Step 6: Butter and Serve
Once out of the oven, brush the hot rolls with melted butter. That’s the finish that makes everyone swoon and grab their second roll before dinner’s even served. Serve immediately warm, or let cool and store (instructions below).
Pro Tips for Making The BEST Homemade Dinner Rolls Recipe
- Don’t Over-Flour: Too much flour can make your rolls dense; aim for a slightly sticky, soft dough for the fluffiest results.
- Keep Milk Warm, Not Hot: Milk that’s too hot can kill the yeast; test with your wrist — it should feel pleasantly warm.
- Consistent Roll Sizes: Weighing dough pieces helps rolls bake evenly, so none end up doughy or dry.
- Butter After Baking: Brushing melted butter after baking keeps rolls moist and adds rich flavor—never skip this step!
How to Serve The BEST Homemade Dinner Rolls Recipe
Garnishes
I like to sprinkle a little flaky sea salt or freshly chopped herbs like parsley or chives on top, right after brushing the rolls with butter. It adds freshness and a nice subtle crunch that makes the rolls feel even more irresistible.
Side Dishes
These rolls are the perfect companion for hearty soups, stews, or a classic roasted chicken dinner. My family goes crazy pairing them with creamy mashed potatoes and green beans—it’s my go-to comfort meal!
Creative Ways to Present
For holidays or dinner parties, I’ve arranged these rolls in a pull-apart spiral on a round pan or baked them in mini muffin tins for individual bite-sized treats. Either way, they look stunning and invite guests to dig right in.
Make Ahead and Storage
Storing Leftovers
If you have any rolls left (which is rare in my house!), store them in an airtight plastic bag or container at room temperature. They stay soft and fresh for up to 3 days—just avoid letting air get in to prevent drying out.
Freezing
These rolls freeze beautifully! Once completely cooled, wrap them tightly in plastic wrap and then place into a freezer bag. They’ll keep for up to 3 months. When you want rolls, simply thaw at room temperature or warm them gently in the oven.
Reheating
To bring back that fresh-baked softness, I pop the rolls in a 300°F oven for about 5–7 minutes wrapped in foil to heat through without drying out. If you’re in a hurry, a quick zap in the microwave with a damp paper towel works too—but I prefer the oven for best texture.
FAQs
-
Can I use active dry yeast instead of instant yeast?
Absolutely! Just proof the active dry yeast in warm milk with a pinch of sugar for 5-10 minutes until bubbly before adding it to your dry ingredients. This step isn’t necessary with instant yeast, which can be mixed directly into the flour.
-
Why are my rolls dense instead of fluffy?
Common causes include adding too much flour, not kneading enough, or not allowing the dough to rise fully. Remember to keep your dough slightly sticky and let it rise in a warm spot until it looks puffed up. Kneading develops gluten which traps air and creates that fluffy texture.
-
Can I make these rolls ahead of time?
Yes! You can shape the rolls after the first rise, then cover and refrigerate overnight. Bring them to room temperature and let rise again before baking. This slow fermentation actually deepens the flavor.
-
What’s the best way to reheat leftover rolls?
Heat them in a preheated 300°F oven for about 5-7 minutes wrapped in foil to keep moisture in. This revives softness and warmth without drying them out.
Final Thoughts
When I first tried this, I was amazed at how a few simple ingredients and a little patience could result in the most tender, buttery rolls I’d ever tasted. My family goes crazy for these, and honestly, I don’t blame them—there’s just something so comforting about bread you make yourself. So grab your stand mixer or roll up your sleeves and try making The BEST Homemade Dinner Rolls Recipe. I promise, it’ll become a staple in your kitchen just like it did in mine!
Print
The BEST Homemade Dinner Rolls Recipe
- Prep Time: 10 minutes
- Cook Time: 12 minutes
- Total Time: 52 minutes
- Yield: 24 rolls
- Category: Bread
- Method: Baking
- Cuisine: American
Description
These BEST Dinner Rolls are light, fluffy, and buttery, made from simple, wholesome ingredients. Perfectly soft and easy to prepare, they make an ideal addition to any meal, whether for a weekday dinner or a special occasion.
Ingredients
Dry Ingredients
- 4 – 5 cups all-purpose flour
- 2 tablespoons rapid rise, instant yeast
- ⅓ cup granulated sugar
- 1 teaspoon salt
Wet Ingredients
- 1½ cups warm milk (about 110 degrees F)
- 5 tablespoons butter, softened
- 1 egg, room temperature
- 2 tablespoons melted butter (for brushing)
Instructions
- Mix Dough: In the bowl of a stand mixer, combine 3 cups of flour, yeast, sugar, salt, warm milk, softened butter, and egg. Attach the dough hook and mix on the lowest speed until the flour is incorporated, scraping down the sides as needed.
- Knead Dough: Increase the speed to medium and beat for 2 minutes. Gradually add ½ cup flour and mix until incorporated, then add another ½ cup flour and continue mixing at medium speed for 2 more minutes until a dough ball forms. Add extra flour as needed—dough should be slightly sticky but pull away from the bowl.
- First Rise: Transfer the dough to a lightly greased bowl, cover with a towel or plastic wrap, and let it rise at room temperature for 30 minutes.
- Shape Rolls: After rising, deflate the dough by gently punching it down. Pinch off pieces and shape into 24 equal rolls (approximately 2 ounces each), adjusting size slightly if needed.
- Second Rise: Place the shaped rolls onto a lightly greased quarter baking sheet or 9×13 baking dish. Cover and let rise again at room temperature for 30 minutes.
- Bake: Preheat the oven to 375°F. Bake the rolls for 12 to 15 minutes or until golden brown and cooked through. If browning too fast, tent with foil.
- Brush and Serve: Remove rolls from oven and brush immediately with melted butter. Serve warm or store cooled rolls in a sealed plastic bag for up to 3 days.
Notes
- Light, fluffy, buttery dinner rolls are impossible to resist.
- Homemade with simple ingredients, these rolls come together quickly.
- Perfect for pairing with any meal, from everyday dinners to special occasions.
- For consistent sizing, weigh each roll at about 2 ounces.
- Use warm milk around 110°F to activate the yeast properly without killing it.
- Store rolls in an airtight container to maintain freshness for up to 3 days.
Nutrition
- Serving Size: 1 roll
- Calories: 74 kcal
- Sugar: 3 g
- Sodium: 136 mg
- Fat: 4 g
- Saturated Fat: 2 g
- Unsaturated Fat: 1.5 g
- Trans Fat: 0 g
- Carbohydrates: 7 g
- Fiber: 0.3 g
- Protein: 1 g
- Cholesterol: 17 mg


