Description
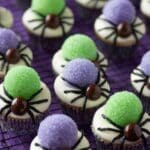
Spider Bites Mini Cupcakes are delightful miniature treats perfect for Halloween or any spooky occasion. These moist chocolate cupcakes are topped with a rich, creamy colored buttercream shaped like playful spider bodies, coated with vanilla candy melts, and decorated with charming espresso bean heads and piped chocolate legs for a fun and festive look.
Ingredients
Scale
Cupcake Ingredients
- 1 cup all purpose flour
- 1/4 cup natural unsweetened cocoa
- 1/2 cup granulated sugar
- 1/2 teaspoon baking powder
- 1/4 teaspoon baking soda
- 1/4 teaspoon salt
- 1 egg
- 1/3 cup buttermilk
- 3 Tablespoons vegetable oil
- 1/2 teaspoon vanilla extract
- 3 Tablespoons hot water
Buttercream Ingredients
- 1 cup (two sticks) butter, room temperature
- 1 lb. confectioners’ sugar
- 1 teaspoon vanilla extract
- 1-3 Tablespoons milk
Decoration Ingredients
- Vanilla candy coating
- White sanding sugar
- Purple or green gel icing color
- Dark chocolate covered espresso beans
Instructions
- Preheat Oven and Prepare Pan: Preheat your oven to 350°F (175°C) and line a mini cupcake pan with 24 miniature baking cups to ensure easy cupcake removal and even baking.
- Mix Dry Ingredients: Sift together all-purpose flour, unsweetened cocoa powder, granulated sugar, baking powder, baking soda, and salt in the bowl of a stand mixer to combine and aerate the dry components.
- Add Wet Ingredients: Add the egg to the dry mixture and mix until just combined. Then pour in buttermilk, vegetable oil, and vanilla extract, blending until the batter is smooth and uniform.
- Incorporate Hot Water: Slowly add the hot water to the batter while mixing, which helps to create a lighter cupcake texture. Ensure all ingredients are thoroughly combined.
- Fill and Bake Cupcakes: Using a small scoop, fill each cupcake liner about two-thirds full with the batter. Bake in the preheated oven for 10-12 minutes or until a toothpick inserted into the center comes out clean. Remove from oven and let cool completely.
- Prepare Buttercream Frosting: Beat the room temperature butter in a large bowl for 3-4 minutes until light and creamy. Gradually add the confectioners’ sugar, one cup at a time, starting on low speed, then increasing until fully incorporated and smooth.
- Add Flavor and Adjust Consistency: Stir in the vanilla extract. Add milk one tablespoon at a time, mixing well after each addition, until the buttercream reaches a thick consistency suitable for piping firm shapes. Note that you may add more milk later for piping finer details like legs.
- Melt Vanilla Candy Coating: Melt the vanilla candy coating until fluid, suitable for dipping the cupcake tops. This will form a smooth, glossy surface for decorating.
- Dip Cupcake Tops: Dip the tops of the cooled cupcakes into the melted vanilla candy coating and allow the coating to dry completely, creating a firm base for decoration.
- Tint Buttercream and Pipe Spider Bodies: Color most of the buttercream with purple or green gel icing color to create the spider bodies. Using an Ateco #808 decorating tip, pipe large dollops of the tinted buttercream on the top and side of each cupcake to form the spider’s body shape.
- Coat Buttercream with Sugar: Gently dip the piped buttercream spider bodies into white sanding sugar to give texture and help shape them into a round ball resembling a spider’s body.
- Attach Spider Heads: Use a small amount of melted vanilla candy coating as glue to attach dark chocolate covered espresso beans at the front of each buttercream spider body, forming the spider’s head.
- Tint Remaining Buttercream and Pipe Legs: Tint the remaining buttercream black and, using a Wilton #2 decorating tip, pipe spider legs onto each cupcake, extending from the spider’s body to complete the look.
- Serve and Enjoy: Allow all decorations to set and then indulge in these festive, adorable Spider Bites Mini Cupcakes.
Notes
- Ensure cupcakes are completely cooled before dipping them in the melted candy coating to prevent melting or damage.
- Adjust the amount of milk in the buttercream frosting to get the right consistency for piping different details.
- If you do not have gel food coloring, use concentrated liquid food coloring but add sparingly to avoid thinning the buttercream.
- Dark chocolate covered espresso beans add a subtle coffee flavor and a lovely glossy finish for the spider heads.
- These mini cupcakes can be stored in an airtight container at room temperature for up to 2 days or refrigerated for up to 4 days; bring to room temperature before serving.
Nutrition
- Serving Size: 1 mini cupcake
- Calories: 160
- Sugar: 18g
- Sodium: 75mg
- Fat: 8g
- Saturated Fat: 4.5g
- Unsaturated Fat: 2g
- Trans Fat: 0g
- Carbohydrates: 22g
- Fiber: 1g
- Protein: 1.5g
- Cholesterol: 30mg