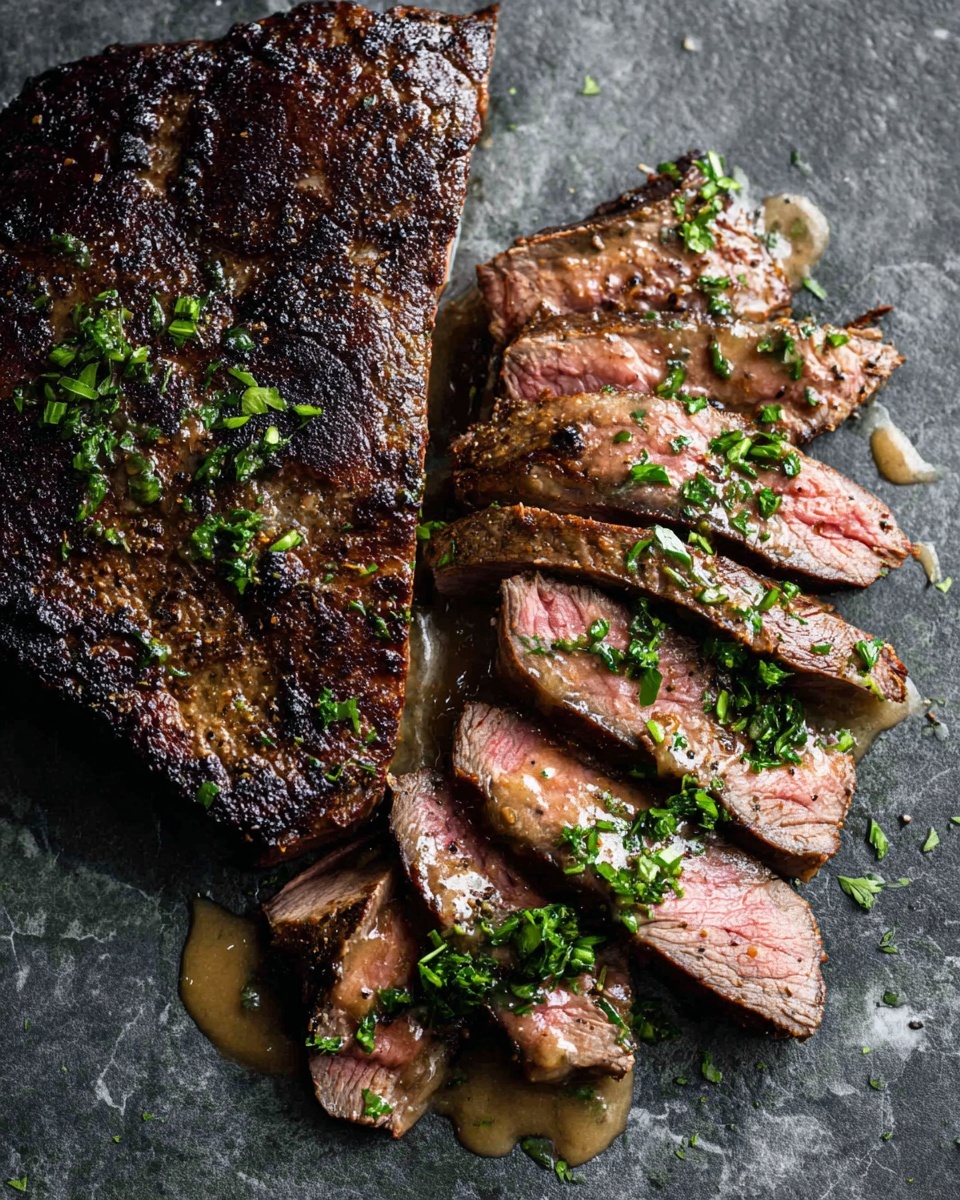
If you’re looking to transform a humble cut of beef into melt-in-your-mouth goodness, you’ve got to try this Sous Vide Chuck Roast Recipe. It’s hands-off, fuss-free, and the results always amaze me — seriously, your family will be asking for seconds before you’re even done plating! Whether you’re new to sous vide or just hunting for that perfect roast method, I promise this recipe is going to be a game changer for your kitchen.
Why You’ll Love This Recipe
- Ultimate Tenderness: The slow sous vide cooking breaks down the chuck roast’s tough fibers like magic, leaving you with fork-tender beef every time.
- Hands-Off Cooking: Once you seal the roast and drop it in the water bath, you’re basically set and free to do other things. No babysitting required!
- Perfect Flavor Lock-In: The seasoning and juices are sealed tight, so flavors get super concentrated and juicy without any drying out.
- Versatility: It’s great for sliced roast, shredded beef, or served with gravy—whatever your mood calls for.

Ingredients You’ll Need
The ingredient list keeps things really simple—quality chuck roast and a good steak seasoning are your stars here. I like to grab a chuck roast with nice marbling because the fat adds so much flavor and juiciness after those long sous vide hours.
- Chuck roast: Choose a boneless cut with good marbling—this helps keep it juicy throughout the long cook.
- Steak seasoning: Use your favorite blend or a simple mix of salt, pepper, garlic powder, and paprika for a solid flavor base.
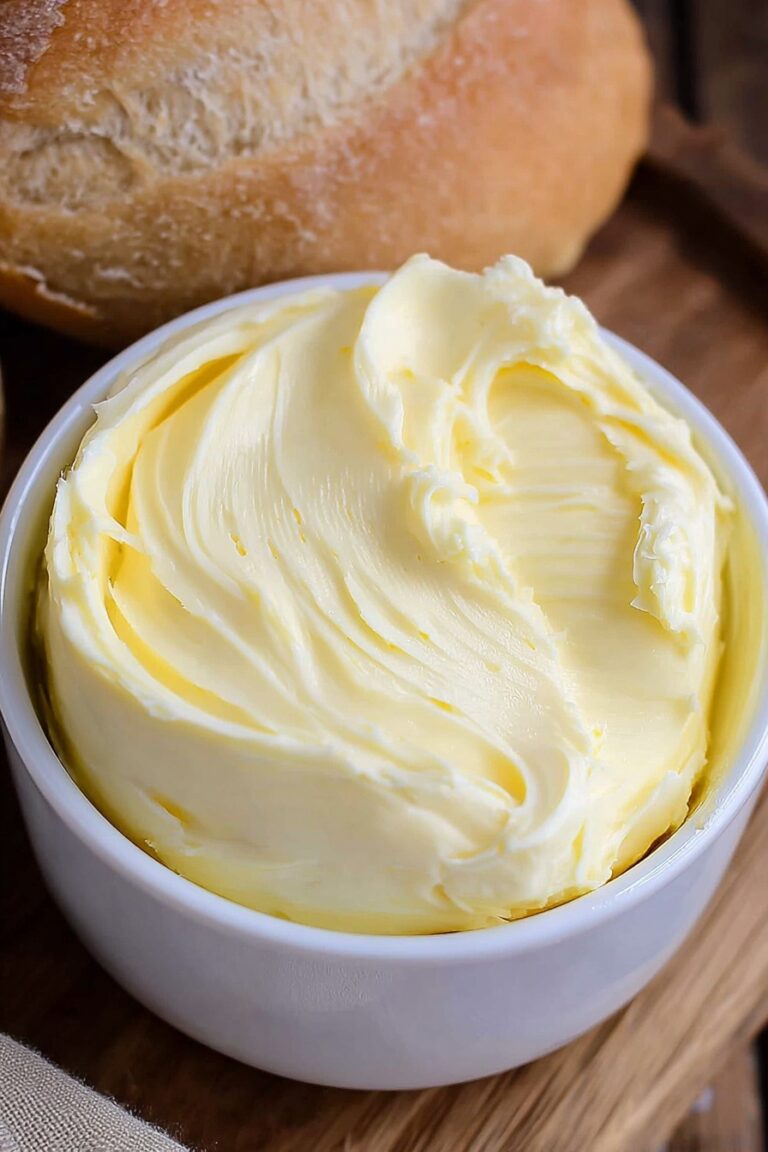
- Unsalted butter: Adds richness and silkiness to your gravy once the roast is done.
- Flour: For thickening that luscious au jus into a gravy; finds its way into many of my roast recipes.
- Sherry: This brings a lovely depth to the gravy, but if you don’t have it, a splash of red wine or even balsamic vinegar works too.
- Beef stock (optional): Handy if your gravy needs thinning—always good to keep some on hand.
- Salt: To taste, especially if you want to tweak seasoning after cooking.
Variations
I love customizing this Sous Vide Chuck Roast Recipe depending on the occasion or what flavors I’m craving. It’s such a flexible base that you can tweak it to suit any palate or dietary need!
- Herb-Infused: Once, I added fresh rosemary, thyme, and garlic cloves to the bag before sealing – it lifted the flavor beautifully and made everything smell amazing while cooking.
- Asian-Inspired: Swap steak seasoning for a mix of soy sauce, ginger, garlic, and a dash of five-spice powder before sous vide; it’s an unexpected but delightful twist!
- Spicy Kick: A pinch of cayenne or smoked paprika in your seasoning adds warmth without overpowering the roast’s natural richness.
- Gluten-Free Gravy: Use cornstarch slurry instead of flour for thickening if you’re avoiding gluten—still gets that great silky finish.
How to Make Sous Vide Chuck Roast Recipe
Step 1: Season and Seal Your Chuck Roast
This is where flavor enters the picture! I like to generously rub in my steak seasoning — don’t be shy, this cut can handle bold flavors. Then, pop the roast into a vacuum seal bag and remove all the air. If you don’t have a vacuum sealer, the water displacement method works great (just lower the bag into water slowly to push out air before sealing). This step seals in all the juices and seasoning, setting you up for juicy, tender results.
Step 2: Sous Vide the Roast Low and Slow
Set your sous vide cooker to 135°F (57°C) for medium-rare perfection. Submerge your sealed chuck roast and leave it to bath for 24 to 36 hours. I usually aim for around 26 hours because it gives a great balance between tender and still sliceable beef. If you want fall-apart soft, go closer to the full 36 hours. Pro tip: keep the bag fully submerged and use clips to keep it from floating; this keeps the cooking consistent throughout.
Step 3: Chill or Sear Based on Your Timing
If you’re not eating right away, don’t rush — drop your sealed bag into an ice bath to cool quickly for safe storage. Planning to eat immediately? Remove the roast from the bag, but first reserve those flavorful juices. Pat the roast dry — this is key for a golden crust later. Wet meat just steams instead of browning, so be thorough here!
Step 4: Sear to Perfection
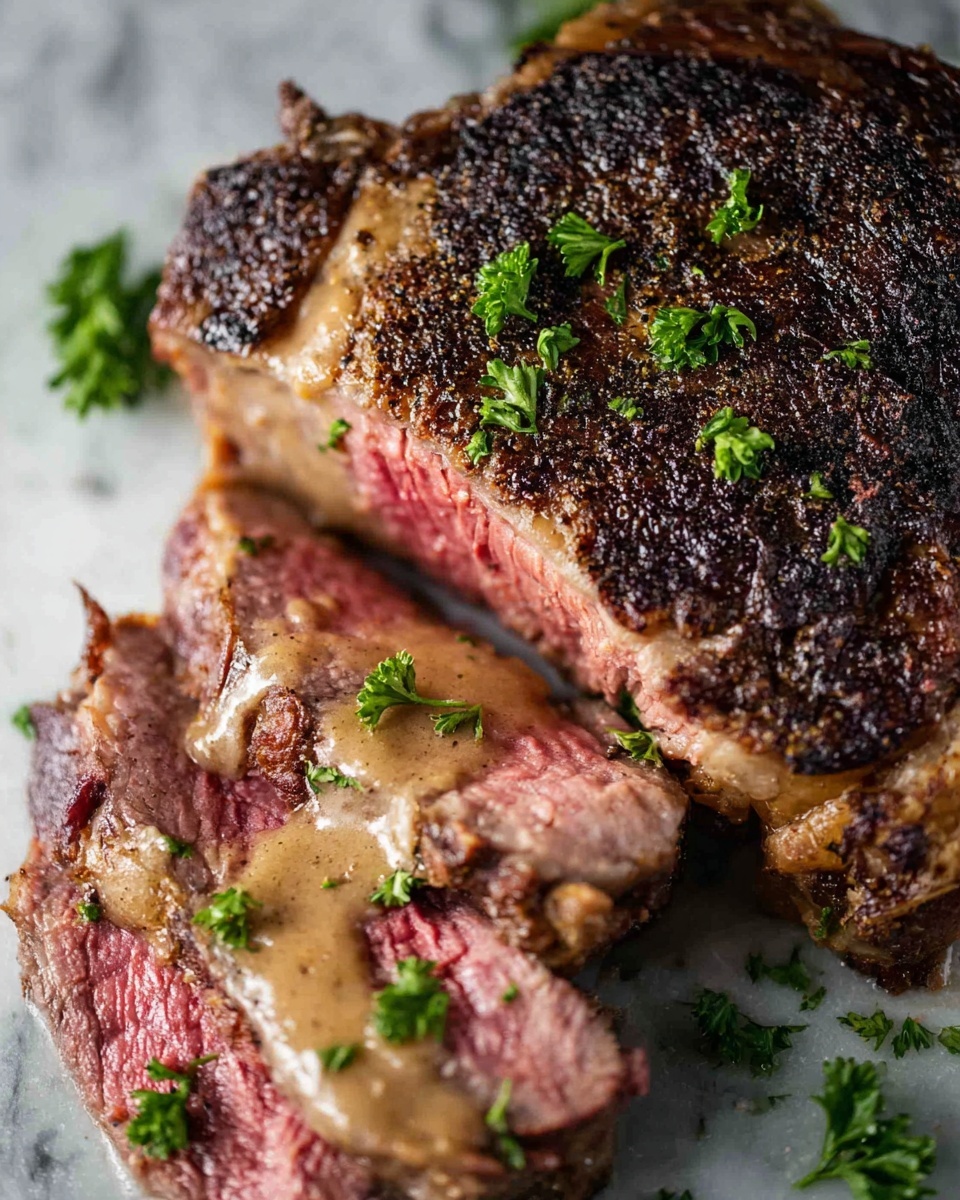
Heat a heavy skillet or grill to smoking hot. I love how a quick 60 to 90 seconds on each side creates this incredible crust that seals the flavor in. Keep an eye on it so it browns but doesn’t overcook — you want that beautiful Maillard reaction without losing the sous vide’s tender texture.
Step 5: Make the Gravy
In the pan, melt two tablespoons of unsalted butter and whisk in a couple teaspoons of flour to create a roux. Slowly add your bag’s drippings and a splash of sherry for a rich, velvety gravy. If it’s too thick, just thin it with some beef stock. Taste and season with salt as needed. This gravy is honestly my favorite part — it pulls those cozy roast vibes together perfectly.
Pro Tips for Making Sous Vide Chuck Roast Recipe
- Don’t Rush the Drying: Dry the roast really well before searing to get that perfect crust—moisture is the enemy of browning.
- Watch Your Water Bath: Use sous vide weights or clips to keep the bag submerged and avoid temperature dips that can lengthen cooking time.
- Timing Is Flexible: Between 24-36 hours works well; I’ve experimented extensively and found 26 hours is my sweet spot.
- Reserve Those Juices: They’re liquid gold for gravy—don’t toss them out!
How to Serve Sous Vide Chuck Roast Recipe
Garnishes
I usually garnish with a sprinkle of fresh chopped parsley—it adds just enough color and freshness to cut through the richness. Sometimes I toss a few crispy fried shallots on top for crunch, which really takes the dish up a notch.
Side Dishes
My go-to sides are creamy mashed potatoes or buttery polenta, plus roasted root veggies to bring some sweetness and texture contrast. On special occasions, I throw in garlic sautéed green beans or a fresh arugula salad with lemon vinaigrette for balance.
Creative Ways to Present
For holiday dinners, I slice the roast thin and fan it out on a wooden board, drizzle with gravy, and surround it with herbs and roasted garlic cloves. It always gets a “wow” from my guests and makes the meal feel super special without extra effort.
Make Ahead and Storage
Storing Leftovers
I store leftover roast and gravy separately in airtight containers in the fridge; this keeps the roast from getting soggy. They stay great up to 3-4 days. I’ve had no problem reheating without losing moisture when done gently.
Freezing
You can freeze the roast cooked sous vide either in the vacuum bag or after searing. Just pop it in a freezer-safe bag or container with some juices, and it’s good for a couple of months. When you’re ready, thaw overnight in the fridge for best results.
Reheating
To reheat, I prefer my cast iron skillet over medium-low heat and a splash of beef stock to gently warm the roast and gravy without drying it out. Alternatively, a quick 30-minute sous vide rewarm at 130°F works perfectly if you want to maintain that juicy texture.
FAQs
-
Can I sous vide a chuck roast to medium-well or well done?
Absolutely! Lower temps (130°F to 140°F) give you medium-rare to medium, but if you prefer it more done, you can raise the temperature to 150°F or even 160°F—just expect a firmer texture. Longer cooking times at these temps will help maintain tenderness.
-
Do I need to sear the chuck roast after sous vide?
Searing is optional but highly recommended! It adds flavor, a beautiful crust, and improves the overall eating experience by enhancing texture and aroma. Plus, it helps warm the meat right before serving.
-
What if I don’t have a vacuum sealer?
No worries! You can use the water displacement method with a ziplock bag: just seal all but a small corner, slowly lower it into the water to push air out, then seal the corner before fully submerging. I use this method often with great results.
-
How do I know when the chuck roast is done?
Sous vide rely on time and temperature rather than traditional doneness cues. For tender chuck roast, 24-36 hours at 135°F is the sweet spot. You’ll feel it’s done when the meat is tender but can still slice nicely; if you want it shreddable, cook longer!
Final Thoughts
This Sous Vide Chuck Roast Recipe is one of those kitchen hacks I keep in my back pocket for easy impressive dinners. I love how it turns an affordable, tough cut into something that tastes like it’s been cooking for days without any stress. I really encourage you to try it out—once you do, you might find yourself making it for every family gathering or special weeknight meal. Trust me, your dinner guests will definitely notice the difference!
Print
Sous Vide Chuck Roast Recipe
- Prep Time: 10 minutes
- Cook Time: 36 hours
- Total Time: 36 hours 10 minutes
- Yield: 6 servings
- Category: Main Course
- Method: Sous Vide
- Cuisine: American
Description
A tender and flavorful sous vide chuck roast cooked low and slow to perfection, then seared for a beautiful crust and served with a rich pan gravy. This method transforms a tough cut into a melt-in-your-mouth meal ideal for family dinners.
Ingredients
Beef
- 3-4 pound boneless chuck roast
- 3 tablespoons steak seasoning
Gravy
- Bag drippings (juice left in the sous vide bag)
- 2 tablespoons unsalted butter
- 2 teaspoons flour
- 1 tablespoon sherry
- Beef stock (optional, use if gravy is too thick)
- Salt (to taste)
Instructions
- Prepare Sous Vide Bath: Heat a sous vide water bath to 135°F (57°C) for perfect medium-rare doneness.
- Season the Meat: Generously season the chuck roast with steak seasoning, ensuring even coverage on all sides.
- Bag the Roast: Place the seasoned chuck roast in a vacuum seal bag and remove all the air using a vacuum sealer or use the water displacement method.
- Cook Sous Vide: Submerge the sealed bag in the water bath and cook for 24 to 36 hours. Around 26 hours yields a roast with a nice bite while longer cooking results in a softer texture.
- Chill if Not Serving Immediately: Remove the bag from the water bath and place it in an ice bath if you don’t plan on eating right away to stop the cooking process.
- Prepare for Searing: When ready to serve, remove the beef from the bag, reserving the juices in a bowl. Pat the roast as dry as possible to ensure a quick and effective sear.
- Sear the Roast: Heat a large skillet or grill over high heat until smoking hot. Sear the chuck roast for 60-90 seconds per side until a brown crust forms, being careful not to overcook.
- Make the Gravy: Use the reserved bag juices to make a gravy by melting butter in the skillet, whisking in flour until smooth, then adding the juices and sherry. Add beef stock if needed to adjust thickness and season with salt to taste.
Notes
- This sous vide method is a no-fail, hands-off way to turn a tough chuck roast into a tender, flavorful meal perfect for Sunday dinners.
- Longer sous vide cooking times result in more tender meat.
- Patting meat dry before searing helps develop a better crust.
- Use beef stock to adjust gravies to your preferred consistency.
Nutrition
- Serving Size: 6 ounces
- Calories: 452 kcal
- Sugar: 1 g
- Sodium: 185 mg
- Fat: 30 g
- Saturated Fat: 14 g
- Unsaturated Fat: 14 g
- Trans Fat: 2 g
- Carbohydrates: 2 g
- Fiber: 1 g
- Protein: 44 g
- Cholesterol: 167 mg


