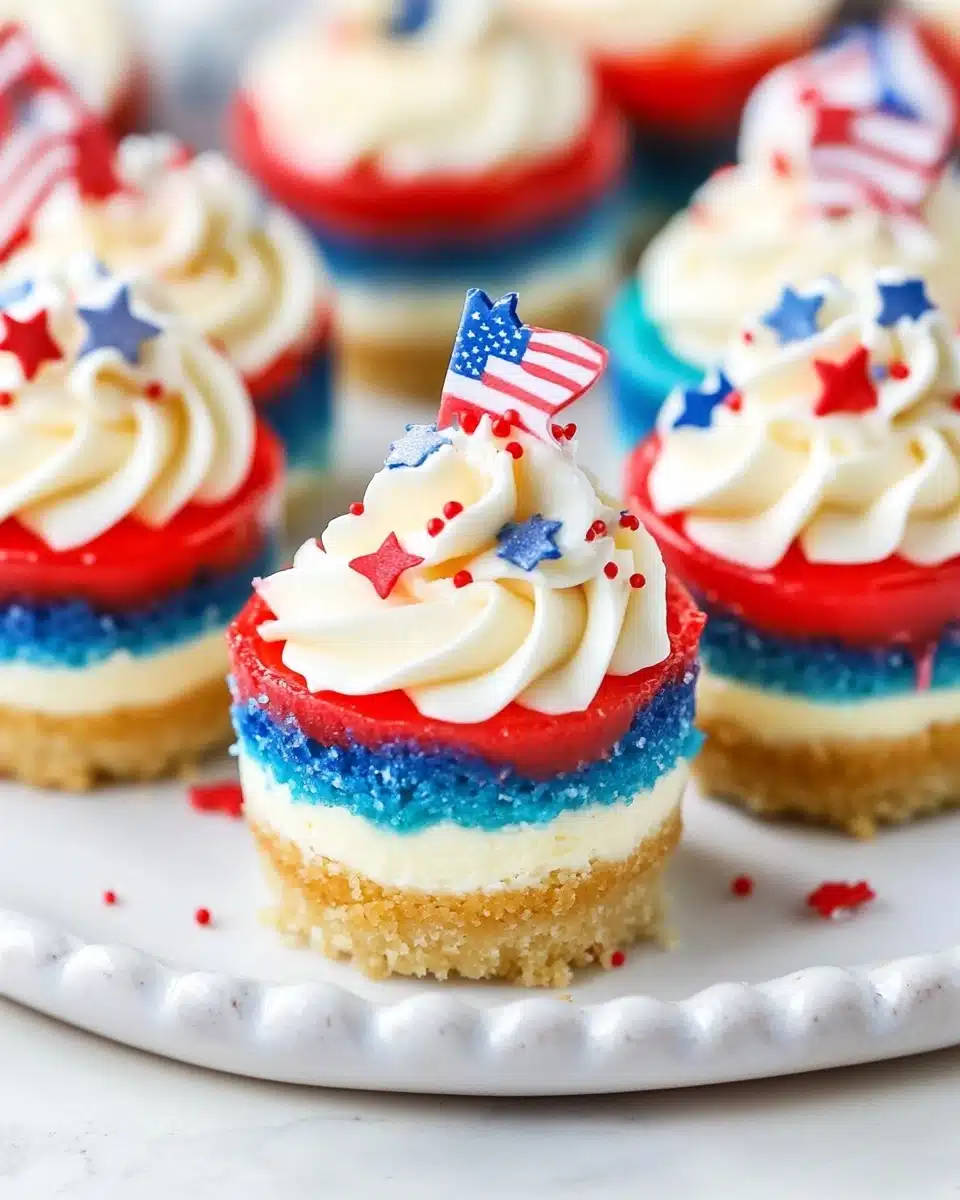
Get ready to capture the spirit of celebration with these Red, White and Blue Mini Cheesecakes! They’re delightfully creamy, vibrantly colored, and perfectly portioned for parties, picnics, or any joyful gathering. Every bite promises a swirl of festive fun and classic New York-style richness. Trust me, these little cheesecakes are the ultimate crowd-pleasers you’ll want to make all summer long!
Why You’ll Love This Recipe
- Festive Showstopper: The red, white, and blue layers make these mini cheesecakes the center of attention at any summer party or patriotic event.
- Perfectly Portable: Their single-serve size means no slicing, no mess, and everyone gets their own delectable dessert!
- Simple Ingredients, Big Flavor: You’ll use pantry staples to create that classic creamy cheesecake taste everyone craves.
- Customizable for Any Celebration: It’s easy to switch up the colors and toppings, so the recipe works for everything from birthdays to backyard barbecues.

Ingredients You’ll Need
The best part? You only need a handful of kitchen basics to make these Red, White and Blue Mini Cheesecakes shine. Each ingredient does a little dance—some for color, some for structure, and every single one for undiluted deliciousness.
- Vanilla wafer cookie crumbs: These create a sweet, buttery, and slightly crunchy base that complements the creamy filling.
- Sugar (granulated and powdered): Granulated for sweetness in the crust and filling, powdered for that ultra-light whipped cream topping.
- Butter (melted): Binds the crumbs together and adds a rich, comforting flavor to the mini crusts.
- Cream cheese: The star of the show—rich, tangy, and always best at room temperature for smooth blending.
- Flour: Just a little helps thicken the batter and gives the mini cheesecakes their signature luscious texture.
- Sour cream: Adds depth, creaminess, and a gentle tang that keeps these bites light and balanced.
- Vanilla extract: Rounds out the flavors with classic warmth and aroma.
- Eggs: Essential for binding and creating that beautiful, dense-yet-fluffy cheesecake consistency.
- Red and blue gel food coloring: For those bold, vibrant layers—gel works best because it doesn’t thin out the batter.
- Heavy whipping cream: Whipped into beautiful peaks for a pillowy, cloud-like topping.
- Sprinkles: The sparkle! Festive to the max and an instant mood-booster for any cheesecake.
Variations
The beauty of Red, White and Blue Mini Cheesecakes is how easy they are to personalize! Don’t be afraid to mix things up—swap flavors, adjust colors, or make them friendly for different diets. Your mini cheesecakes, your rules!
- Oreo Crust: For an extra decadent twist, replace vanilla wafer crumbs with crushed chocolate sandwich cookies.
- Berry Swirl: Instead of food coloring, swirl in spoonfuls of strawberry or blueberry preserves for natural color and fruity bursts.
- Gluten-Free Version: Use gluten-free wafer cookies or graham crackers for the crust so everyone can indulge worry-free.
- No-Dye Option: Layer with fresh sliced strawberries and blueberries instead of food dye for a more natural look and taste.
How to Make Red, White and Blue Mini Cheesecakes
Step 1: Prepare the Pan and Crust
Preheat your oven to 325°F (162°C) and line your cupcake pan with liners. Combine the vanilla wafer cookie crumbs, sugar, and melted butter in a bowl, mixing until it resembles wet sand. Scoop about two tablespoons of the mixture into each liner and press firmly to form an even base. Bake for five minutes—just enough to set—then let them cool while you dream about that creamy filling.
Step 2: Mix the Cheesecake Filling
Drop your oven temperature to 300°F (148°C). Beat the cream cheese, sugar, and flour together on low to avoid extra air (which means no cracks!). Scrape down the bowl so everything blends beautifully. Next, stir in the sour cream and vanilla until the mixture is dreamy and smooth. Finally, add your eggs one at a time, mixing just enough to combine. The result? Silky, luscious cheesecake batter ready to get festive.
Step 3: Color and Layer the Batter
Divide your batter evenly into three bowls. Leave one bowl as it is (for that classic creamy white). Give another bowl a squeeze of red gel coloring, and the third a dose of blue, mixing gently for vibrant streak-free color. Now layer: Add a tablespoon of white batter to each crust, followed by red, then blue. The order is up to you—the colors will settle into playful, patriotic swirls that look fabulous once baked!
Step 4: Bake and Cool
Bake the mini cheesecakes for 18–20 minutes, until the centers are just set. Then turn off the oven and let them rest inside for 10 minutes—this gentle cooling helps prevent cracks. Crack the oven door for another 15–20 minutes to let them acclimate. Once they’re cool enough to handle, transfer to the fridge to finish chilling and firm up, at least a couple of hours or overnight if you can wait!
Step 5: Whip, Decorate & Serve
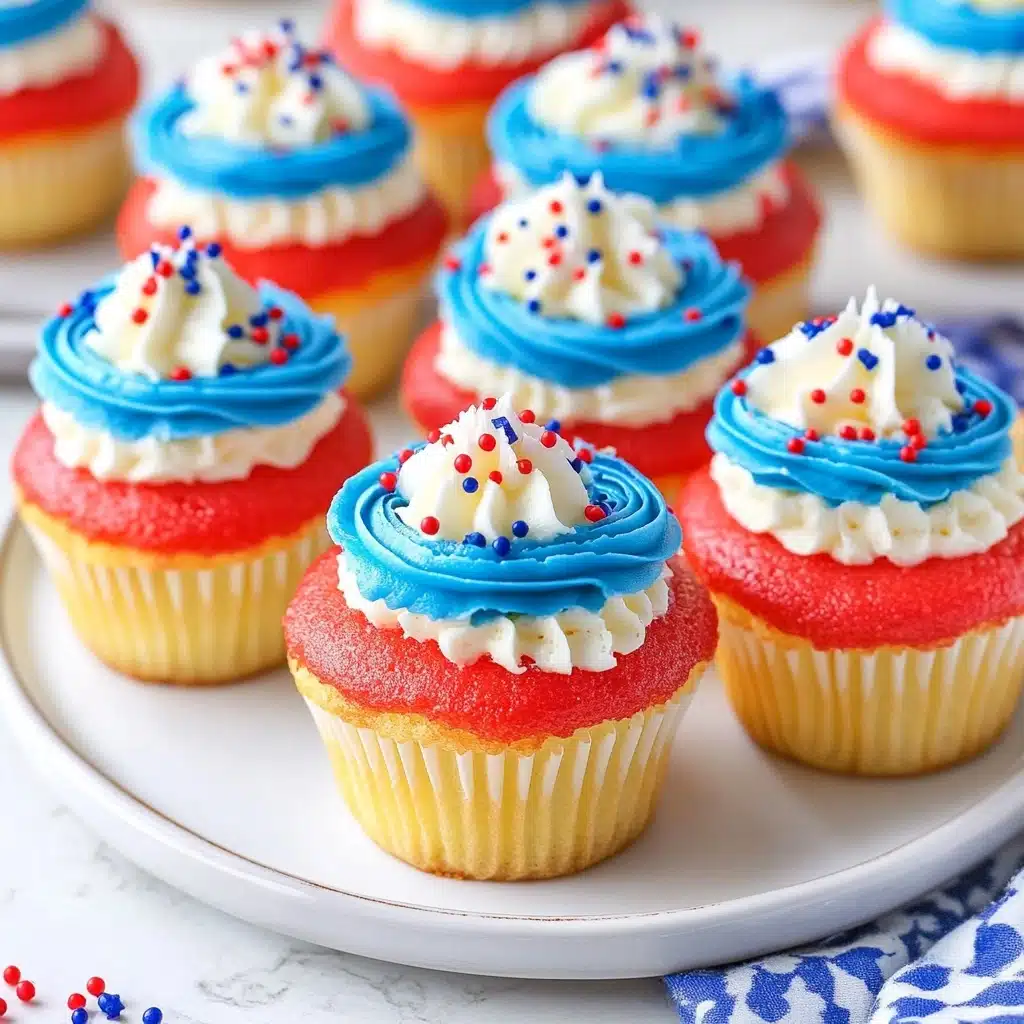
When your Red, White and Blue Mini Cheesecakes are fully chilled, they’re ready for a flourish! Whip the heavy cream, powdered sugar, and a splash of vanilla to stiff peaks. Pipe swirls of whipped cream atop each cheesecake and shower with sprinkles. Keep them tucked in the fridge until it’s time for your big, cheery reveal.
Pro Tips for Making Red, White and Blue Mini Cheesecakes
- Room Temperature Ingredients Are Key: For the silkiest batter, make sure your cream cheese (and even eggs) are at room temperature before starting. Cold cream cheese can lead to lumpy filling!
- Use Gel Food Coloring for Bold Layers: Gel coloring creates intense hues without watering down your batter, ensuring your red and blue are vivid and your cheesecake texture stays perfect.
- Bake and Cool Gently: Cooling the cheesecakes in the oven first, then with the door cracked, prevents unsightly cracks and gives you that picture-perfect finish every time.
- Smooth, Stiff Whipped Cream: For those gorgeous swirls on top, beat your whipped cream until stiff peaks form and pipe onto cheesecakes just before serving for the best shape and freshness.
How to Serve Red, White and Blue Mini Cheesecakes
Garnishes
You can never go wrong with a generous (okay, slightly excessive!) cloud of freshly whipped cream and a shower of colorful sprinkles. Consider adding fresh berries for a juicy pop, or even tiny flags and edible glitter if you want extra sparkle—these Red, White and Blue Mini Cheesecakes love to be the life of the celebration!
Side Dishes
Pair these festive minis with a fresh fruit salad, a crisp lemonade, or even a scoop of vanilla ice cream for a classic dessert duo. If you’re hosting a full party, set them beside a tray of chocolate-dipped strawberries or salty-sweet snack mixes for a well-rounded ending to any summer feast.
Creative Ways to Present
Arrange your mini cheesecakes on a tiered dessert stand, alternating colors for a dramatic effect, or pop them into clear treat boxes as adorable party favors. For barbecues or picnics, try setting them in individual mason jars for grab-and-go cuteness—and zero clean-up fuss!
Make Ahead and Storage
Storing Leftovers
Leftover Red, White and Blue Mini Cheesecakes keep beautifully in the fridge, stored in an airtight container. They’ll taste fresh and fabulous for two to three days—just long enough to stretch out the celebration (if they last that long!).
Freezing
To freeze, skip the whipped cream and sprinkles, and place the cooled cheesecakes on a baking sheet until firm, then transfer to a freezer-safe container. They’ll stay lush for up to two months. Defrost in the fridge overnight, then decorate just before serving for the best texture and flavor.
Reheating
No real reheating required—these treats are at their best cold from the fridge or just slightly closer to room temperature. If you freeze them, let them thaw slowly in the refrigerator so the luscious texture stays intact.
FAQs
-
Can I make Red, White and Blue Mini Cheesecakes in advance?
Absolutely! These mini cheesecakes taste even better after a night in the fridge, so feel free to bake them a day or two in advance. Just wait to add whipped cream and sprinkles until just before serving for the best look and texture.
-
What food coloring is best for these cheesecakes?
Gel food coloring is your best friend here—it’s much more concentrated than liquid coloring and won’t thin your batter, so you’ll get those vivid red and blue layers without compromising the cheesecake’s texture.
-
Can I use different cookies for the crust?
Definitely! Swap vanilla wafers out for graham crackers, golden Oreos, or even gingersnaps to change the flavor profile. Just keep the ratios similar for best results.
-
How do I prevent cracks in my mini cheesecakes?
The trick is gentle mixing, baking at a low temperature, and allowing a slow cool-down in the oven first, then on the counter. This gradual temperature change helps the filling set without cracking.
Final Thoughts
It’s truly impossible not to smile when you see—and taste—these Red, White and Blue Mini Cheesecakes. They’re whimsical, creamy, and just waiting to be shared with friends and family. Give them a try for your next get-together and let your celebrations sparkle with every sweet, colorful bite!
Print
Red, White and Blue Mini Cheesecakes Recipe
- Prep Time: 20 minutes
- Cook Time: 20 minutes
- Total Time: 40 minutes
- Yield: 12-14 Mini Cheesecakes
- Category: Dessert
- Method: Baking
- Cuisine: American
- Diet: Vegetarian
Description
These Red, White and Blue Mini Cheesecakes are a fun and festive dessert perfect for patriotic celebrations. Creamy cheesecake filling on a vanilla wafer crust, topped with whipped cream and sprinkles!
Ingredients
CRUST
- 1 cup (134g) vanilla wafer cookie crumbs
- 2 tbsp (26g) sugar
- 4 tbsp (56g) butter, melted
FILLING
- 12 ounces (339g) cream cheese, room temperature
- 1/2 cup (104g) sugar
- 3 tbsp (24g) flour
- 1/2 cup (115g) sour cream
- 1 1/2 tsp vanilla extract
- 2 eggs
- Blue gel icing color
- Red gel icing color
TOPPING
- 1/2 cup (120ml) heavy whipping cream, cold
- 5 tbsp (36g) powdered sugar
- 1/2 tsp vanilla extract
- Sprinkles
Instructions
- Preheat oven to 325°F (162°C). Add cupcake liners to a cupcake pan.
- Combine the vanilla wafer cookies crumbs, sugar and melted butter. Divide the mixture between the cupcake liners (about 2 tablespoons per cup) and press into the bottoms.
- Bake the crusts for 5 minutes then remove from oven. Allow to cool while you make the filling.
- To make the filling, reduce oven to 300°F (148°C). In a large bowl, mix the cream cheese, sugar, and flour until combined. Scrape down the sides of the bowl.
- Add the sour cream and vanilla extract. Beat on low speed until well combined.
- Add the eggs one at a time, beating slowly and scraping the sides of the bowl after each addition.
- Divide the batter evenly into three bowls. Leave one as is and color one red and the other blue.
- Layer the colored batter into the crusts, starting with a tablespoon of white batter in each cup, then a tablespoon of red, then a tablespoon of blue.
- Bake the cheesecakes for 18-20 minutes, then turn off the oven and leave the door closed for another 10 minutes.
- Crack the oven door and allow cheesecakes to cool for 15-20 minutes, then put in the fridge to finish cooling.
- When cheesecakes are cooled, remove them from the pan.
- To make the whipped cream topping, add the heavy whipping cream, powdered sugar and vanilla extract to a large mixer bowl. Whip on high speed until stiff peaks form.
- Pipe the whipped cream onto the tops of the cheesecakes and add sprinkles.
- Refrigerate the cheesecakes in an airtight container until ready to serve. Cheesecakes are best for 2-3 days.
Nutrition
- Serving Size: 1 Mini Cheesecake
- Calories: 196
- Sugar: 15.8 g
- Sodium: 155 mg
- Fat: 11.2 g
- Carbohydrates: 20.3 g
- Protein: 4.2 g
- Cholesterol: 53.2 mg


