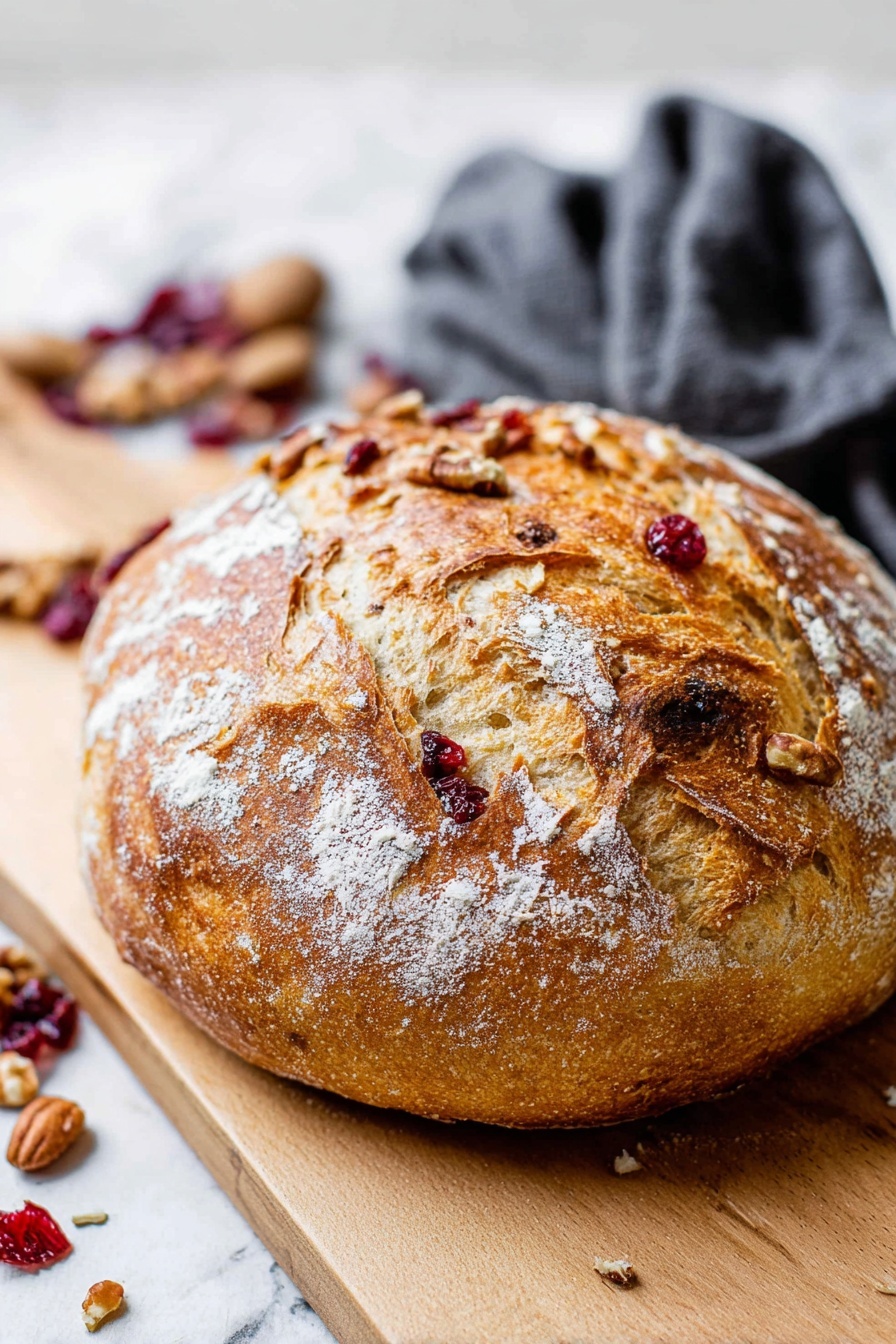
If you’re anything like me, you absolutely love the smell of fresh bread wafting through your home, especially when it has that festive, cozy twist. That’s why I have to share this No-Knead Cranberry Walnut Bread Recipe with you. It’s hands-down one of my favorite breads to make, especially as the holiday season sneaks in. The best part? No kneading required—yes, you read that right! This recipe combines tart cranberries, crunchy walnuts, and just a hint of orange zest for an irresistible loaf that tastes way more complicated than it is. Trust me, once you try this, it’ll quickly become a staple in your kitchen.
Why You’ll Love This Recipe
- Effortless Preparation: You don’t have to knead the dough, saving time and avoiding sticky messes.
- Flavorful Ingredients: Tart cranberries and toasted walnuts bring a fantastic contrast of textures and tastes.
- Perfect Holiday Bread: The orange zest and honey add a fresh spring to every bite, making it festive yet simple.
- Impressive Crust: Baking in a Dutch oven gives you that bakery-quality crust without hassle.

Ingredients You’ll Need
Each ingredient in this No-Knead Cranberry Walnut Bread Recipe plays an essential role, from the yeast that helps it rise just right, to the bright citrus notes that make it stand out. When I shop for this bread, I always pick bread flour for its gluten strength and use fresh walnuts to ensure crunch and flavor.
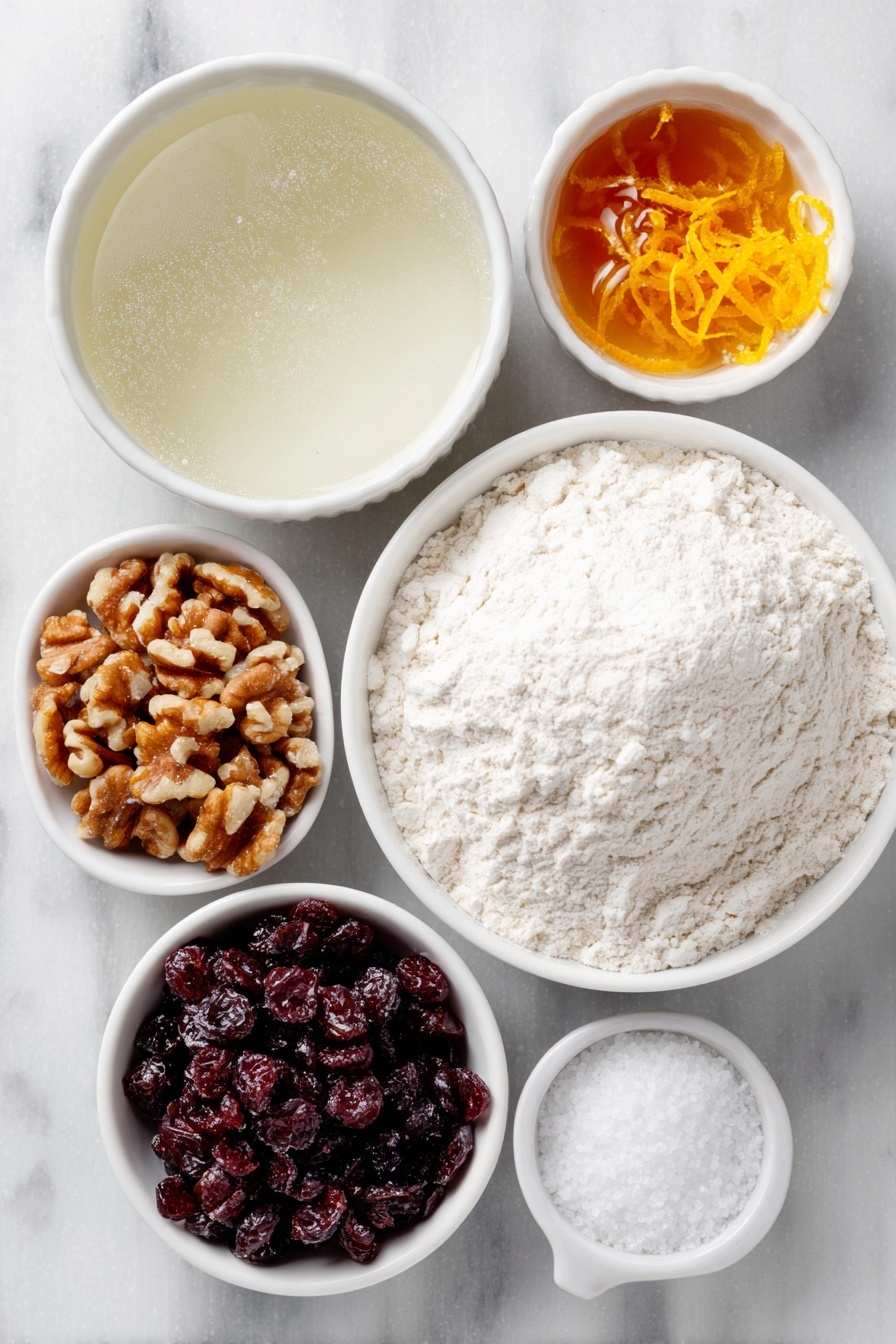
- Active dry yeast: Make sure it’s fresh for a good rise; proof it in warm water to check it’s active.
- Warm water: Ideally between 110 to 115°F – too hot can kill the yeast, too cold slows the rise.
- Granulated sugar: Just a touch to help wake up the yeast and add subtle sweetness.
- Kosher salt: Enhances flavor without overpowering the bread.
- Bread flour: Gives structure and a chewy texture; all-purpose flour won’t quite do.
- Dried cranberries: Your fruity burst; I love how they keep the bread moist and add lovely chewiness.
- Dried walnuts: Roughly chopped for a buttery crunch—you can toast them slightly if you want an extra nutty punch.
- Honey: Adds depth and a gentle sweetness that pairs beautifully with the cranberries.
- Orange zest: Brings a fresh, citrusy brightness that livens the whole loaf up.
Variations
The beauty of this No-Knead Cranberry Walnut Bread Recipe is how easy it is to make your own. I’ve experimented with different nuts and dried fruits, and you’ll find that swapping or adding ingredients can make each loaf feel just a little more special.
- Pecan Swap: I once swapped walnuts for pecans, and the buttery flavor was a delightful change that gave the bread an even richer texture.
- Dried Cherries instead of Cranberries: This adds a subtly different tartness that’s just as delicious, especially if you prefer something less sharp.
- Gluten-Free Version: Though I haven’t perfected it myself yet, some friends have had success with a blend of gluten-free flours and extra xanthan gum.
- Spices: Sometimes I throw in a pinch of cinnamon or nutmeg around the holidays for warm notes that complement the fruit and nuts beautifully.
How to Make No-Knead Cranberry Walnut Bread Recipe
Step 1: Prepare Your Yeast Mixture
Start by dissolving the active dry yeast and a teaspoon of sugar in warm water heated to about 110 to 115 degrees Fahrenheit. I always use a kitchen thermometer here because if the water’s too hot, it’ll kill the yeast and your bread won’t rise; too cold, and the yeast won’t activate properly. Let the mixture sit for about 10 minutes until it foams up—that’s your sign it’s alive and ready. If you don’t see any bubbles, toss it and try again with fresh yeast.
Step 2: Mix Your Dough
In a large bowl, whisk together the bread flour and kosher salt. Pour in the yeast mixture along with honey, then stir everything until it just comes together and there are no dry flour pockets—don’t overdo it, the dough will be sticky and wet! Add in the dried cranberries, walnuts, and orange zest, and stir gently until evenly distributed. Cover the bowl tightly with plastic wrap, making sure it doesn’t touch the dough, and let it rise at room temperature for 18 hours. This long rest is like magic—it lets the flavor develop deeply while the dough gets bubbly and alive.
Step 3: Shape Your Dough Gently
After your patient 18-hour wait, the dough will be very sticky, like a wet sponge—that’s perfect. Don’t punch it down! Instead, generously flour your countertop and your hands, then carefully transfer the dough onto the surface. You want to fold the edges gently toward the center to create a rough ball, taking care not to deflate those precious air bubbles. Turn it smooth side up and shape just a bit if needed. Then, set it on a floured parchment paper sheet, cover it loosely, and let it rest for another 30 minutes while you preheat your oven.
Step 4: Preheat and Bake in Your Dutch Oven
This part is key! Place a 5 or 6-quart Dutch oven with a tight-fitting lid into your oven and preheat to 450°F for at least 30 minutes. Once everything is piping hot, score an “X” or any decorative pattern on your dough with a sharp knife—the scoring helps control how the bread expands while baking. Carefully lift the parchment paper and dough and transfer it into the hot Dutch oven. Cover it tightly and bake for 30 minutes. Resist the urge to peek—keeping the lid on traps steam, helping create that gorgeous crust.
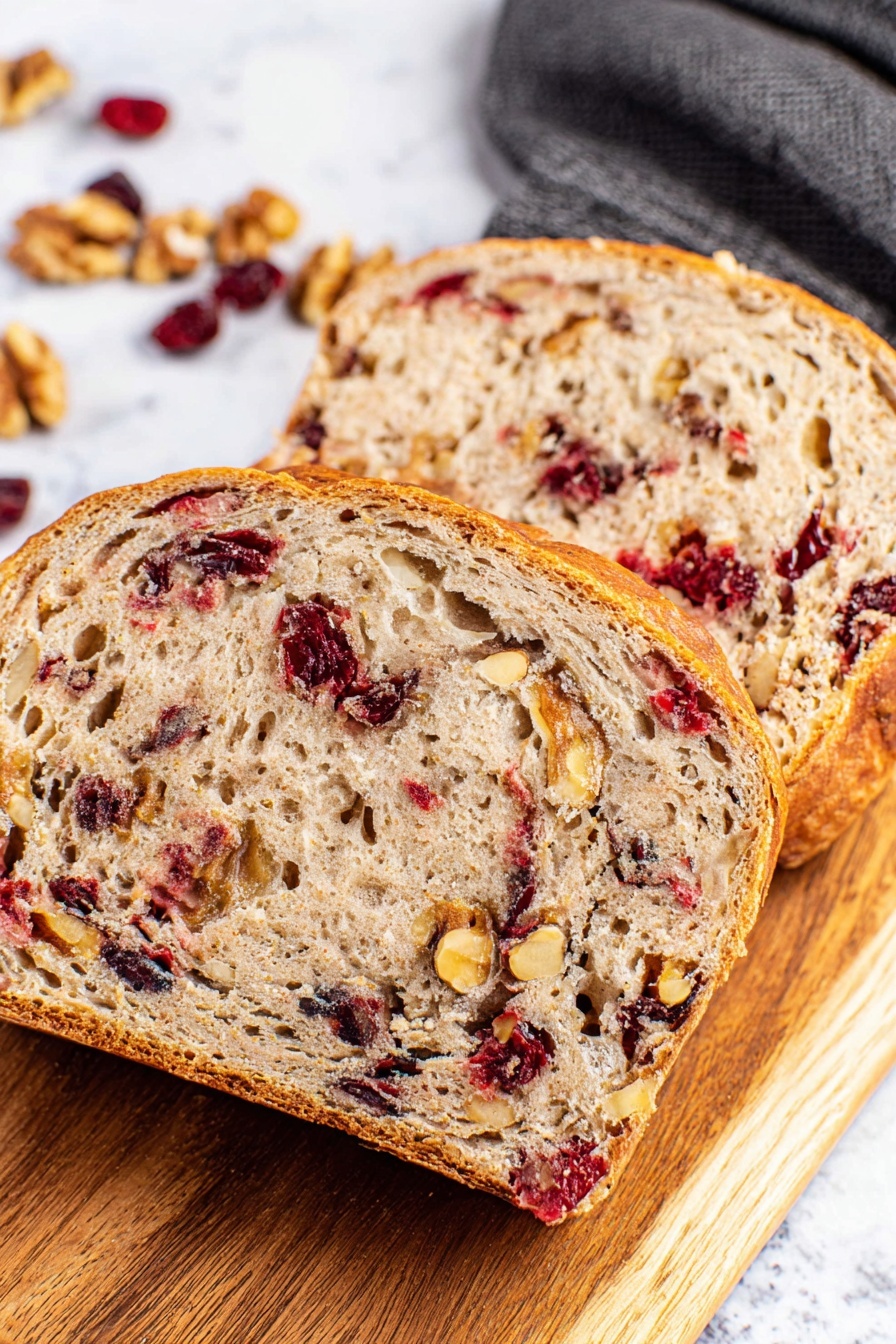
After 30 minutes, remove the lid and bake for another 8 to 10 minutes. You’ll see that lovely golden crust form and crackle. Pull it out, use the parchment paper to lift it from the pot, and let the loaf cool completely before slicing. I know it’s tempting, but this cool-down is important—it helps the bread finish baking inside and sets the crumb.
Pro Tips for Making No-Knead Cranberry Walnut Bread Recipe
- Get Your Water Temperature Right: I can’t stress enough how important it is to have your water around 110–115°F for the yeast to bloom perfectly.
- Don’t Rush the Rise: That 18-hour wait is where flavor and texture really take off; cutting it short makes the bread less airy and flavorful.
- Flour Generously When Handling Dough: Sticky dough is intimidating, but a well-floured surface and hands will make shaping almost effortless.
- Use a Hot Dutch Oven: Preheating the pot ensures steam gets locked in for that bakery-style crust you’re aiming for.
How to Serve No-Knead Cranberry Walnut Bread Recipe
Garnishes
I love a simple brush of softened butter right after slicing because it melts beautifully into the warm crumb. Sometimes I top my slice with a little cream cheese or ricotta for creaminess that balances the tart cranberries perfectly. A drizzle of honey over the top is also divine if you want a sweet finish.
Side Dishes
This bread pairs wonderfully with soups, especially butternut squash or pumpkin soup, offering a festive fall feel. I also enjoy serving it alongside a nice cheese platter with sharp cheddar and brie—perfect for holiday gatherings or cozy evenings.
Creative Ways to Present
For holiday brunches, I slice the bread thick and stack the slices on a rustic wooden board, surrounded by fresh cranberries and sprigs of rosemary for that holiday vibe. Another time, I made little croutons from leftover slices and tossed them into a mixed greens salad—it was a hit with guests who loved the burst of cranberry flavor in every bite.
Make Ahead and Storage
Storing Leftovers
I usually store leftover bread in a paper bag inside a bread box or on the counter overnight. This method keeps the crust crisp and the crumb soft. Plastic bags tend to make the crust chewy, which I personally don’t like.
Freezing
If you want to freeze the bread, wrap it tightly in aluminum foil, then seal in a freezer-safe bag. I’ve kept mine frozen for up to three months, and when thawed at room temperature, it tastes almost as fresh as the day I baked it.
Reheating
To reheat, I pop slices or the whole loaf in a 350°F oven for 10-15 minutes wrapped in foil, sometimes uncovering it towards the end to refresh the crust. This way, you get that fresh-baked warmth with a crispy outer shell and soft, chewy inside.
FAQs
-
Can I use all-purpose flour instead of bread flour?
While you can substitute all-purpose flour, the texture will be softer and less chewy. Bread flour has higher gluten content, which helps the bread develop a better structure and chewiness, especially important for no-knead recipes.
-
Is it okay if I can’t let the dough rise for a full 18 hours?
If you’re short on time, a rise of at least 12-16 hours can work, but the bread won’t be as flavorful or have as much texture. The long rise is crucial for developing those complex flavors and light crumb.
-
Do I really need a Dutch oven to get a good crust?
Using a Dutch oven traps steam during baking, which creates the perfect crust. If you don’t have one, you can bake on a heavy baking sheet and add a pan of water to the oven for steam, but results vary and may not be as crusty as with a Dutch oven.
-
Can I add other nuts or dried fruit?
Absolutely! This recipe is quite flexible. Walnuts and cranberries are classic, but feel free to swap in pecans, almonds, dried cherries, or even chopped dried apricots to suit your taste or what you have on hand.
Final Thoughts
This No-Knead Cranberry Walnut Bread Recipe has quickly won over my kitchen and heart because it feels like a special homemade treat without the intimidating process of traditional bread-making. Every loaf is a warm invitation to slow down, savor the aroma, and share something wholesome with loved ones. I hope you’ll give it a go and make it your own—I promise you’ll feel like a baker even if you’ve never kneaded a thing in your life.
Print
No-Knead Cranberry Walnut Bread Recipe
- Prep Time: 15 minutes
- Cook Time: 40 minutes
- Total Time: 19 hours 25 minutes
- Yield: 12 slices
- Category: Bread
- Method: Baking
- Cuisine: American
- Diet: Vegetarian
Description
This Thanksgiving Cranberry Walnut Bread is a flavorful, no-knead artisan loaf that combines the tartness of dried cranberries with the crunch of walnuts and a hint of orange zest. Baked in a Dutch oven to create a perfectly crisp crust and a moist, tender crumb, this rustic bread is a festive addition to any holiday meal or a delightful snack any time of year.
Ingredients
Dry Ingredients
- ½ teaspoon active dry yeast
- 3 cups bread flour, plus 2 tablespoons, plus more for surface
- 2 teaspoons Kosher salt
- 1 teaspoon granulated sugar
Wet Ingredients
- 1 ½ cups warm water (110 to 115 degrees F)
- 1 tablespoon honey
Add-ins and Flavorings
- ¾ cup dried cranberries
- ½ cup dried walnuts, roughly chopped
- 1 tablespoon orange zest
Instructions
- Prepare yeast mixture: Dissolve the yeast and sugar in the warm water (110 to 115 degrees F). Let it sit for 10 minutes or until it becomes foamy. If it doesn’t foam, discard and start over to ensure active yeast.
- Mix dry ingredients: In a large bowl, whisk together the bread flour and Kosher salt until evenly combined.
- Combine wet and dry ingredients: Add the foamy yeast mixture and honey to the flour mixture. Stir together until no pockets of flour remain, being careful not to overmix.
- Add cranberries, walnuts, and orange zest: Gently fold in the dried cranberries, chopped walnuts, and orange zest until just combined. The dough will be very sticky and wet, which is normal.
- First rise: Cover the bowl tightly with plastic wrap, making sure the wrap does not touch the dough, and let it rest at room temperature on your kitchen countertop for 18 hours. This slow fermentation develops flavor and texture.
- Shape the dough: After 18 hours, the dough will be sticky and wet. Transfer it gently onto a well-floured surface. Sprinkle plenty of flour on top and on your hands to manage the dough. Carefully fold the edges over to the center to create a ball, preserving the air bubbles. Place the dough seam side down on a floured piece of parchment paper, smooth side up.
- Second rise: Cover the dough loosely with plastic wrap and let it rest at room temperature for 30 minutes.
- Preheat Dutch oven: While the dough rests, place a 5 to 6 quart oven-proof Dutch oven with a tight-fitting lid inside your oven. Preheat the oven to 450 degrees F and heat the Dutch oven for 30 minutes.
- Score the dough: After the second rise, use a sharp knife or bread lame to score an X or desirable pattern on the dough ball to allow steam to escape and guide the bread expansion.
- Bake covered: Carefully remove the hot Dutch oven from the oven. Using the parchment paper, lift and transfer the dough into the Dutch oven. Cover with the lid tightly and bake for 30 minutes without opening the lid to trap steam for a crisp crust.
- Bake uncovered: Remove the lid and continue baking for an additional 8 to 10 minutes until the crust is a deep golden brown.
- Cool and serve: Carefully remove the bread along with the parchment paper from the Dutch oven. Let the bread cool completely on a wire rack before slicing to allow the crumb to set. Enjoy your homemade cranberry walnut bread!
Notes
- Allow the dough to rise for a full 18 hours to maximize flavor and texture development. A minimum of 12 hours is possible but may yield denser bread.
- The dough will be very sticky and wet before and after rising; flour your surface and hands liberally when handling.
- A Dutch oven is essential as it traps steam, creating a crisp, golden crust and moist interior.
- Store bread in a semi-open paper bag to maintain the crust’s crispness while keeping the crumb fresh.
- For freezing, wrap the bread in aluminum foil and place inside a freezer-safe resealable plastic bag for up to 3 months. Thaw at room temperature before slicing.
Nutrition
- Serving Size: 1 slice (approximately)
- Calories: 180
- Sugar: 7g
- Sodium: 350mg
- Fat: 4.5g
- Saturated Fat: 0.4g
- Unsaturated Fat: 3.5g
- Trans Fat: 0g
- Carbohydrates: 31g
- Fiber: 2g
- Protein: 5g
- Cholesterol: 0mg


