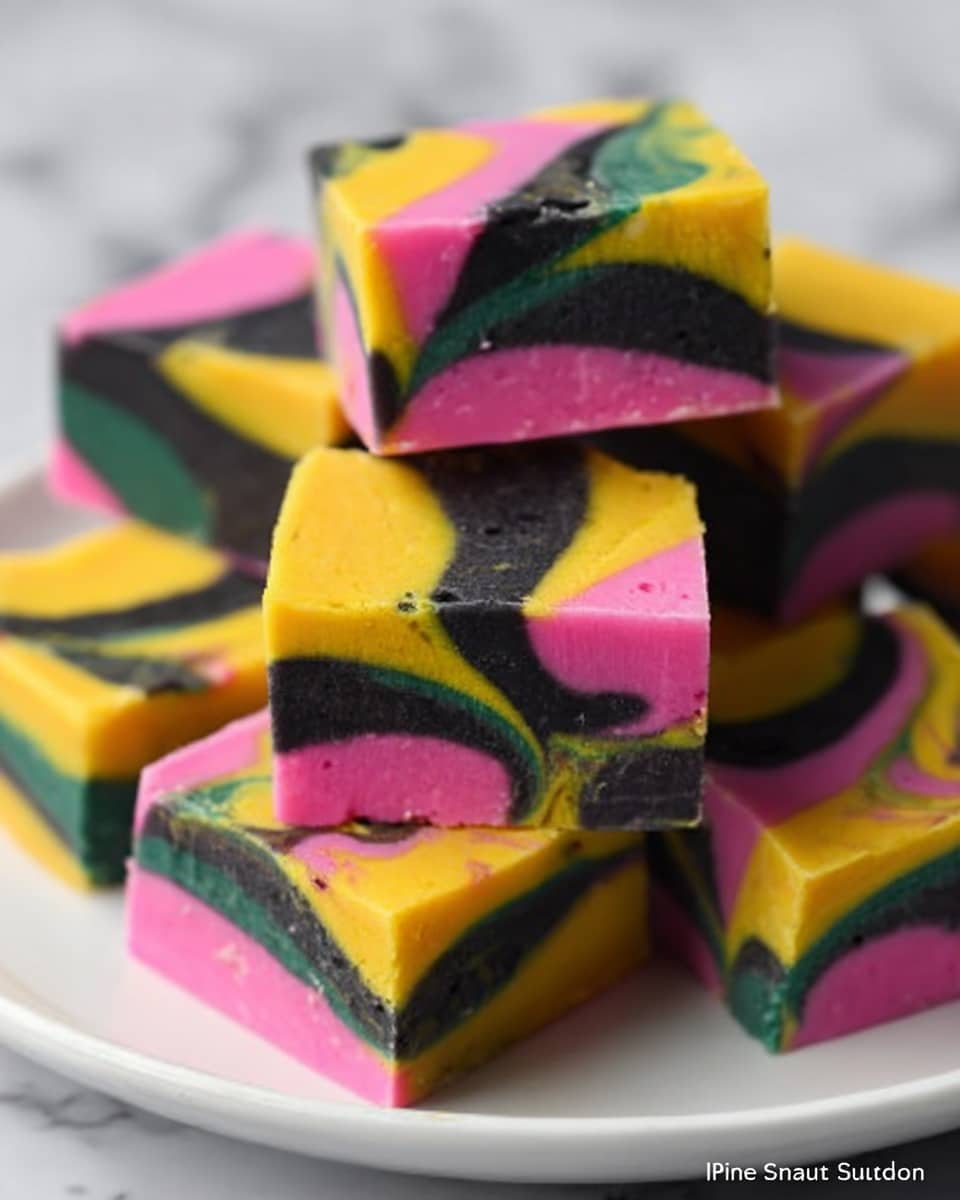
If you’re a fan of something both sweet and whimsical, then get ready to fall in love with my Nightmare Before Christmas Fudge Recipe. It’s an absolute showstopper for any season, mixing creamy white chocolate with a peppermint twist and a swirl of colors that feel like they jumped right out of the movie. I can’t wait to share the steps, some handy tips, and a few creative spins that’ll make this fudge your new go-to for gifts or cozy nights in.
Why You’ll Love This Recipe
- Minimal Ingredients: Just six simple ingredients come together for a rich, elegant fudge.
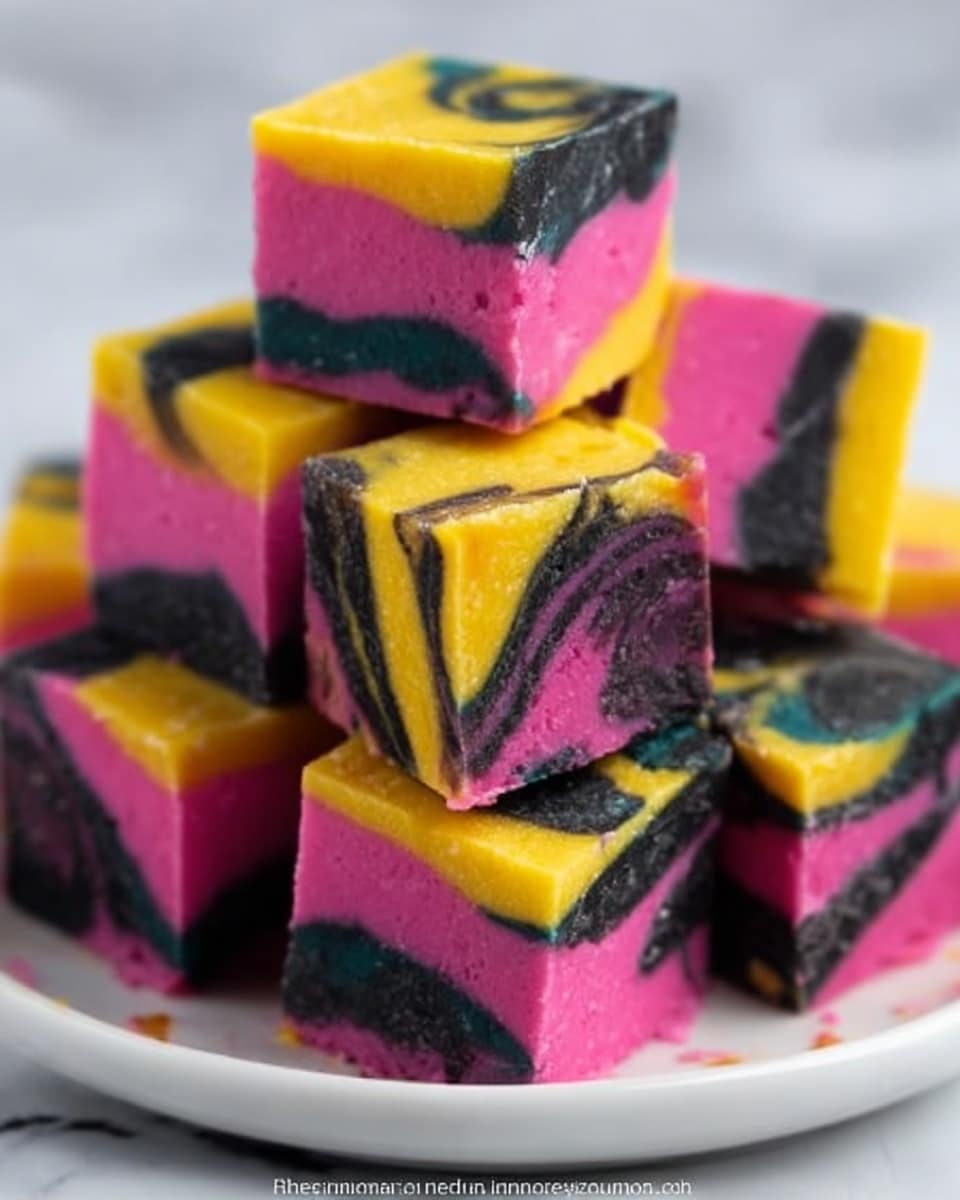
- Fun & Festive: The colorful swirls make this fudge look like a work of art inspired by Sally Skellington’s dress.
- Kid-Friendly Activity: Swirling the colors is fun for kids and adults alike, making it perfect for shared kitchen moments.
- Peppermint Kick: The subtle peppermint flavor adds that extra festive zing that makes this fudge unforgettable.

Ingredients You’ll Need
These ingredients blend beautifully to give you creamy, melt-in-your-mouth fudge with a peppermint hint and colorful swirls that bring this dessert to life. Before you shop, remember that gel food coloring works best because it won’t thin the fudge like liquid colorings can.
- White Chocolate Chips: Go for good-quality chips for the smoothest texture and richest flavor.
- Sweetened Condensed Milk: This is the magic that makes the fudge creamy and sets it perfectly.
- Marshmallow Fluff: It helps keep the fudge silky and adds a subtle chewiness I love.
- Unsalted Butter: Adds richness without overpowering sweetness.
- Vanilla Bean Paste or Extract: Enhances the overall flavor with warm vanilla notes.
- Peppermint Extract: Just a little gives a refreshing, festive touch without being overpowering.
- Gel Food Coloring: Black, pink, yellow, and teal – the colors bring the iconic Nightmare Before Christmas vibe to your fudge.
Variations
I’ve played around with a few versions of this Nightmare Before Christmas fudge recipe, and you can absolutely make it your own! Whether you want it dairy-free, extra chocolaty, or even themed for other holidays, the basic method stays the same and is super forgiving.
- Vegan Variation: I swapped white chocolate chips and butter for plant-based alternatives once, and it still set beautifully, though the flavor shifted slightly.
- Chocolate Lovers’ Twist: Adding a swirl of dark chocolate fudge alongside the white chocolate gives a wonderful contrast and depth.
- Holiday Flavors: Try swapping the peppermint extract for orange or almond extract for a fun seasonal twist.
- Texture Addition: For crunch, fold in chopped pecans or crushed candy canes before swirling colors.
How to Make Nightmare Before Christmas Fudge Recipe
Step 1: Prep Your Pan Like a Pro
Line an 8″ x 8″ pan with parchment paper, making sure the edges overhang by about 2 inches on all sides. I learned the hard way that this extra allowance makes lifting out the fudge so much easier without any mess. If you want, secure the edges with binder clips—that was a game changer for me, especially when swirling the colors.
Step 2: Melt the Base
On low heat, gently warm the white chocolate chips and sweetened condensed milk in a medium pot. Stir frequently to avoid scorching—about five minutes until everything’s silky smooth. This gentle melting is key to getting that perfect fudge texture without a grainy finish.
Step 3: Mix in the Magical Extras
Stir in the Marshmallow Fluff, butter, vanilla bean paste, and peppermint extract. Keep the heat low, and mix until everything is well combined and warm—around one more minute. I love how the Marshmallow Fluff adds just the right amount of chewiness, making this fudge feel a little extra special.
Step 4: Divide and Color
Divide your warm fudge evenly into four bowls—about a cup in each. Add black gel food coloring to one bowl and pink, yellow, and teal gel food coloring to the other three, one color per bowl. Mix quickly but gently, adding more drops if you want deeper colors. Timing is everything here—move fast before the fudge starts to set up!
Step 5: Swirl and Set
Drop spoonfuls of each colored fudge randomly into your prepared pan, then swirl the colors together with a toothpick or paring knife. I discovered this swirling step is so satisfying—and no two batches ever look the same! Chill your fudge in the fridge for at least two hours, or better yet, overnight, for clean cutting.
Step 6: Slice and Serve
Use the parchment edges to lift the fudge out of the pan, transfer to a cutting board, then cut into generous squares. I prefer bigger pieces so I can savor the peppermint punch and colorful swirls with every bite.
Pro Tips for Making Nightmare Before Christmas Fudge Recipe
- Low and Slow Melting: Take your time melting the chocolate and condensed milk on low heat to avoid gritty texture.
- Swirling Technique: Use a toothpick to swirl gently; vigorous stirring can muddy colors.
- Coloring Fast: Add gel coloring quickly before fudge thickens to ensure even, vibrant color.
- Parchment Overhang: Don’t skip the extra parchment edges — it’s your best friend for easy fudge removal and clean cuts.
How to Serve Nightmare Before Christmas Fudge Recipe
Garnishes
I usually keep the fudge simple to showcase the swirls, but for special occasions, I love sprinkling crushed candy canes or edible glitter on top right before chilling for an extra festive sparkle. It makes the fudge feel like a party on a plate, perfect for gift-giving!
Side Dishes
This fudge is rich, so I often serve it alongside hot cocoa or peppermint tea for a perfect balance. I’ve also paired it with fresh fruit to cut through the sweetness when sharing at holiday gatherings.
Creative Ways to Present
For Halloween or Christmas parties, I like arranging the fudge squares on themed platters or stacking them in little boxes tied with ribbon. One year, I even used Halloween cookie cutters to shape the fudge pieces into fun silhouettes—talk about a crowd-pleaser!
Make Ahead and Storage
Storing Leftovers
Once cut, I store the fudge in an airtight container layered between sheets of parchment paper to prevent sticking. It keeps perfectly at room temperature for up to a week, but I usually don’t have leftovers that long!
Freezing
I’ve frozen this fudge several times when prepping for holiday gifts. Wrap the fudge tightly in plastic wrap, then foil, and place it in a freezer bag. It stays fresh for up to two months and thaws beautifully in the fridge overnight without losing its texture.
Reheating
Fudge isn’t typically reheated, but if you find it a little firm from the fridge, letting it sit at room temperature for 15-30 minutes softens it nicely before serving. Avoid microwaving as it can melt unevenly.
FAQs
-
Can I use regular food coloring instead of gel for this Nightmare Before Christmas fudge recipe?
Gel food coloring is preferred because it provides vibrant hues without adding extra liquid, which could alter the fudge’s consistency. Regular liquid food coloring can make the fudge too thin and may affect how it sets.
-
How long does it take for the fudge to set properly?
The fudge needs at least 2 hours in the fridge to firm up nicely, but chilling overnight yields the best cutting texture and flavor integration.
-
Can I make this fudge without marshmallow fluff?
While marshmallow fluff adds a signature chewiness and smoothness, you can omit it if necessary. The fudge will still be delicious but might be a little less creamy and slightly firmer.
-
What’s the best way to cut fudge cleanly?
Use a sharp knife warmed by running under hot water, then dry it off before slicing. Warming the knife minimizes sticking and ensures smooth, clean edges perfect for gifting or serving.
Final Thoughts
This Nightmare Before Christmas fudge recipe holds a special place in my kitchen because it’s such a joyful blend of flavor, color, and fun. Every time I make it, I remember those cozy movie nights and the smiles around the table when everyone digs in. I hope you’ll try it out—it’s truly one of those recipes that makes the holidays sweeter and memories even sweeter. You’re going to love bringing a little bit of that Halloween-meets-Christmas magic into your home!
Print
Nightmare Before Christmas Fudge Recipe
- Prep Time: 15 minutes
- Cook Time: 6 minutes
- Total Time: 2 hours 21 minutes
- Yield: 36 squares
- Category: Dessert
- Method: Stovetop
- Cuisine: American
Description
This Nightmare Before Christmas Fudge is a rich, creamy, and colorful treat inspired by Sally Skellington’s iconic dress. Made with white chocolate, sweetened condensed milk, and flavored with peppermint, this fudge features vibrant swirls of black, pink, yellow, and teal—a perfect festive dessert for Halloween or Christmas celebrations.
Ingredients
Fudge Base
- 3 1/2 cups white chocolate chips
- 1 (14-oz.) can sweetened condensed milk
- 3 tablespoons Marshmallow Fluff
- 2 tablespoons unsalted butter
- 1/4 teaspoon vanilla bean paste or extract
- 1/2 teaspoon peppermint extract
Food Coloring
- Black gel food coloring
- Pink gel food coloring
- Yellow gel food coloring
- Teal gel food coloring
Instructions
- Prepare the pan: Line an 8″ x 8″ pan with two pieces of parchment paper arranged in a plus sign shape with 2″ overhang on all sides. Use binder clips to secure the parchment overhang optionally.
- Melt chocolate mixture: In a medium pot over low heat, combine the white chocolate chips and sweetened condensed milk. Stir occasionally until the chocolate is fully melted and smooth, about 5 minutes.
- Add flavor and fluff: Stir in the Marshmallow Fluff, unsalted butter, vanilla bean paste, and peppermint extract. Continue cooking and stirring for about 1 minute until well combined and heated through.
- Divide and color fudge: Divide the fudge evenly among four medium bowls, approximately 1 cup each. Add about 4 drops of black gel food coloring to one bowl, and about 2 drops of pink, yellow, and teal to the other three bowls respectively. Mix quickly to achieve uniform color, adding more drops as needed while the fudge remains soft.
- Layer and swirl: Randomly drop spoonfuls of each colored fudge into the prepared pan. Use a toothpick or paring knife to swirl the colors together gently, creating a marbled effect.
- Chill to set: Refrigerate the pan with the fudge for at least 2 hours or overnight until fully set.
- Cut and serve: Use the parchment paper overhang to lift the fudge from the pan. Transfer to a cutting board and cut into approximately 36 squares.
Notes
- This fudge comes together with just six basic ingredients, making it an easy yet impressive treat.
- The peppermint extract adds a refreshing twist that complements the creamy white chocolate.
- Work quickly when mixing food coloring to prevent the fudge from setting prematurely.
- Storing fudge in an airtight container in the refrigerator keeps it fresh for up to one week.
- For a festive touch, use binder clips to keep parchment paper secured while pouring fudge.
Nutrition
- Serving Size: 1 square (about 28g)
- Calories: 120
- Sugar: 18g
- Sodium: 30mg
- Fat: 5g
- Saturated Fat: 3.5g
- Unsaturated Fat: 1.5g
- Trans Fat: 0g
- Carbohydrates: 19g
- Fiber: 0g
- Protein: 1g
- Cholesterol: 10mg


