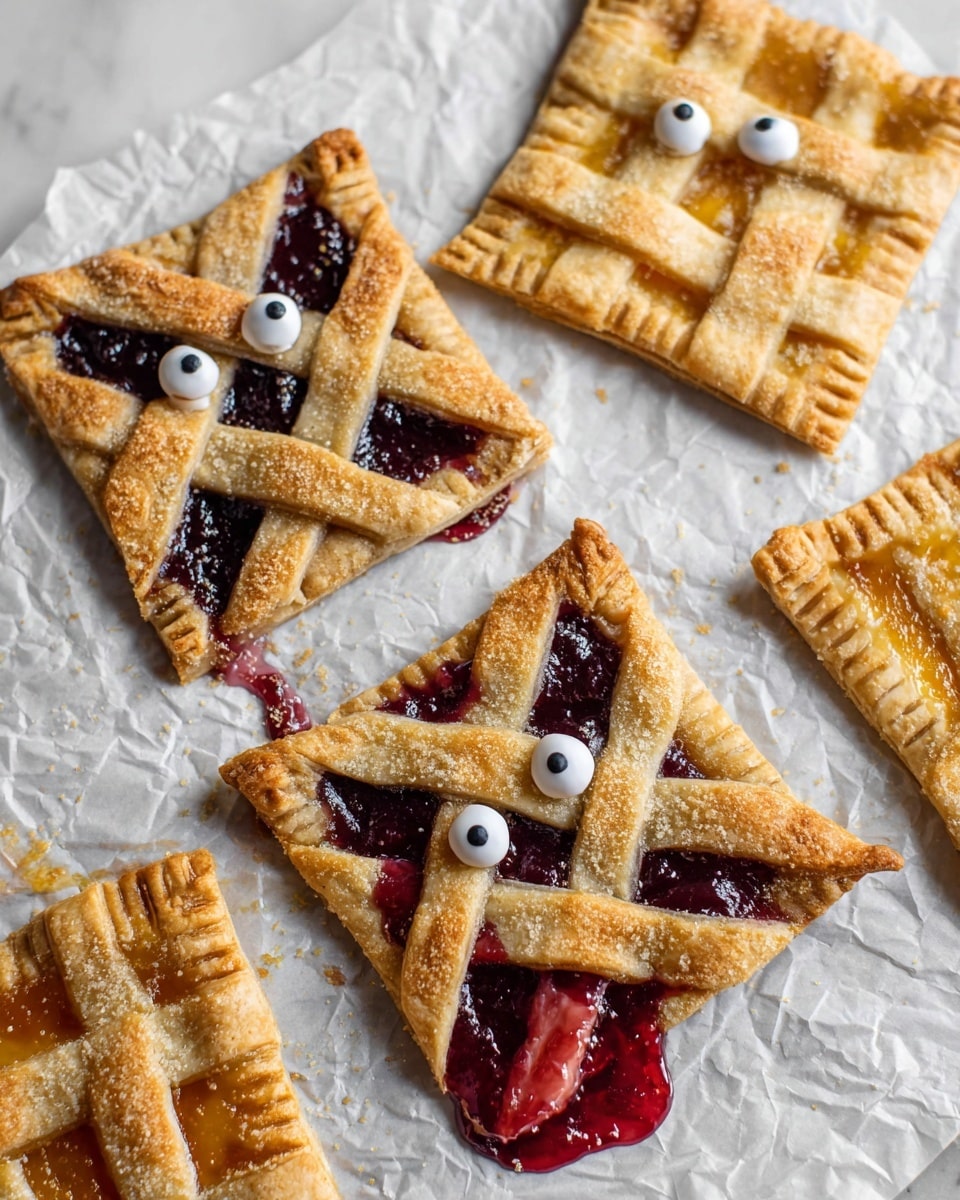
If you’re looking for a fun, spooky treat that’s as adorable as it is delicious, you’ve got to try this Mummy Hand Pies Recipe. These flaky, jam-filled hand-shaped pies wrapped in pastry “bandages” are seriously my go-to for Halloween parties or any time I want to wow a crowd with minimal effort. Trust me, once you make these, you’ll be hooked — my family absolutely goes crazy for them!
Why You’ll Love This Recipe
- Easy but Impressive: These pies look fancy with their creepy bandage detail, yet they’re surprisingly simple to make.
- Customizable Flavors: You can switch up the jam or preserves to match whatever fruit you love or have on hand.
- Kid-Friendly Fun: My kids love helping me stick on the candy eyes and arrange the pastry strips—it’s a great way to get them involved in baking.
- Perfect for Halloween & Beyond: These pies add festive charm without being overly tricky or time-consuming.

Ingredients You’ll Need
The beauty of this Mummy Hand Pies Recipe is in its simplicity—the ingredients all work together to create flaky, sweet, and slightly spiced bites that everyone loves. Plus, you’ll find these easy to source at any grocery store.
- Pie dough: I usually grab a good-quality store-bought double crust pie dough to save time—just make sure it’s thawed as per instructions before rolling.
- Jam or fruit preserves: This is your chance to get creative. I’ve tried raspberry, apricot, and even mixed berry—each gives a unique twist.
- Egg: You’ll use this for the egg wash that helps the crust get that gorgeous golden color.
- Water: Just a splash mixed with the egg to make the wash smooth and easy to brush on.
- Sugar: A sprinkle of sugar adds a nice crunch and sweetness on the outside.
- Ground cinnamon: This little bit of spice makes the sugar topping extra special and warm.
- Candy eyes: The finishing touch that brings these mummies to life; find these in the baking aisle or online.
Variations
I love that the Mummy Hand Pies Recipe is totally flexible—you can easily adjust the filling, spice it up, or make it allergy-friendly depending on your needs and preferences. Here are a few ways I’ve personalized it over time.
- Fruit and Nut Combo: Once, I added finely chopped nuts to the jam filling for extra texture and crunch; it was a big hit at a party.
- Gluten-Free Version: I’ve used gluten-free pie dough successfully—just handle it gently as it can be more delicate than the traditional dough.
- Spiced Jam: To give the filling a little twist, try warming the jam with a hint of ginger or nutmeg first—it adds a cozy depth.
- Mini Mummy Bites: Want to make party appetizers? Use a smaller cookie cutter to create bite-size pies; they’re perfect finger foods!
How to Make Mummy Hand Pies Recipe
Step 1: Prep Your Dough and Oven
Start by taking your pie dough out of the freezer and letting it rest on the counter until it’s pliable—usually 15 to 30 minutes or follow the package directions. This step is key because if the dough is too cold, it can crack when you roll it out. While it’s resting, preheat your oven to 400°F and whisk together the egg and water to make your egg wash, setting it aside for later.
Step 2: Cut and Shape the Mummy Hands
Once your dough is soft enough, roll out the first crust and trim the edges to form a roughly rectangular shape about 2-3 inches deep (save those edges for the “bandages”). Cut this large rectangle into 6 equal smaller rectangles for your pie bases.
Place a heaping tablespoon of your chosen jam in the center of one small rectangle and gently spread it out, leaving about a half-inch border free of filling. Brush that border with egg wash—it acts like glue for sealing.
From the reserved dough edges, slice thin strips you’ll use as the mummy’s “bandages.” Lay these strips crisscrossing over the jam-filled rectangle to create the wrapped look. Don’t worry about making perfect neat strips—the more natural the “bandages,” the spookier the effect!
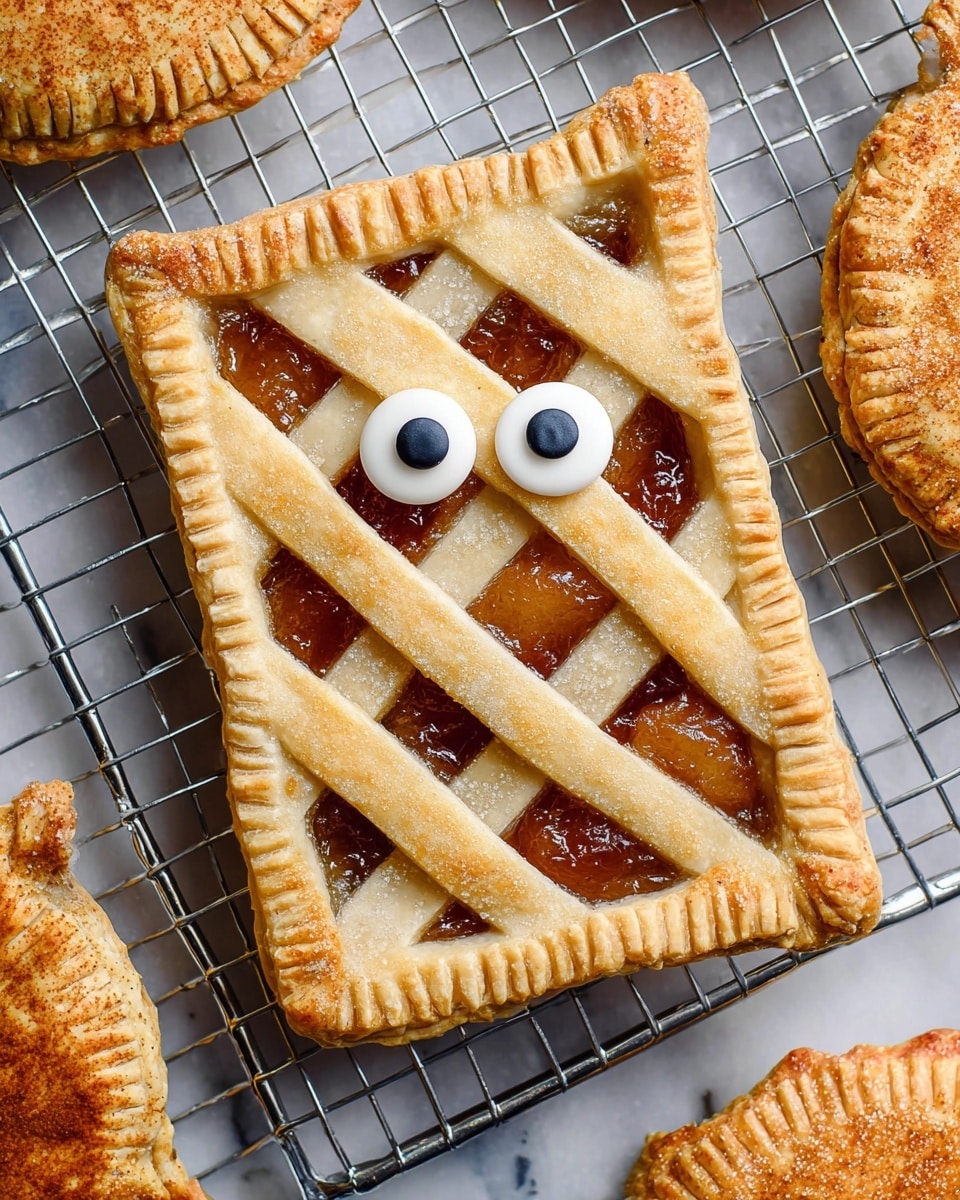
Use a fork to crimp the edges, sealing the filling inside. If the edges look jagged, a sharp knife or pizza cutter can trim them for a cleaner finish. Brush a bit more egg wash over the top crust and then sprinkle with your cinnamon-sugar mix for that pretty, lightly sweet sparkle.
Repeat this whole process with the second crust and remaining dough—they should yield about 12 mummy hand pies in total.
Step 3: Bake to Golden Perfection
Place your finished pies on a parchment-lined baking sheet and pop them in the oven for about 15-18 minutes, or until they turn a beautiful golden brown. That cinnamon sugar will caramelize slightly, adding great flavor and a lovely crunch.
Once baked, let them cool just enough so you don’t melt the candy eyes but they can still stick—usually a few minutes is perfect. Add a pair of eyes to each pie, and voilà! Your mummies are ready to fright and delight.
Pro Tips for Making Mummy Hand Pies Recipe
- Use Room Temperature Dough: Cold dough is hard to work with and cracks easily—letting it come to room temp makes rolling and shaping way easier.
- Don’t Overfill: Be generous but keep filling inside the borders, so that jam doesn’t ooze out and make your pies soggy.
- Egg Wash All the Way: Make sure to brush enough egg wash on the edges and top to get that perfect golden color and seal the pies well.
- Cool Slightly Before Adding Eyes: Adding candy eyes while the pies are too hot will cause them to melt or slide off—let them cool just a bit for best results.
How to Serve Mummy Hand Pies Recipe
Garnishes
I like to add a tiny dusting of powdered sugar around the edges of the serving plate to give that eerie, cobweb-like effect. Fresh mint leaves or small edible flowers also look surprisingly festive and add a pop of color. If you want something savory to balance sweetness, sprinkle a pinch of flaky sea salt on top right after baking.
Side Dishes
When I serve these mummy hand pies at parties, I pair them with a warm spiced cider or a creamy hot chocolate for the ultimate cozy combo. They also go nicely alongside a simple green salad if you want a complete meal with a festive twist.
Creative Ways to Present
For Halloween, I love arranging the pies on a slate board with little plastic spiders or Halloween confetti to ramp up the spooky vibe. Another fun idea? Serve them in a vintage wooden hand-shaped bowl or wrap them individually with a bit of parchment paper tied with black and orange twine for easy grab-and-go treats at parties.
Make Ahead and Storage
Storing Leftovers
Any leftovers store really well in an airtight container at room temperature for up to two days. I recommend placing parchment paper between layers to keep the bottom from getting soggy. If you want to extend their life, refrigerate but bring back to room temp before serving for best texture.
Freezing
I’ve frozen these pies both before and after baking, and both methods work great. To freeze before baking, assemble the pies on parchment-lined trays, freeze until firm, then transfer to freezer bags. Bake straight from frozen, just add a few extra minutes. If freezing after baking, wrap them tightly in plastic wrap and foil; thaw at room temperature before reheating.
Reheating
To get that fresh-from-the-oven crispness back, I reheat these in a preheated 350°F oven for about 8-10 minutes. Microwaving softens the crust too much, so the oven is my go-to. Keep an eye so they don’t over-brown and dry out.
FAQs
-
Can I use homemade pie dough for Mummy Hand Pies Recipe?
Absolutely! Homemade pie dough adds a wonderful flaky texture and lets you control ingredients. Just make sure your dough is well-chilled and not too sticky before rolling out to make cutting and shaping easier.
-
What other fillings can I use besides jam?
Feel free to get creative—apple pie filling, sweetened cream cheese, pumpkin puree with spices, or even chocolate chips all work beautifully. Just keep the filling thick enough so it doesn’t leak during baking.
-
My dough cracked while rolling—how can I fix that?
That happens if the dough is too cold or dry. Let it warm a little longer on the counter and try rolling it out on a lightly floured surface. If it cracks, gently press it back together with your fingers or dab a bit of water on the cracks before shaping.
-
How do I keep the candy eyes from melting?
Make sure your pies have cooled slightly after baking—typically 5 minutes is enough—before gently pressing the candy eyes on. If your pies are too hot, the candy will melt or slide off.
-
Can I make these ahead for a party?
Yes! You can assemble the pies and freeze them before baking, then pop them in the oven a little before your guests arrive. Or bake in advance, store airtight, and reheat gently in the oven when ready to serve.
Final Thoughts
I absolutely love how this Mummy Hand Pies Recipe brings a playful, festive spirit with such minimal fuss. When I first made these, I was amazed how something so simple could get such rave reviews from everyone around the table. Whether you’re baking for Halloween or just want a fun, unique snack, these pies deliver big on flavor and fun. Give them a try, and don’t be surprised if they become a new seasonal tradition in your home too!
Print
Mummy Hand Pies Recipe
- Prep Time: 30 minutes
- Cook Time: 20 minutes
- Total Time: 50 minutes
- Yield: 12 hand pies, 12 servings
- Category: Dessert
- Method: Baking
- Cuisine: American
Description
These adorable Mummy Hand Pies are a fun and festive treat perfect for Halloween. Made with flaky pie dough, sweet fruit preserves, and decorated with cinnamon sugar and candy eyes, they combine a deliciously sweet filling with a charming mummy bandage design. Easy to prepare and bake, these hand pies make a spooky snack that’s sure to delight kids and adults alike.
Ingredients
Pie Dough
- 15 oz pie dough (enough for a double crust pie)
Filling
- 3/4 cup jam or fruit preserves
Egg Wash
- 1 egg
- 1 tbsp water
Topping
- 1/4 cup sugar
- 2 tsp ground cinnamon
- 12 pairs candy eyes
Instructions
- Prepare the dough: Take the pie dough out of the freezer and allow it to rest on the counter at room temperature according to package instructions until it becomes pliable.
- Make egg wash and cinnamon sugar: Whisk together 1 egg and 1 tablespoon of water to create the egg wash; set aside. In a small bowl, mix 1/4 cup sugar with 2 teaspoons ground cinnamon and set aside.
- Preheat oven: Preheat the oven to 400 degrees Fahrenheit (200 degrees Celsius) and line a baking sheet with parchment paper.
- Roll out dough and cut rectangles: Roll out the first pie crust dough. Trim the edges of the dough circle about 2-3 inches deep to form a rectangle, reserving the trimmed edges for strips later. Cut the rectangle into 6 equal smaller rectangles.
- Fill and assemble hand pies: Place a heaping tablespoon of jam in the center of one dough rectangle, spreading it evenly while leaving about a half-inch border. Brush the border with the egg wash.
- Create mummy bandages: Slice the reserved dough edges into thin strips using a sharp knife or pizza cutter. Arrange the strips diagonally across the filled dough rectangle to resemble mummy bandages. Use a fork to crimp and seal the edges firmly.
- Apply egg wash and cinnamon sugar: Brush more egg wash over the top of the pie crust, focusing on just the crust areas. Sprinkle evenly with the cinnamon sugar mixture.
- Bake the pies: Place the assembled pies onto the parchment-lined baking sheet. Repeat the filling and assembly process until all dough is used, approximately 12 hand pies. Bake in the preheated oven for 15-18 minutes or until the pies are golden brown.
- Cool and decorate: Remove the pies from the oven and allow to cool slightly. Attach a pair of candy eyes to each pie while still warm so they stick properly.
- Serve: Serve the Mummy Hand Pies warm or at room temperature and enjoy this spooky, sweet treat!
Notes
- These Mummy Hand Pies are easy to assemble and make for a perfect Halloween-themed dessert or snack.
- You can use any flavor of jam or fruit preserves you prefer, such as strawberry, raspberry, or apricot.
- If you don’t have candy eyes, small chocolate chips or mini marshmallows can be used as alternative decorations.
- Ensure the edges are sealed well to prevent filling leakage during baking.
- For a gluten-free option, substitute regular pie dough with gluten-free pie crust.
Nutrition
- Serving Size: 1 hand pie
- Calories: 180
- Sugar: 15g
- Sodium: 120mg
- Fat: 7g
- Saturated Fat: 3g
- Unsaturated Fat: 4g
- Trans Fat: 0g
- Carbohydrates: 27g
- Fiber: 1g
- Protein: 2g
- Cholesterol: 35mg


