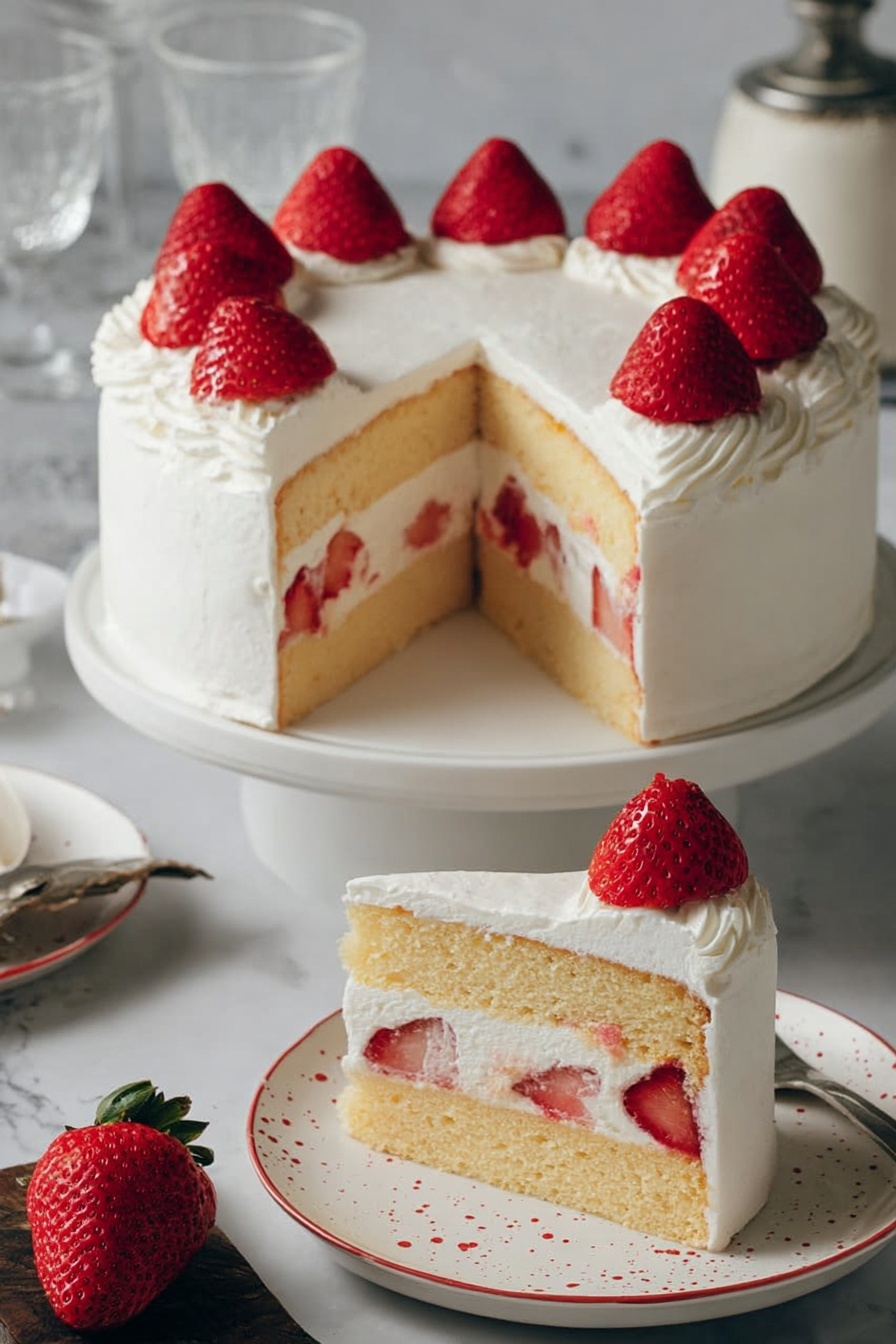
I’m so excited to share my Japanese Strawberry Cake Recipe with you! This cake is a fan-freaking-tastic dessert masterpiece—light, fluffy, and beautifully fresh with juicy strawberries tucked between ultra-soft layers and gently sweetened whipped cream. When I first tried this recipe, I was blown away by how effortlessly elegant it looked and tasted. If you’ve been craving a cake that’s more than just delicious but also a joy to make and impresses every time, you’re in the right place.
Why You’ll Love This Recipe
- Light and Fluffy Texture: The sponge is delicately airy thanks to the gentle folding of whipped egg whites.
- Fresh Strawberry Flavor: Macerating the strawberries adds natural sweetness and juicy brightness.
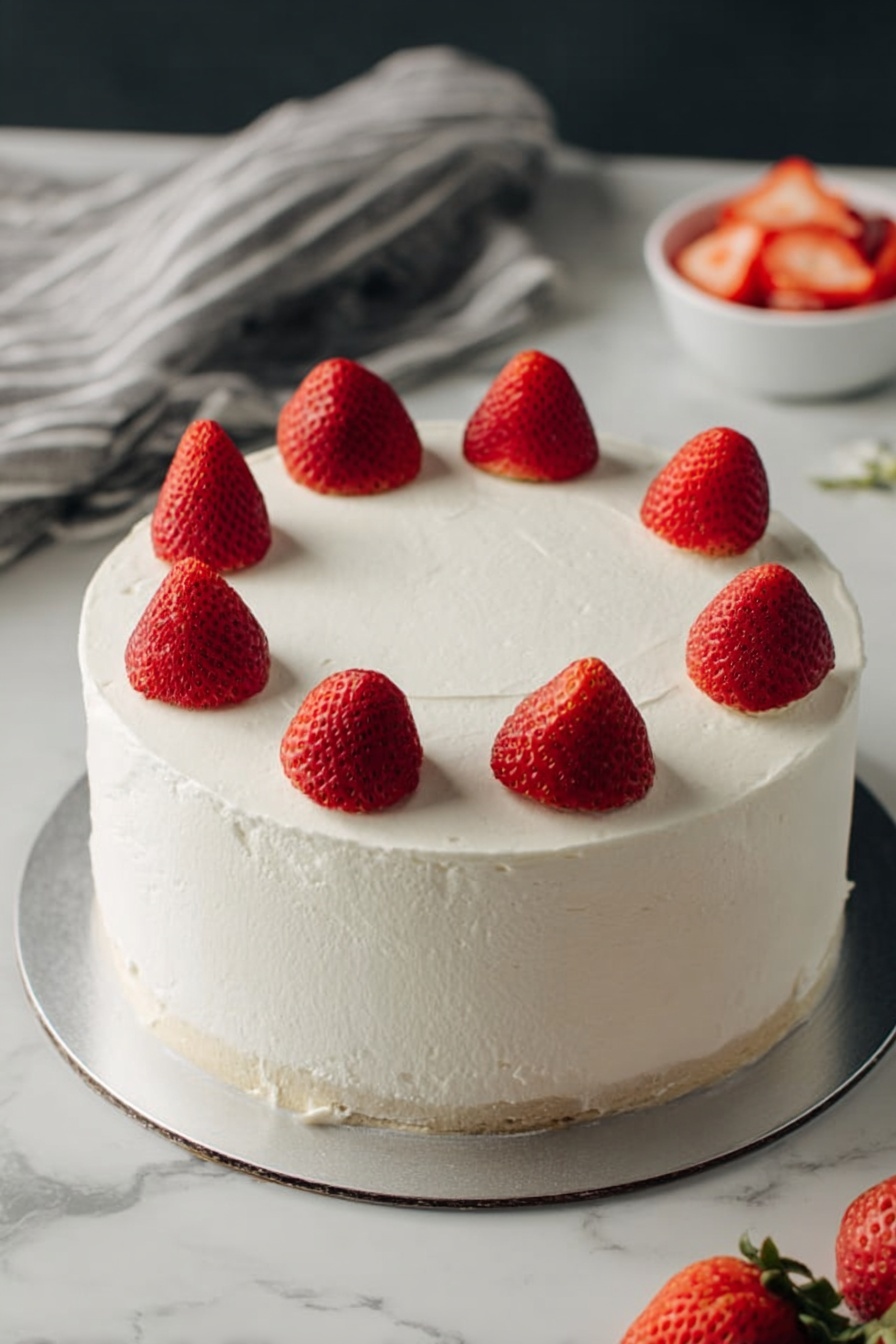
- Impressively Elegant: The smooth whipped cream and neat layers make it perfect for any celebration.
- Comfortably Manageable: Though sophisticated, the recipe breaks down into manageable steps with helpful tips.

Ingredients You’ll Need
The ingredients for this Japanese Strawberry Cake Recipe are pretty simple, but each one plays a specific role in the texture and flavor. When shopping, I recommend using the freshest strawberries you can find, preferably sweet and fragrant, because they really do transform the cake.

- Whole Milk: Adds moisture and tenderness to the cake base.
- Unsalted Butter: Gives richness without overpowering flavors.
- Cake Flour: The key to a light and delicate crumb—try to avoid using all-purpose flour here.
- Egg Yolks: Contribute to the cake’s golden color and moisture.
- Egg Whites: Beaten until glossy, they create that bouncy fluffy texture.
- Sugar (Caster if possible): Sweetens the cake and the strawberry maceration.
- Strawberries: Half go into the cake layers and half for decorating—choose bright red and ripe.
- Heavy Whipping Cream: Whipped to soft peaks for that signature Japanese light frosting.
- Confectioners’ Sugar: Sweetens the whipped cream gently without graininess.
- Gelatin (Optional): Stabilizes the whipped cream for longer-lasting firmness, especially handy for warmer climates.
- Cold Water (Optional): Used to bloom the gelatin.
- Sugar and Hot Water (for syrup): Keeps the cake moist and infuses extra sweetness.
Variations
I love how versatile this Japanese Strawberry Cake Recipe is. You can stick to the classic strawberries and cream, or tweak it based on what you have or your dietary preferences. Here are a couple ways I like to mix things up depending on the mood.
- Chocolate Strawberry Cake: Adding a thin layer of melted chocolate or cocoa powder into the batter really ups the indulgence factor. My family goes crazy for this twist!
- Seasonal Fruit Variation: Try swapping strawberries for raspberries or peaches in summer when those fruits are at their peak.
- Vegan Adaptation: I’ve experimented with aquafaba instead of egg whites and coconut cream for frosting – it needs some fine-tuning but is a fun challenge!
- Stabilized vs. Regular Cream: If you want your frosting to hold up longer, use gelatin, but for immediate serving, the regular cream is perfect and lighter.
How to Make Japanese Strawberry Cake Recipe
Step 1: Prep and Bake the Light-as-Air Sponge Cake
Start by lining an 8-inch round cake pan with parchment paper at the bottom. I like to prep this first so everything is ready for the delicate batter. Preheat your oven to 325°F (160°C). Then, get a high-walled pan ready for a water bath — this keeps the cake moist and bakes it gently, creating that beautifully soft sponge. If you use a springform pan, wrap the bottom with foil to prevent leaks.
Microwave the milk and butter together until melted, then sift in the cake flour and gently fold until smooth. Whisk egg yolks in next, mixing just enough to combine. Beat egg whites until frothy at medium-high speed, gradually adding sugar until glossy and holding medium peaks—this part is essential for airiness!
Fold a quarter of the egg whites into the yolk mixture to lighten it, then fold this back into the remaining whites carefully — you want it smooth without losing those fluffy air bubbles. Pour into your pan and tap it down a couple times on the counter to release large bubbles. Bake in the water bath for about 1.5 hours; resist opening the oven early or you risk collapse. The cake is done when a skewer comes out clean and edges start to pull away.
Step 2: Macerate Your Strawberries for Maximum Sweetness
While the cake cools, slice about 8 oz of your strawberries thinly and toss them with 1.5 teaspoons of sugar. Let them sit for at least an hour to release their natural juices and become glossy and fragrant. I usually do this in the morning for an afternoon bake, and the flavor really deepens—you’ll notice a subtle sweet syrup leftover in the bowl, which you can mix into the cake syrup for an extra pop of strawberry flavor.
Step 3: Whip the Cream (with or without Gelatin)
Whipping the cream is my favorite part because it all starts to look and feel like a genuine celebration cake. For stabilized cream, bloom the gelatin in cold water, melt gently, then fold it into soft-peaked whipped cream, being careful not to overwhip. Otherwise, whip the heavy cream with confectioners’ sugar until it forms firm but soft peaks. You’ll find that the cream is magically light but rich—it’s the perfect balance.
Step 4: Assemble Your Beautiful Japanese Strawberry Cake Recipe
Once your cake is fully cooled, mark the top edge and halfway point with toothpicks so you can slice even layers. Cut off the browned top—it doesn’t taste bad but looks nicer without it. Slice the cake horizontally into two layers with a serrated knife.
I like to place the bottom layer on my cake stand upside down so the smooth side is up, then brush it with cake syrup (mixed hot water, sugar, and optional strawberry juice). Follow with a generous layer of whipped cream, spreading evenly but not overly thick, then top with as many macerated strawberries as you can fit. Add another thin layer of cream over the strawberries before placing the top layer back on.
Repeat the syrup brushing and then cover the entire cake with a thin crumb coat of cream. Chill briefly if using stabilized cream. Finally, apply a thicker luscious layer of cream all over and decorate with the remaining strawberries on top. If you want, use a piping bag with leftover cream to add delicate touches.
Pro Tips for Making Japanese Strawberry Cake Recipe
- Gentle Folding: Take your time folding the egg whites into the batter. This keeps your sponge light and airy.
- Water Bath Importance: Baking with a water bath prevents cracking and keeps the cake moist.
- Strawberry Maceration: Don’t skip the sugar rest—this dial-up sweetness and texture dramatically.
- Whipping Cream Peaks: Stop whipping as soon as firm peaks form to avoid buttering the cream.
How to Serve Japanese Strawberry Cake Recipe
Garnishes
I typically keep it simple with fresh whole strawberries on top—sometimes I add a light dusting of confectioners’ sugar or a few mint leaves for color. This keeps the cake looking fresh and inviting without overpowering the sweetness.
Side Dishes
Serve this cake with a cup of green tea or a light sparkling sake to complement the delicate sweetness. A simple fruit salad with citrus also pairs wonderfully without stealing the spotlight.
Creative Ways to Present
For birthdays or special occasions, I like to create a “strawberry garden” look on top with shredded coconut “grass” and small edible flowers. You can also pipe whipped cream rosettes around the edges for a fancier flair—this cake definitely shines with a bit of effort in presentation.
Make Ahead and Storage
Storing Leftovers
I store leftovers covered loosely with plastic wrap or a cake dome in the fridge. The stabilized cream makes the cake hold up well for up to 2 days without drying out, but honestly, it’s usually all eaten pretty quickly around here!
Freezing
I’ve tried freezing this cake before, and while the sponge freezes well, the fresh strawberries and whipped cream can get a little watery when thawed. If you want to freeze, I recommend assembling fresh after defrosting or freezing the cake layers and cream separately.
Reheating
Slices can be brought to room temperature for about 30 minutes before serving—which really lets the cream soften and flavors bloom. I usually avoid microwaving it to keep the texture and cream intact.
FAQs
-
Can I use all-purpose flour instead of cake flour for this recipe?
You can substitute all-purpose flour, but the texture won’t be as light and delicate. To mimic cake flour, try replacing 2 tablespoons of each cup of all-purpose flour with cornstarch, then sift well before using.
-
Is gelatin necessary for the whipped cream?
Gelatin isn’t required but it stabilizes the whipped cream, keeping it firm longer—especially helpful if the cake will sit out or be served hours later. If you skip it, serve the cake promptly for best results.
-
How do I prevent the sponge from sinking?
Gently fold the egg whites to maintain airiness, don’t overmix batter, and avoid opening the oven door before the first hour. Also, bake at a steady low temperature and use a water bath for even heat.
-
Can this cake be made ahead for a party?
Yes! Bake the sponge a day ahead and keep it wrapped tightly. Assemble with whipped cream and strawberries the day of to maintain freshness. If using stabilized cream, you can assemble up to a day before serving.
-
What if I don’t have a cake stand?
No worries! You can place your cake on a flat plate or even create a makeshift stand by inverting a bowl and placing a flat plate on top—this makes spreading easier and gives you more control.
Final Thoughts
This Japanese Strawberry Cake Recipe has become one of my absolute favorites to make and share. It’s light enough to enjoy any time but special enough to wow guests. I love how it balances the tender sponge, fresh strawberries, and airy cream in such a harmonious way. If you’re looking for a cake that feels both comforting and elegant, this one’s for you. Try it out, and I promise you’ll be impressed with how approachable and delicious it is—like sharing a little piece of Japan’s sweet charm right from your own kitchen.
Print
Japanese Strawberry Cake Recipe
- Prep Time: 1 hour
- Cook Time: 1 hour 30 minutes
- Total Time: 3 hours 30 minutes
- Yield: 8 servings
- Category: Dessert
- Method: Baking
- Cuisine: Japanese
- Diet: Vegetarian
Description
This Japanese Strawberry Cake is a light and fluffy sponge cake layered with sweet macerated strawberries and whipped cream frosting. The cake is baked in a water bath for a moist texture and decorated elegantly with fresh strawberries, making it a perfect dessert for special occasions.
Ingredients
Cake
- 80 g (1/3 cup) whole milk
- 50 g (3 1/2 tablespoons) unsalted butter
- 75 g (1/2 cup + 1/2 tablespoon) cake flour
- 4 large egg yolks
- 4 large egg whites
- 70 g (5 1/2 tablespoons) sugar (caster sugar if available)
Strawberries
- 12 oz to 1 lb (340 g to 450 g) strawberries, divided
- 1 1/2 teaspoons sugar
Whipped Cream Frosting
- 280 g (10 oz) heavy whipping cream
- 2 tablespoons confectioners sugar
- 3/4 teaspoon gelatin (Optional)
- 2 tablespoons cold water (Optional)
Cake Syrup
- 2 tablespoons sugar
- 3 tablespoons hot water
Instructions
- Prepare the cake pan and oven: Cut a piece of parchment paper to fit the bottom of an 8-inch round cake pan and line the pan. Preheat the oven to 325°F (160°C). Prepare a high-walled pan or baking dish for a water bath and boil water to cover about one inch of the cake pan during baking. If using a springform pan, wrap the outside with foil to prevent leaks.
- Make the batter base: In a heatproof bowl, combine milk and butter, then microwave until melted and stir to combine. Sift the cake flour into the mixture and fold gently with a spatula until smooth, then add egg yolks and mix until evenly combined.
- Whip egg whites: In a clean bowl, beat egg whites at medium-high speed until frothy. Gradually add sugar while beating until glossy medium peaks form.
- Combine batters: Fold one-quarter of the whipped egg whites into the yolk mixture gently to lighten it, then pour this back into the remaining egg whites, folding gently until just smooth without overmixing.
- Bake the cake: Pour batter into the lined pan, gently tap the pan on the counter twice to release bubbles. Place the pan in the water bath, add hot water around it, and bake for 1 hour 30 minutes without opening the oven before one hour. The cake is done when a skewer comes out clean and it pulls away from the pan edges.
- Cool the cake: Run a knife around the pan edge, invert the cake onto a cooling rack and let cool completely before cutting and decorating.
- Macerate the strawberries: Slice 8 oz of strawberries into about 1/4-inch slices. Sprinkle with sugar and toss to coat. Let sit for 1 to 2 hours until glossy and sweet. Remove strawberries and reserve the juice.
- Make cake syrup: Stir sugar and hot water together until dissolved. Optionally add reserved strawberry juice for extra flavor and pink tint.
- Prepare whipped cream frosting: (Optional) To stabilize, soak gelatin in cold water for 5 minutes, then melt gently. Whip heavy cream with confectioners sugar until very soft peaks form. Mix some whipped cream into the gelatin and combine, then fold back into the bowl and whip briefly. For regular cream, whip cream with sugar to firm peaks.
- Assemble the cake: Level the cake by cutting off the browned top using toothpicks as a guide. Slice the cake horizontally into two even layers. Place the bottom layer on a cake stand, brush with syrup, spread a thin layer of whipped cream, and evenly arrange sliced strawberries. Cover strawberries with another thin cream layer. Place the top cake layer on, brush with syrup, and coat the entire cake with a thin crumb coat of cream. Apply a thicker final layer of cream and smooth the sides. Optionally pipe extra cream decoratively.
- Decorate and chill: Arrange remaining strawberries on top. If using stabilized cream, refrigerate the cake uncovered for at least 30 minutes to set. If using regular cream, serve immediately or refrigerate and serve within a few hours.
- Serve: Use a serrated knife to slice the cake. For stabilized cream, allow it to come to room temperature for about an hour for best texture before serving.
Notes
- If you don’t have a spinning cake stand, you can make one by turning a bowl or cake pan upside down and placing a flat plate or removable pie pan bottom on top.
- Do not open the oven during the first hour of baking to prevent the cake from collapsing.
- Be careful not to overwhip the stabilized whipped cream as it can start to separate.
- Using gelatin helps the cream hold its shape longer, ideal for decorated cakes that need to be displayed.
- The cake is best eaten within 1-2 days when stored refrigerated.
Nutrition
- Serving Size: 1 slice (approx. 1/8 of cake)
- Calories: 320
- Sugar: 24 g
- Sodium: 70 mg
- Fat: 20 g
- Saturated Fat: 13 g
- Unsaturated Fat: 6 g
- Trans Fat: 0.1 g
- Carbohydrates: 26 g
- Fiber: 2 g
- Protein: 5 g
- Cholesterol: 110 mg


