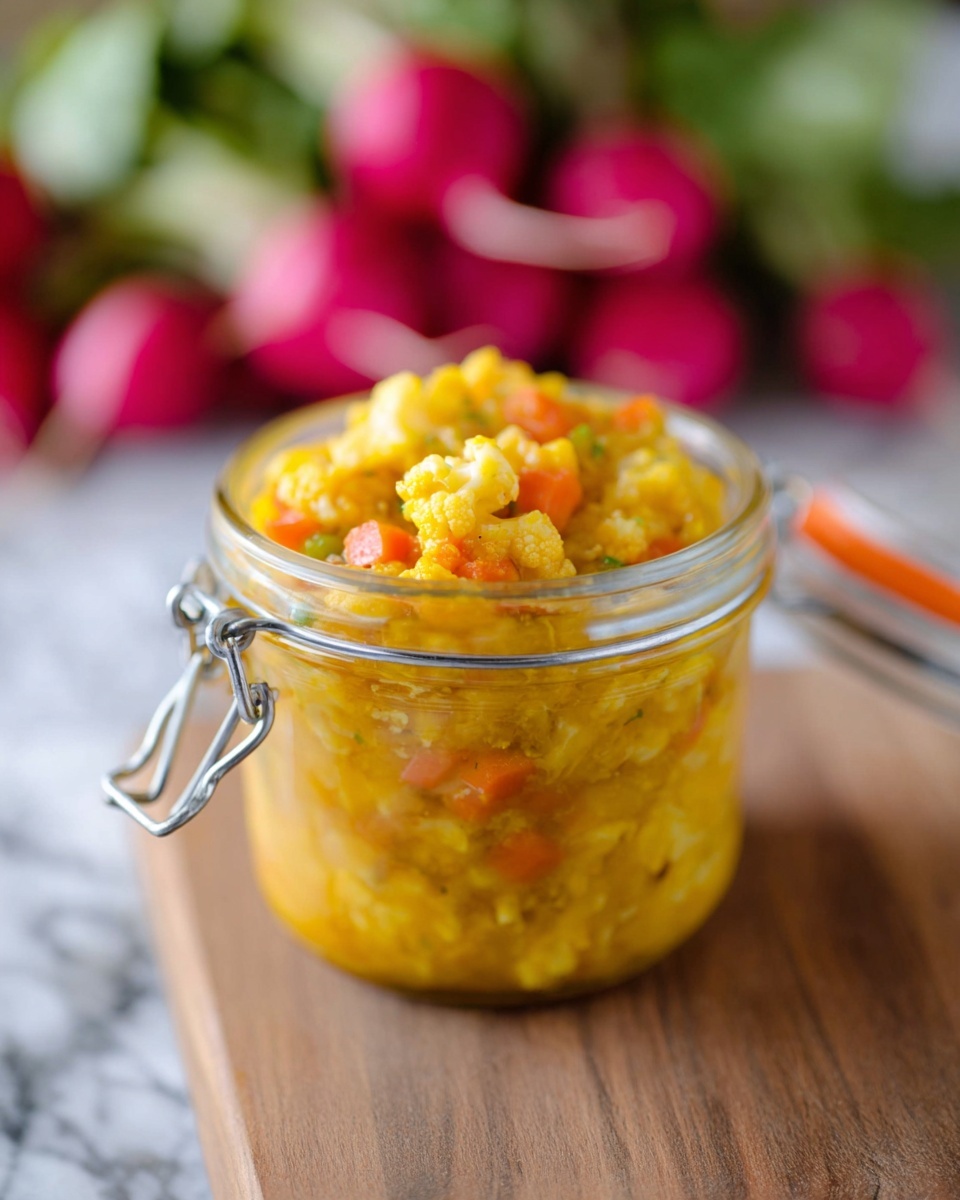
If you’re craving something tangy, a little spicy, and packed full of crunchy veggies, then you’re going to absolutely adore this Homemade Piccalilli with Vegetables Recipe. I’ve been making this relish for years, and it never fails to brighten up any meal — whether it’s slathered on a sandwich, served alongside cold meats, or just enjoyed straight from the jar. Trust me, once you try this, you’ll want to make it again and again!
Why You’ll Love This Recipe
- Bright & Tangy Flavors: The combination of vinegar, mustard, and turmeric creates a zesty punch that’s irresistible.
- Crunchy Veggie Goodness: A colorful mix of cauliflower, cucumbers, and beans gives every bite a satisfying crunch.
- Perfect for Meal Boosts: Use it as a condiment or an accompaniment to lift simple meals.
- Easy to Make: You don’t need fancy equipment or complex methods to whip this up.

Ingredients You’ll Need
Each ingredient plays a special role in balancing flavors and creating the perfect texture for this Homemade Piccalilli with Vegetables Recipe. I’ll share some tips so you know exactly what to look out for while shopping and prepping.
- Cauliflower: Choose fresh heads with firm white florets; this veggie gives the piccalilli its classic crunch.
- Shallots: Their mild sweetness complements the vinegar’s acidity beautifully.
- Cucumber: I prefer English cucumbers for fewer seeds and a crisp bite.
- Green beans: Fresh and vibrant beans add color and texture balance.
- Carrots (optional): Adds a subtle sweetness and extra crunch, but feel free to skip or add more depending on your preference.
- Salt: Essential for drawing moisture out of the vegetables and kickstarting the pickling process.
- Apple cider vinegar: Brings tang and a slight fruity undertone; you can use white vinegar but the flavor will differ.
- Granulated sugar: Balances the sourness and spices with gentle sweetness.
- Ground turmeric: This vibrant spice gives piccalilli its iconic yellow color and subtle earthiness.
- Mustard powder: A must-have for that traditional tangy mustard kick.
- Ground ginger: Adds a warm, spicy note that lifts the whole relish.
- Ground nutmeg: Just a pinch for a hint of warmth and depth, it’s surprising how much this little touch adds.
- All-purpose flour: Used to thicken the sauce so it clings to the vegetables perfectly.
Variations
One of my favorite things about this Homemade Piccalilli with Vegetables Recipe is how adaptable it is. Over time, I’ve experimented a lot and found some tasty variations you might want to try yourself.
- Extra Spice Variation: When I want a bit of a kick, I toss in some chili flakes or freshly ground black pepper — it really wakes up the flavors.
- Seasonal Veggies: Sometimes I swap in diced bell peppers or add shredded kale depending on what’s fresh; it’s a great way to use up odds and ends from the fridge.
- Vegan-Friendly: This recipe is naturally vegan, but just be sure your mustard powder is free from additives if that matters to you.
- Less Sweet Option: I reduced sugar once when I wanted something more tang-forward, and it still held up beautifully with just a bit more mustard powder to balance.
How to Make Homemade Piccalilli with Vegetables Recipe
Step 1: Salt and Soak Your Veggies
Start by chopping all your vegetables into small, bite-sized pieces — I love how this keeps the texture consistent. Then, place them in a large bowl and cover with cold water, stirring in the salt. Cover everything with a towel and let it sit for about one hour. This salting step draws out moisture, which is key for that perfect crunch and stops the veggies from going mushy later.
Step 2: Simmer With Spices and Vinegar
Drain the salted vegetables well, then transfer them to a large saucepan. Add the apple cider vinegar, sugar, turmeric, mustard powder, ground ginger, and nutmeg. Bring the mixture to a gentle simmer uncovered, and let it cook for about 10 minutes. You’re aiming for tender veggies, but they should still have a bite — keep an eye on them so they don’t get too soft. Also, the liquid will reduce slightly, concentrating all those wonderful flavors together.
Step 3: Sterilize Your Jars
While your veggies cook, it’s a great time to sterilize your jar or jars. I like using a big pasta pot because it’s easy to submerge everything. Place the clean jars and lids upright in boiling water and keep them there for at least 10 minutes. This step is crucial — it ensures your piccalilli stays fresh and safe by removing any bacteria.
Step 4: Thicken and Fill
Next, make a smooth paste by mixing a little cold water with the all-purpose flour. Stir this paste into the simmering vegetables and continue cooking gently until the sauce thickens and coats the veggies beautifully. When it’s ready, fill your sterilized jar(s) leaving about an inch of space at the top to allow for any liquid that the veggies might release. Seal them tightly once filled.
Step 5: Let It Pickle and Mature
This is where patience pays off! Allow your homemade piccalilli to pickle for at least 3 to 4 weeks in a cool, dark place before digging in. This resting time lets the flavors meld and develop that classic, tangy depth. Once opened, keep it refrigerated and enjoy within a week — the flour-based sauce means it’s best eaten fresh rather than canned long-term.
Pro Tips for Making Homemade Piccalilli with Vegetables Recipe
- Even Chopping Matters: I learned early on that cutting veggies uniformly helps them cook evenly and look more appealing in the jar.
- Don’t Skip the Salt Soak: This simple step pulls out excess water, which keeps the final relish crisp instead of soggy.
- Sterilize Jars Properly: Using boiling water for sterilization prevents spoilage and gives me peace of mind about food safety.
- Watch the Thickness: Adding flour paste gradually avoids lumps and ensures a smooth, thick sauce that clings just right.
How to Serve Homemade Piccalilli with Vegetables Recipe
Garnishes
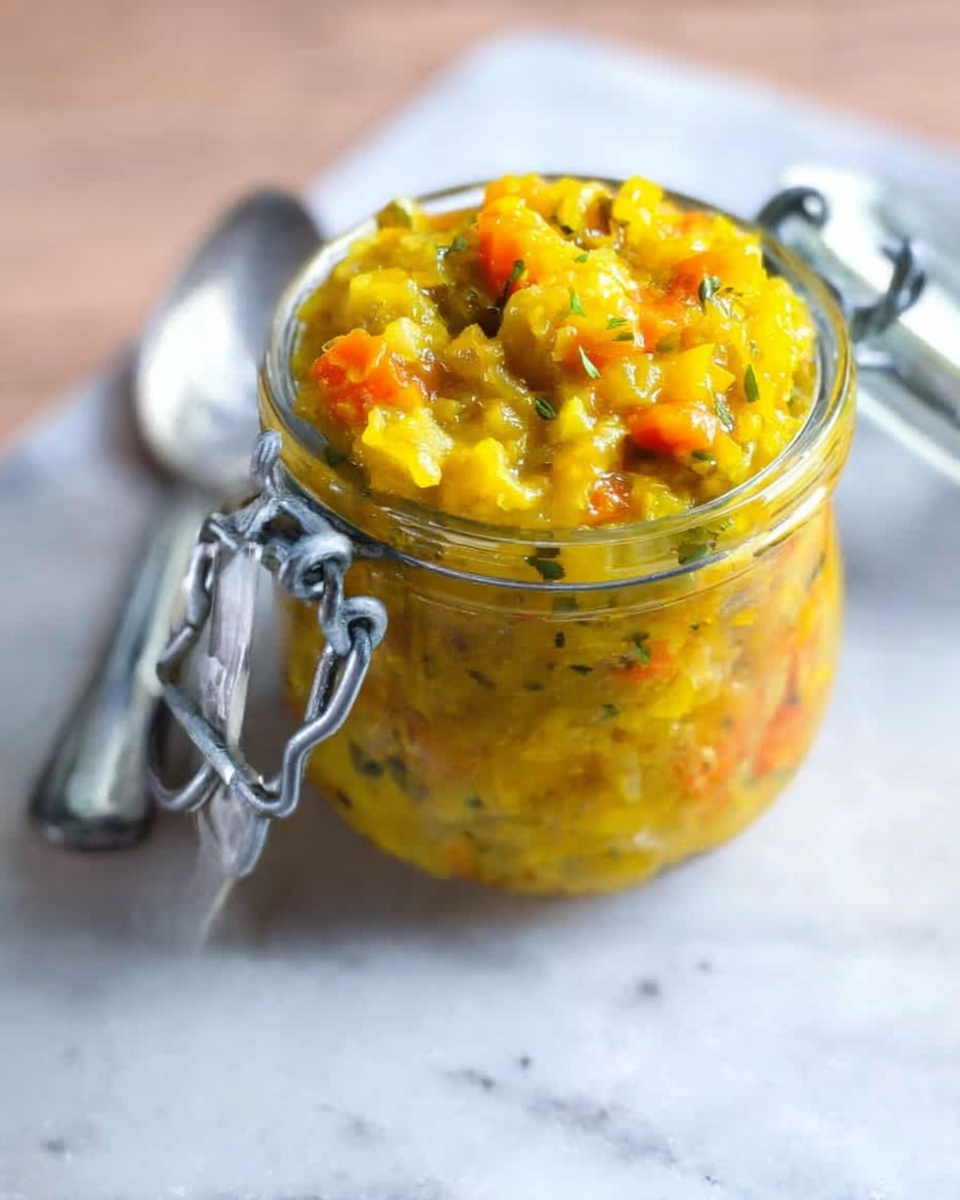
I often sprinkle a few fresh herbs like chopped parsley or coriander on top — it adds a fresh note that contrasts nicely with the tanginess. If you want a little more heat, a pinch of cracked black pepper or a few sliced fresh chilies works wonders here too.
Side Dishes
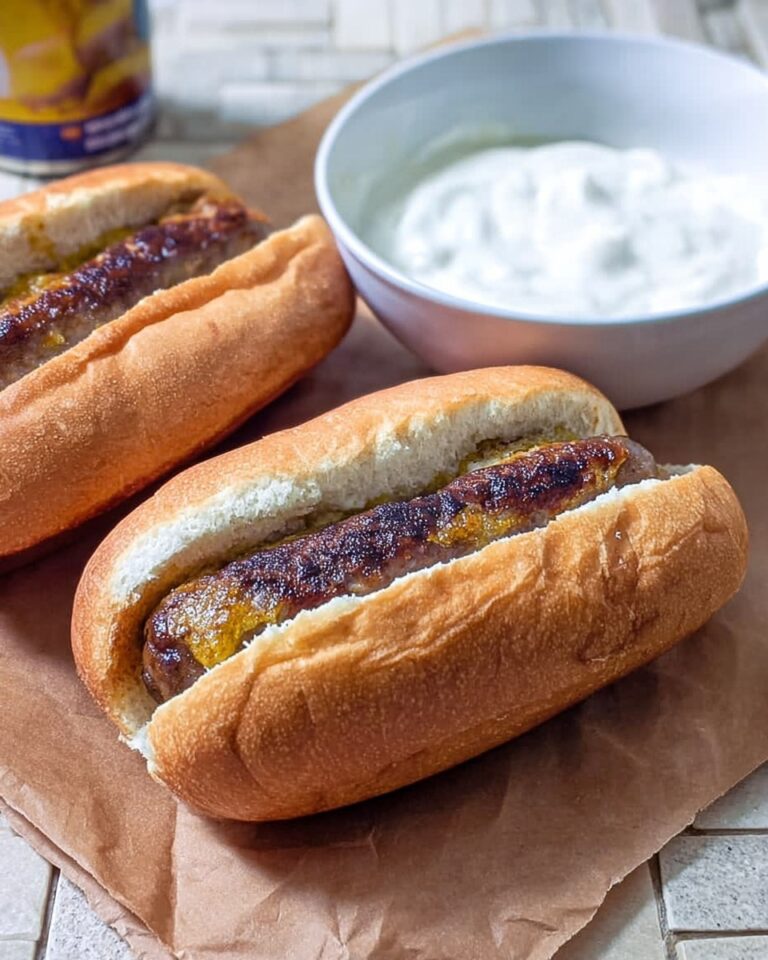
My go-to pairing is always with simple roast meats like pork or chicken, but it’s equally brilliant alongside a cheese board or served with warm crusty bread. Sometimes I add it to sandwiches or burgers for a real flavor boost — my family goes crazy for that zesty crunch.
Creative Ways to Present
For special occasions, I’ve arranged the piccalilli in small ramekins alongside charcuterie boards with artisan cheeses, nuts, and fresh fruit. The bright yellow relish pops beautifully on the table and invites conversation — plus, it’s a great way to impress guests without much extra effort.
Make Ahead and Storage
Storing Leftovers
After opening, I keep my piccalilli in the refrigerator tightly sealed. It stays fresh and flavorful for about a week. Because this recipe uses flour to thicken it, I’ve found it doesn’t store well long-term once opened, so I usually make smaller batches to avoid waste.
Freezing
Freezing isn’t my favorite method for this recipe; the texture of the veggies and sauce can change a bit once thawed. If you decide to freeze, do so before cooking thickening, then thaw and gently warm before serving, but honestly, fresh is best.
Reheating
If you want to warm your piccalilli (maybe as part of a cooked dish), just heat gently on the stove, stirring slowly to prevent the sauce from breaking down. Avoid microwaving directly, as it can sometimes dry things out unevenly.
FAQs
-
How long does it take to make homemade piccalilli with vegetables?
Preparing the vegetables and soaking them with salt takes about 1 hour, then cooking and thickening takes another 15-20 minutes. However, the real magic happens during the pickling period, so you’ll want to wait at least 3-4 weeks for the flavors to fully develop before enjoying.
-
Can I use different vegetables for this recipe?
Absolutely! While this recipe uses cauliflower, cucumber, green beans, shallots, and carrots, feel free to experiment with other crunchy veggies like bell peppers or even shredded cabbage. Just keep in mind that some veggies may soften faster, so adjust cooking times accordingly.
-
Why is it important to salt and soak the vegetables?
The salting process draws out excess water from the vegetables, which prevents your piccalilli from becoming soggy and helps maintain a perfect crunchy texture once pickled. It’s a simple step that really improves the final result.
-
How should I store homemade piccalilli?
Once sealed and before opening, store your piccalilli in a cool dark place. After opening, refrigeration is essential, and it’s best consumed within one week due to the flour content which can affect shelf life.
Final Thoughts
I absolutely love how this Homemade Piccalilli with Vegetables Recipe brings a burst of flavor and color to my meals, and I know you’ll enjoy it just as much. It’s one of those recipes that’s humble yet so rewarding, a true staple in my kitchen for adding that mustardy tang and crunchy goodness to everything from sandwiches to roasts. Give it a try—you might just discover your new favorite condiment!
Print
Homemade Piccalilli with Vegetables Recipe
- Prep Time: 20 minutes
- Cook Time: 15 minutes
- Total Time: 1 hour 35 minutes
- Yield: 4 servings
- Category: Condiment
- Method: Stovetop
- Cuisine: British
Description
Piccalilli is a traditional British mixed vegetable relish characterized by its tangy, slightly spicy mustard sauce. This vibrant condiment combines chopped cauliflower, shallots, cucumbers, green beans, and optional carrots, all pickled in a flavorful blend of apple cider vinegar, turmeric, mustard powder, and other aromatic spices. Perfect for adding zest to sandwiches, cold meats, and cheeses, this recipe allows the vegetables to soak and simmer before thickening the sauce with flour, resulting in a perfect balance of crunch and tang.
Ingredients
Vegetables
- 8 ounces (226 grams) cauliflower, chopped into small pieces
- 6 ounces (170 grams) shallot, chopped small
- 6 ounces (170 grams) cucumber, chopped small
- 3 ounces (85 grams) green beans, chopped small
- 2 carrots, peeled and chopped (optional)
Seasonings and Pickling
- 1 ½ tablespoons salt
- 5 cups (1 liter) apple cider vinegar
- ⅔ cup (132 grams) granulated sugar
- 2 teaspoons ground turmeric
- 1 ½ tablespoons mustard powder
- 1 ½ tablespoons ground ginger
- ⅛ teaspoon ground nutmeg
Thickener
- ½ cup (75 grams) all-purpose/plain flour
Instructions
- Salt Soak: Add all the chopped vegetables to a large bowl, cover them with water, and stir in 1 ½ tablespoons of salt. Cover the bowl with a towel and let the vegetables soak for 1 hour to soften and draw out moisture.
- Drain Vegetables: After 1 hour, drain the vegetables thoroughly to remove the salty water.
- Simmer Vegetables: Transfer the drained vegetables to a large saucepan. Add 5 cups of apple cider vinegar, ⅔ cup sugar, 2 teaspoons turmeric, 1 ½ tablespoons mustard powder, 1 ½ tablespoons ground ginger, and ⅛ teaspoon nutmeg. Bring the mixture to a simmer uncovered and cook for about 10 minutes until the vegetables are tender and the liquid has reduced slightly.
- Sterilize Jars: While the vegetables cook, sterilize your jars. Submerge a 1-liter (32-ounce) jar and its lid fully in boiling water for 10 minutes. Keep the jars hot until ready to fill.
- Thicken Pickle Sauce: Mix a little water with ½ cup flour to make a smooth paste. Stir this paste into the simmering vegetables to thicken the sauce. Continue simmering until the mixture thickens to a relish consistency.
- Fill and Seal Jars: Carefully fill the sterilized jars with the hot piccalilli, leaving a 1-inch headspace to allow for any liquid expansion. Seal the jars tightly to preserve freshness.
- Pickling Time: Allow the piccalilli to pickle for 3-4 weeks in a cool, dark place before consuming to develop full flavor. After opening, store in the refrigerator and consume within 1 week. Avoid long-term canning due to flour content which may go rancid.
Notes
- Piccalilli is a distinctly colored mixed vegetable relish with a tangy, slightly spicy mustard sauce.
- The use of flour as a thickener limits its suitability for long-term canning; refrigerate after opening.
- Optional carrots can be added for extra texture and sweetness.
- The pickling process takes 3-4 weeks, so plan ahead for best flavor development.
Nutrition
- Serving Size: 1 serving (about 1/4 of the batch)
- Calories: 183
- Sugar: 11 grams
- Sodium: 2032 milligrams
- Fat: 1 gram
- Saturated Fat: 0 grams
- Unsaturated Fat: 1 gram
- Trans Fat: 0 grams
- Carbohydrates: 39 grams
- Fiber: 7 grams
- Protein: 8 grams
- Cholesterol: 0 milligrams


