If you’ve ever wanted to capture that perfect balance of tangy, crunchy, and garlicky in your own kitchen, this Homemade Dill Pickles Recipe is exactly what you need. I absolutely love how this turns out—there’s something so satisfying about making your own pickles fresh and knowing exactly what’s in them. Whether you’re making them for a summer barbecue or just to have a delicious snack on hand, these pickles bring that classic deli-style flavor right to your fridge.
When I first tried making dill pickles at home, I was surprised at how simple the process is, yet how impactful the result is. You don’t need fancy equipment, and this recipe is beginner-friendly, which means you can enjoy fresh pickles without waiting months. Plus, these homemade pickles store beautifully in the fridge, staying crisp and flavorful for weeks, making them a handy addition to sandwiches, salads, or just straight from the jar!
Why You’ll Love This Recipe
- Simple Ingredients: You likely already have most of these pantry staples, making it easy to whip up anytime.
- Quick Prep & No Canning Required: Ready to eat in just a day or two, with no special equipment needed.
- Crisp Texture & Authentic Flavor: Keeps that satisfying crunch and fresh dill aroma that make pickles so crave-worthy.
- Customizable Style: Easily make spears or chips to suit your snacking or sandwich needs.

Ingredients You’ll Need
The magic of this Homemade Dill Pickles Recipe is in the harmony between fresh cucumbers, aromatic dill, and that perfect tang from vinegar and seasoning. Using crisp Persian or pickling cucumbers is my secret to getting that unbeatable snap every time.
- Persian or pickling cucumbers: I prefer Persian cucumbers for their thin skin and fewer seeds, perfect for a tender crunch.
- Garlic cloves: Adds a pungent kick—fresh and halved for maximum flavor infusion.
- Mustard seeds: These little seeds add a subtle zing and depth to the brine.
- Peppercorns: Whole peppercorns balance the flavors with slight heat and warmth.
- Fresh dill sprigs: The star of the show—use plenty for that classic dill aroma and taste.
- Water: Dilutes the vinegar to keep the pickles tangy but not overwhelming.
- Distilled white vinegar: Essential for that sharp pickle flavor and proper preservation.
- Cane sugar: Just a touch softens the brine’s acidity and rounds out the flavor.
- Sea salt: Ensures crispness and balances the sweetness with saltiness.
Variations
I love how flexible this Homemade Dill Pickles Recipe is—you can tweak it to match your taste buds and what you have on hand. Don’t hesitate to play around with spices or even the cucumber cut to make these pickles truly your own.
- Spicy Pickles: Add a pinch of red pepper flakes or a few slices of jalapeño to the jar for a fiery twist. My family goes crazy for that little heat kick!
- Garlic Lovers: Double up on the garlic cloves. When I do this, the garlic flavor becomes more robust, perfect for pairing with sandwiches.
- Sweet & Tangy: Swap cane sugar for honey or brown sugar for a subtle sweetness variation I once tried that gave the pickles a unique depth.
- Herb Infusions: Mix in fresh thyme or oregano sprigs for an herbaceous note that I like when making pickles for a Mediterranean-inspired meal.
How to Make Homemade Dill Pickles Recipe
Step 1: Prep and Cut Your Cucumbers
Wash your cucumbers thoroughly and decide how you want them—spears or chips. I usually slice Persian cucumbers into quarters for spears, which makes them perfect for pickling and munching. Thinly sliced chips work fast too if you’re in a hurry. Just be consistent with the size so they pickle evenly.
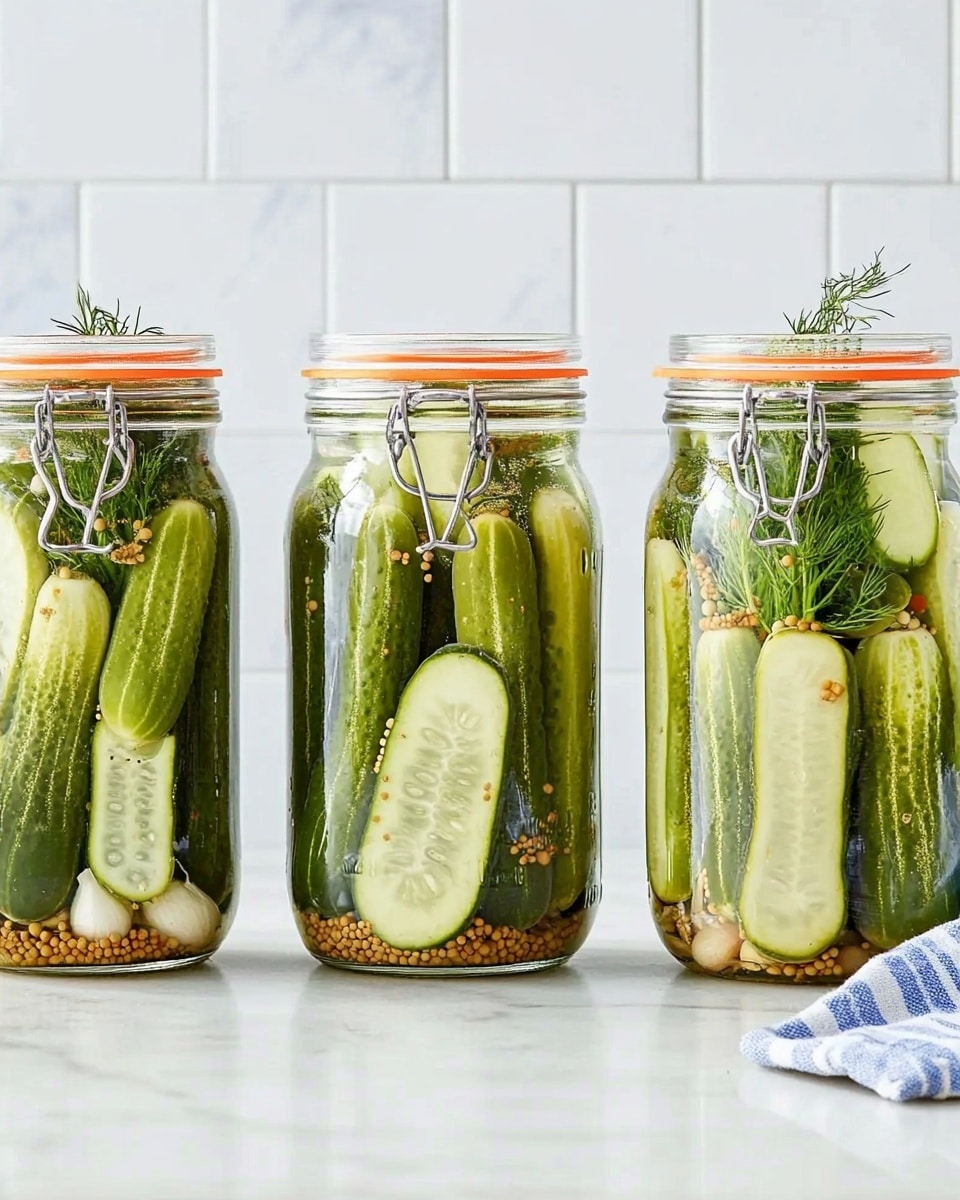
Step 2: Pack the Jars with Cucumbers and Flavorings
Divide your cucumbers evenly across mason jars. Then, add halved garlic cloves, mustard seeds, peppercorns, and a generous handful of fresh dill sprigs to each jar. I like to tuck the dill in between the cucumbers so every bite has flavor. Don’t skip the garlic—it really makes a big difference.
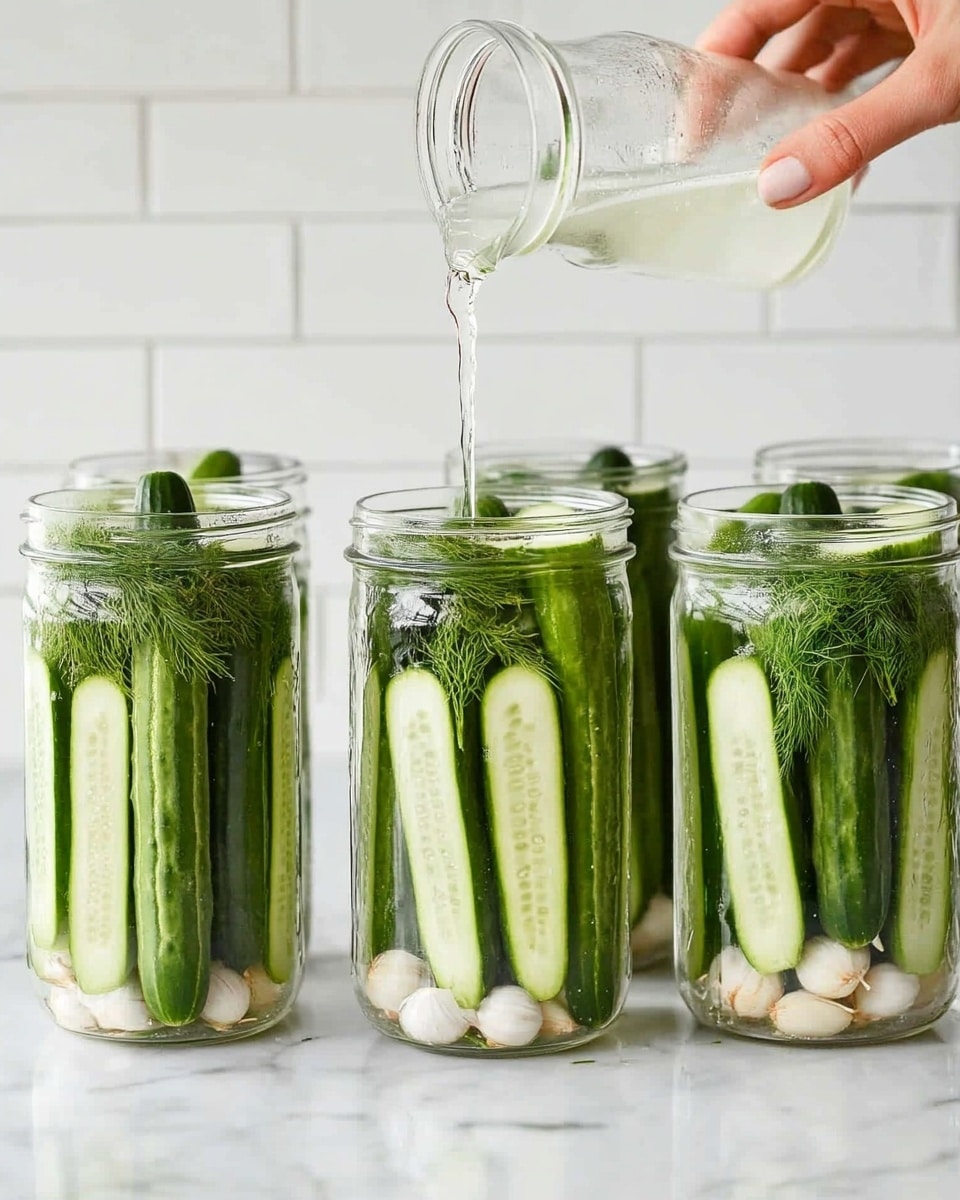
Step 3: Make and Pour the Brine
Heat water, vinegar, sugar, and sea salt in a saucepan until the sugar and salt fully dissolve, usually about a minute or so. Let this brine cool just a bit before pouring it over the cucumbers—hot brine can soften the cucs too much. Pour until the cucumbers are fully submerged, then seal the jars and leave them to cool to room temp.
Step 4: Chill and Wait for Flavor to Develop
Pop your jars in the fridge. Chips will be pleasantly pickled after just one day, with flavor deepening day by day. Spears take a bit longer to mellow—try them after two days, but for the best snap and tang, I wait about five or six days. Patience here really pays off!
Pro Tips for Making Homemade Dill Pickles Recipe
- Choose Fresh, Firm Cucumbers: I learned the hard way that softer cucumbers lead to mushy pickles, so always go for the firmest ones you can find.
- Don’t Overheat the Brine: Pour the brine when it’s warm, not hot, to keep your cucumbers crispy and prevent them from cooking in the jar.
- Give the Pickles Time: Though you can snack early, letting them sit a few extra days multiplies the flavor and texture—trust me, it’s worth waiting for!
- Use Glass Jars: Plastic can absorb odors and flavors. I always use glass for cleaner taste and easier cleaning.
How to Serve Homemade Dill Pickles Recipe
Garnishes
I love adding fresh dill sprigs as a garnish when serving—just a little visual reminder of that fresh herb flavor inside. Sometimes, I sprinkle a pinch of red pepper flakes on the side to offer a spicy contrast. It turns a simple pickle snack into something a bit more festive!
Side Dishes
These homemade dill pickles are the perfect crunchy counterpoint to a juicy burger or a deli sandwich loaded with meats and cheese. I also love slicing them up into salads for an extra zing or pairing them with smoked meats and cheeses on a charcuterie board.
Creative Ways to Present
For get-togethers, I’ve served these pickles in a clear jar alongside sliders and sliders toppings—everyone loves digging into their own mini jar. Another time, I chopped up the pickles and mixed them into homemade tartar sauce for dipping fish fingers, which was a total hit in my house!
Make Ahead and Storage
Storing Leftovers
I keep my pickles in their original jars in the fridge where they stay fresh, crisp, and flavorful for up to several weeks. Each time I reach in for one, it feels like a fresh snack. Just be sure to always use a clean fork or tongs to avoid introducing any bacteria.
Freezing
Freezing pickles isn’t my go-to because the texture changes a lot—frozen cucumbers become mushy. I’ve tried it once out of curiosity but honestly recommend enjoying them fresh from the fridge instead for that unbeatable crunch.
Reheating
No need to reheat pickles! They’re best served cold or at room temperature to savor their crispness. This is one of those recipes where serving straight from the fridge is just perfect and super convenient.
FAQs
-
How long do homemade dill pickles last in the fridge?
When properly stored in sealed jars, homemade dill pickles stay fresh and tasty for about 3 to 4 weeks. The vinegar brine acts as a natural preservative, but for the best crunch and flavor, try to consume them within that timeframe.
-
Can I use regular cucumbers for this recipe?
Yes, but I recommend using pickling cucumbers or smaller Persian cucumbers because they’re firmer and have fewer seeds, resulting in crisper pickles. Regular cucumbers can work but may not stay as crunchy after pickling.
-
Do I need to sterilize the jars before pickling?
Since this is a quick refrigerator pickle recipe and not a long-term canned pickle, sterilizing jars isn’t strictly necessary. Just ensure your jars and lids are clean and dry before use to keep everything safe and fresh.
-
How can I make my pickles crunchier?
Use fresh, firm cucumbers and avoid soaking them in water too long before pickling. Also, don’t pour hot brine on the cucumbers—let it cool slightly to keep the texture crisp. Adding a grape leaf or two to the jar is an old trick some swear by for extra crunch.
-
Can I make this recipe vegan and gluten-free?
Absolutely! This Homemade Dill Pickles Recipe is naturally vegan and gluten-free as it contains just vegetables, herbs, and basic pantry ingredients. Just make sure your vinegar is gluten-free if you have strict dietary needs.
Final Thoughts
Making your own dill pickles at home is such a rewarding and surprisingly easy kitchen adventure. This Homemade Dill Pickles Recipe is my go-to whenever I want that perfect balance of crunch and tang without any unknown additives. I encourage you to try it—you’ll find just how fun and delicious homemade pickling can be. Trust me, once you taste these fresh pickles, store-bought ones won’t feel quite the same anymore!
Print
Homemade Dill Pickles Recipe
- Prep Time: 10 minutes
- Cook Time: 1 minute
- Total Time: 1 day 11 minutes
- Yield: 16 servings
- Category: Pickles & Preserves
- Method: Stovetop
- Cuisine: American
Description
This classic Dill Pickles recipe offers a crunchy, tangy, and flavorful bite made with fresh cucumbers, garlic, and fragrant dill. Quick to prepare and naturally preserved in a vinegar and spice brine, these pickles are perfect for snacking, sandwiches, or enhancing any meal. The recipe provides instructions for making both spears and chips, with a simple stovetop brining technique and no canning required.
Ingredients
Pickling Vegetables
- 12 to 14 Persian cucumbers or 8 to 10 pickling cucumbers
Spices and Herbs
- 4 garlic cloves, halved
- 2 teaspoons mustard seeds
- 2 teaspoons peppercorns
- Fresh dill sprigs, a few per jar (approx. 8 sprigs total)
Brine
- 2 cups water
- 2 cups distilled white vinegar
- 1/4 cup cane sugar
- 2 tablespoons sea salt
Instructions
- Prepare the Cucumbers: Slice the cucumbers lengthwise into quarters to make pickle spears or thinly slice them horizontally to make pickle chips, depending on your preference.
- Fill the Jars: Divide the sliced cucumbers evenly among 4 (8-ounce) or 2 (16-ounce) clean glass jars. Then, distribute the halved garlic cloves, mustard seeds, peppercorns, and fresh dill sprigs equally into each jar.
- Make the Brine: In a medium saucepan, combine water, distilled white vinegar, cane sugar, and sea salt. Heat over medium heat, stirring occasionally until the sugar and salt completely dissolve, about 1 minute. Remove from heat and let the brine cool slightly.
- Pour and Chill: Pour the warm brine over the cucumbers and spices in each jar until fully submerged. Leave the jars uncovered to cool to room temperature.
- Refrigerate: Seal the jars with lids and place them in the refrigerator. For pickle spears, light pickling occurs in about 2 days, with peak flavor developing around day 5 or 6. For pickle chips, they are lightly pickled after 1 day and become more flavorful over several days. Store refrigerated pickles for several weeks for best freshness and taste.
Notes
- Use fresh cucumbers, preferably Persian or pickling varieties, for the best crunch.
- If you prefer a less sweet pickle, you can reduce the cane sugar to 2 tablespoons.
- Make sure jars and lids are clean to extend shelf life and avoid spoilage.
- Pickles develop flavor over time; for best results, wait at least 2 days before eating spears and 1 day for chips.
- Store pickles in the refrigerator; this recipe does not require canning or shelf storage.
- You can experiment with adding other spices such as coriander seeds or red pepper flakes for varied flavor profiles.
Nutrition
- Serving Size: 1 pickle spear or equivalent chips (approx. 30g)
- Calories: 10
- Sugar: 1g
- Sodium: 250mg
- Fat: 0g
- Saturated Fat: 0g
- Unsaturated Fat: 0g
- Trans Fat: 0g
- Carbohydrates: 2g
- Fiber: 0.3g
- Protein: 0.3g
- Cholesterol: 0mg
