
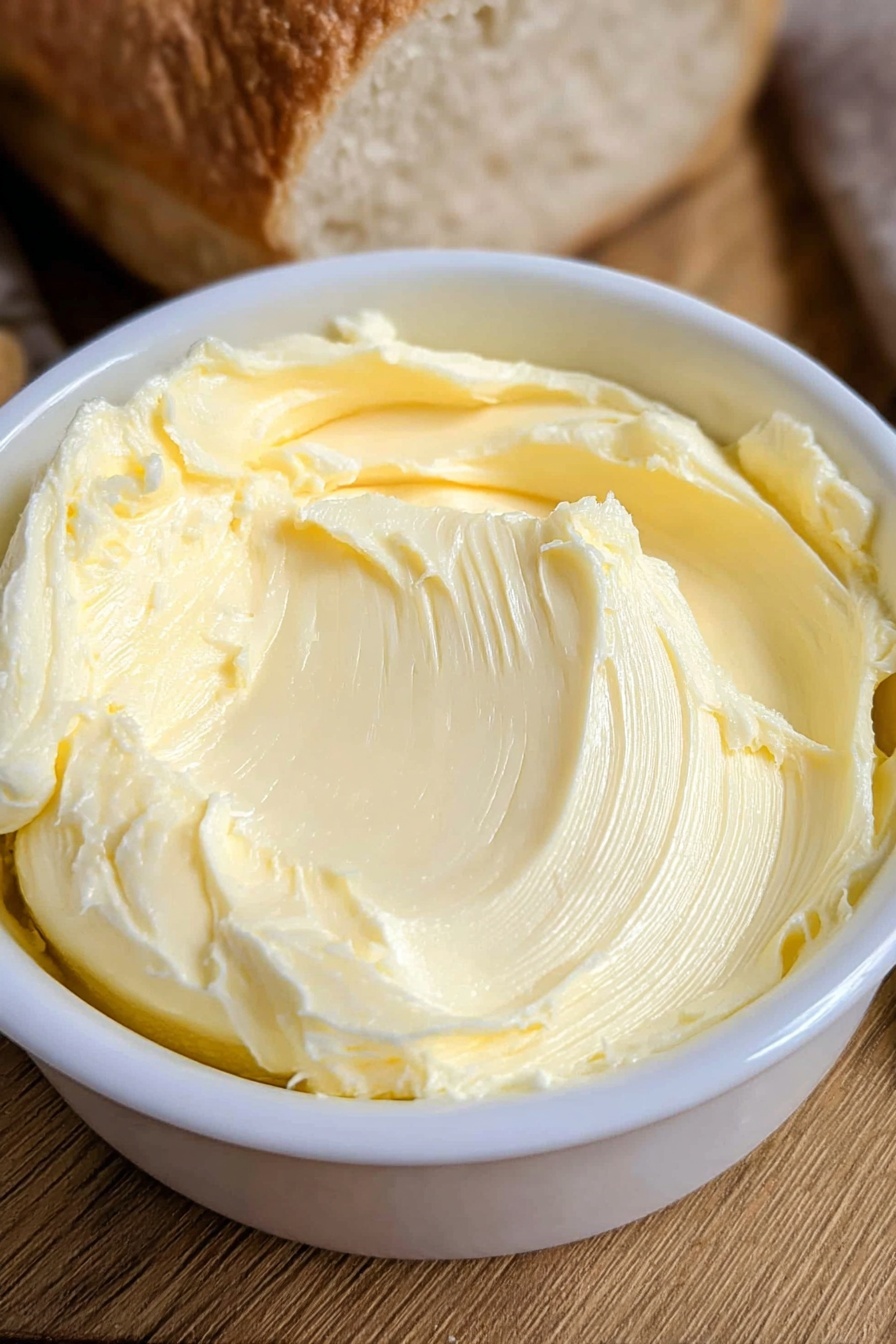
If you’ve ever wondered how to make your own butter at home, you’re in for a real treat with this Homemade Butter Recipe. It’s incredibly simple, requires just one main ingredient, and the taste? Absolutely next-level fresh and creamy. Trust me, once you try making butter yourself, you’ll never want to go back to store-bought again. Stick with me as I walk you through every step to get this fan-freaking-tastic butter on your table!
Why You’ll Love This Recipe
- Simple Ingredients: You only need heavy cream (and salt if you want it) — no fancy equipment or chemicals.
- Hands-On Fun: I love how this recipe turns making butter into such a satisfying kitchen project.
- Freshness that Pops: Homemade butter tastes so fresh and creamy, you’ll notice the difference immediately.
- Customizable Flavor: You can add salt or herbs to make it exactly how you like it.

Ingredients You’ll Need
For this Homemade Butter Recipe, the ingredients are straightforward but make all the difference. Using good quality heavy whipping cream really gives you that rich texture and flavor, so pick the freshest cream you can find!

- Heavy whipping cream: Choose a cream with at least 36% fat content — this is key to getting that thick, creamy butter we all crave.
- Sea salt (optional): For salted butter lovers, I recommend fine sea salt because it blends smoothly without overpowering the butter’s delicate flavor.
- Ice water: This helps rinse the butter and get out any leftover buttermilk, which improves the shelf life and texture.
Variations
I love how customizable this Homemade Butter Recipe is. You can really play with it depending on your mood or what you have on hand — whether it’s adding herbs or trying salted vs. unsalted. Make it your own!
- Herb-Infused Butter: Once your butter is made, mix in chopped fresh herbs like parsley, chives, or thyme for delicious savory spreads. I first tried adding garlic and rosemary, and my family goes crazy for it on crusty bread!
- Flavored Sweet Butter: Add a touch of honey and cinnamon after you finish for a sweet twist that pairs wonderfully with pancakes or toast.
- Salted vs Unsalted: I usually make unsalted butter and add salt when spreading, but for baking, salted butter straight out of the fridge really elevates the flavor.
How to Make Homemade Butter Recipe
Step 1: Whip the Cream Until It Transforms
Start by pouring your heavy whipping cream into a large bowl or stand mixer fitted with the whisk attachment. I love using my stand mixer because it saves my arm from a workout, but if you don’t have one, a hand mixer works just fine. Whisk the cream on medium speed for about 10 minutes. What you’re looking for is for the cream to go from soft peaks to stiff peaks and then beyond — eventually it will start breaking down and separating into butter and buttermilk. It’s magical to watch! When it starts clumping on the whisk and liquid pools at the bottom, you’re right on track. This is the moment you add the optional sea salt.
Step 2: Strain the Butter from Buttermilk
Once the butter and buttermilk have separated, it’s time to strain. Place a mesh sieve over a bowl and carefully pour the contents from your mixer bowl. I always recommend doing this slowly to keep the butter in the sieve and let the buttermilk drip down. You can save the buttermilk for pancakes or baking — don’t toss it!
Step 3: Rinse and Squeeze for Creamy Perfection
Next, fill a bowl with ice water and dip the butter in. This rinse helps wash away excess buttermilk, which can make your butter spoil quicker. I like to gently squeeze the butter a few times in the water and then press out as much liquid as possible with my hands or a spatula. This step is key to silky, long-lasting homemade butter.
Step 4: Shape and Store Your Butter
Now comes the fun part—forming your butter! I usually put it on a piece of parchment paper and shape it into a log or a block. You can wrap it tightly, twist the ends of the paper, and even add kitchen twine for a charming look. Storing butter this way in the fridge helps it keep for up to three weeks, but you can also freeze it to enjoy later.
Pro Tips for Making Homemade Butter Recipe
- Use Cold Cream: I discovered that using cream straight from the fridge gives the best whipping results and firm butter.
- Don’t Overwhip: Watch carefully as the cream thickens; stopping just after separation ensures buttery texture without turning grainy.
- Save the Buttermilk: Use the leftover buttermilk to make pancakes or biscuits—it’s a delicious bonus!
- Rinse Well: The ice water rinse is a game changer—skipping it can make your butter spoil faster.
How to Serve Homemade Butter Recipe
Garnishes
I often sprinkle flaky sea salt or fresh cracked black pepper right on the butter before serving. For something special, a sliver of roasted garlic or a little fresh herb mix folded into softened butter tastes incredible.
Side Dishes
My family can’t get enough of homemade butter paired with warm crusty bread, steamed veggies, or mashed potatoes. It also shines on pancakes or cornbread—trust me, the fresh creaminess amplifies every bite.
Creative Ways to Present
For a special brunch, I like to shape butter into small balls or fun shapes using cookie cutters, then chill them. Adding edible flowers or herbs on top makes the presentation pop, and everyone asks how I made it so pretty!
Make Ahead and Storage
Storing Leftovers
I store my homemade butter wrapped tightly in parchment and then placed in an airtight container in the fridge. This keeps it fresh and prevents it from absorbing any other flavors from the fridge. It stays good for up to three weeks, but is usually gone before then!
Freezing
Freezing homemade butter works wonderfully. I slice it into sticks, wrap tightly in parchment and plastic wrap, then pop it in a freezer bag. It keeps for up to nine months and thaws quickly when you need it.
Reheating
Butter doesn’t need much reheating—just bring it to room temperature for easy spreading. If you want it melted, gently warm it on the stovetop on low heat. I avoid the microwave because it can separate the fats too much.
FAQs
-
How long does homemade butter last in the fridge?
When stored properly wrapped in parchment or wax paper and kept in an airtight container, homemade butter stays fresh for up to 3 weeks in the refrigerator. The ice water rinse helps extend its shelf life by removing excess buttermilk.
-
Can I use milk instead of heavy cream for butter?
Unfortunately, no. Heavy whipping cream’s high fat content is essential for making butter. Milk doesn’t have enough fat and won’t whip into butter no matter how long you mix it.
-
What’s the leftover liquid after making butter?
That’s buttermilk, a slightly tangy liquid perfect for baking or cooking. Don’t throw it away—use it in pancakes, biscuits, or dressings for a delicious boost.
-
Can I make salted butter with this recipe?
Absolutely! Just add about 2 teaspoons of fine sea salt once the cream reaches stiff peaks during whipping. Mix it well before separating the butter and buttermilk.
-
What equipment do I need to make homemade butter?
A stand mixer with a whisk attachment is ideal, but you can also use a hand mixer or even a jar to shake the cream by hand. The key is to whip the cream until it separates into butter and buttermilk.
Final Thoughts
I absolutely love how this Homemade Butter Recipe transforms a simple ingredient into something so rich and delicious. When I first tried making butter myself, I couldn’t believe how easy and rewarding it was. You’ll enjoy the freshness and the fun of crafting your own butter, not to mention how impressed your friends and family will be when you serve it up. So go ahead, give it a try—you’ll never look at store-bought butter the same way again!
Print
Homemade Butter Recipe
- Prep Time: 25 minutes
- Cook Time: 0 minutes
- Total Time: 25 minutes
- Yield: 32 servings (1 lb or 4 sticks of butter)
- Category: Dairy
- Method: Blending
- Cuisine: American
Description
This homemade butter recipe guides you through turning heavy whipping cream into fresh, creamy butter using a stand mixer or hand mixer. With simple ingredients and easy techniques, you can create delicious butter that is perfect for spreading, cooking, or baking.
Ingredients
Ingredients
- 4 cups heavy whipping cream
- 2 tsp sea salt (optional, for salted butter)
- Ice water, as needed
Instructions
- Prepare: Get out a stand mixer fitted with the whisk attachment or use a large mixing bowl with a hand mixer and whisk attachment. Ensure your bowl is large enough to accommodate the expanding heavy cream during whipping.
- Whip heavy cream: Pour the heavy cream into the bowl and whisk on medium speed for about 10 minutes. Once stiff peaks form, add salt if desired, then continue whisking until the butter and buttermilk separate. The butter will stick to the whisk, and buttermilk will be liquid in the bowl.
- Strain: Place a mesh sieve over a smaller bowl and carefully pour the mixture to separate the butter from the buttermilk, which will collect in the bowl beneath.
- Squeeze: Gather the butter and squeeze out any remaining liquid. Dip the butter into a bowl of ice water and squeeze again to remove excess liquid.
- Store: Shape the butter into a log or a block on parchment or wax paper. Wrap tightly and secure with kitchen twine or string. For convenience, cut into sticks and wrap individually if preferred.
- Chill/store: Refrigerate the butter to firm up. It will stay fresh for up to 3 weeks refrigerated or can be frozen for up to 9 months.
Notes
- This recipe yields approximately 1 lb (4 sticks) of butter, equivalent to 32 tablespoons.
- Use only heavy whipping cream for authentic results; substitutions are not recommended.
- Adding salt is optional and adjustable based on taste preferences.
- Ensure butter is well-squeezed to prevent excess moisture which can affect shelf life.
- Homemade butter can be stored refrigerated or frozen for extended preservation.
Nutrition
- Serving Size: 1 tablespoon (14g)
- Calories: 102
- Sugar: 0.1g
- Sodium: 90mg
- Fat: 11.5g
- Saturated Fat: 7g
- Unsaturated Fat: 3.5g
- Trans Fat: 0.5g
- Carbohydrates: 0.1g
- Fiber: 0g
- Protein: 0.1g
- Cholesterol: 31mg


