If you’re on the hunt for a fun, festive treat that’s super easy to whip up but guaranteed to wow your guests, let me introduce you to the Hocus Pocus S’mores Pops Recipe. These adorable s’mores-on-a-stick beauties are perfect for Halloween parties, fall gatherings, or whenever you want a little magical sweet fix. I absolutely love how this recipe combines nostalgic campfire flavors with a quirky twist, and I promise once you try it, it’ll be your go-to spooky snack too!
Why You’ll Love This Recipe
- Super Easy to Make: With just a few ingredients and no baking required, this recipe is a breeze to pull together—even if you’re short on time.
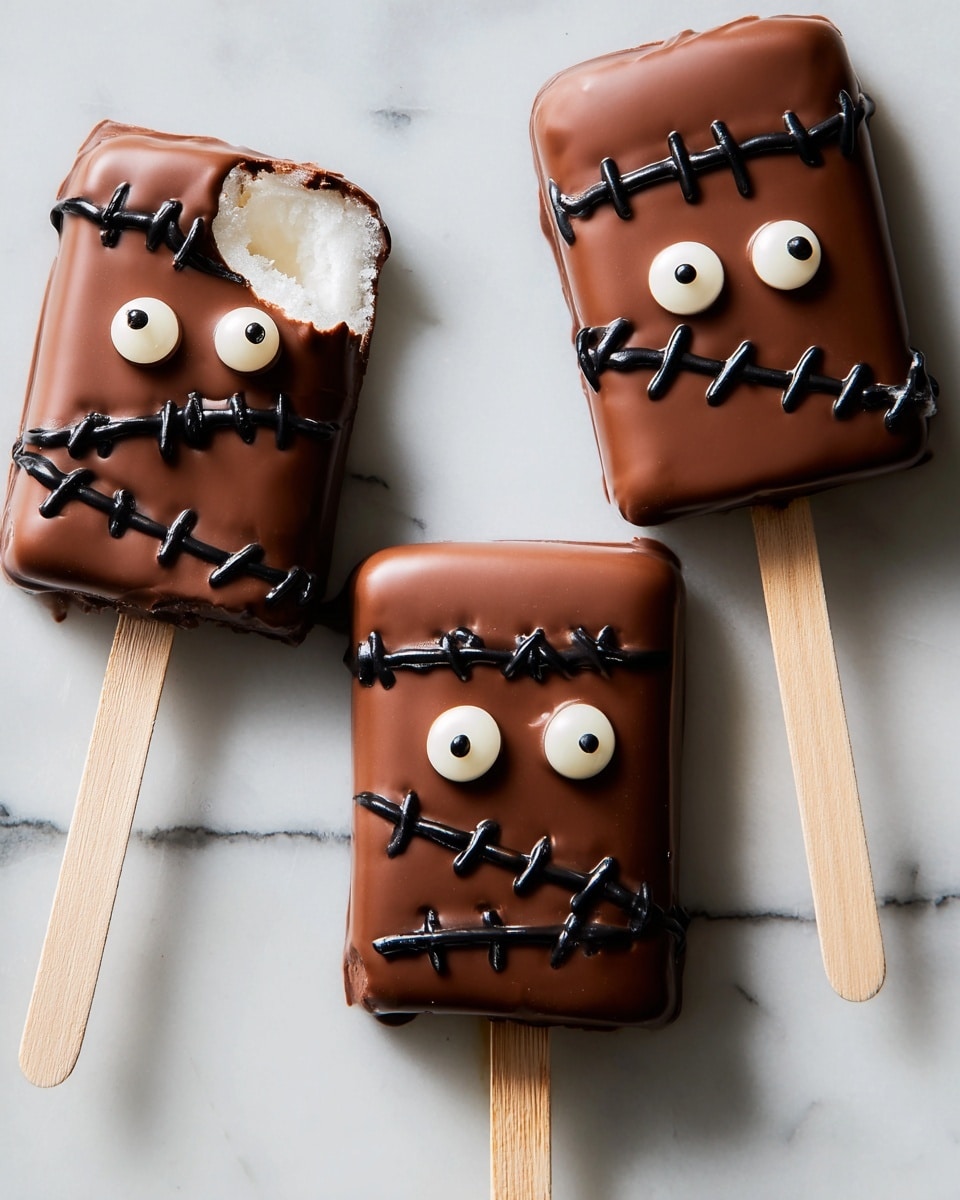
- Perfect Halloween Vibes: The candy eyes and cookie frosting make these pops delightfully spooky and fun, great for kids and adults alike.
- Mess-Free S’mores Experience: By putting these treats on sticks, you avoid sticky hands and marshmallow meltdowns—trust me, this is a game-changer!
- Customizable and Kid-Friendly: You can tweak flavors or decorations easily to fit your crowd or theme.
Ingredients You’ll Need
Each ingredient in this Hocus Pocus S’mores Pops Recipe plays its part in making the ultimate s’mores treat that’s rich, gooey, and perfectly spooky. I always recommend using good-quality chocolate chips—they melt smoother and give a nicer shine, making your pops look extra magical.
- Graham crackers: I prefer halving regular-sized ones so the pops are a perfect handheld size.
- Marshmallow crème: This is your gooey magic—it sticks the sandwich together and tastes just like gooey marshmallows roasted to perfection.
- Semisweet chocolate chips: Opt for semisweet for that perfect balance of rich chocolate flavor without it being too sweet.
- Coconut oil: This helps melt and smooth out the chocolate when dipping your pops.
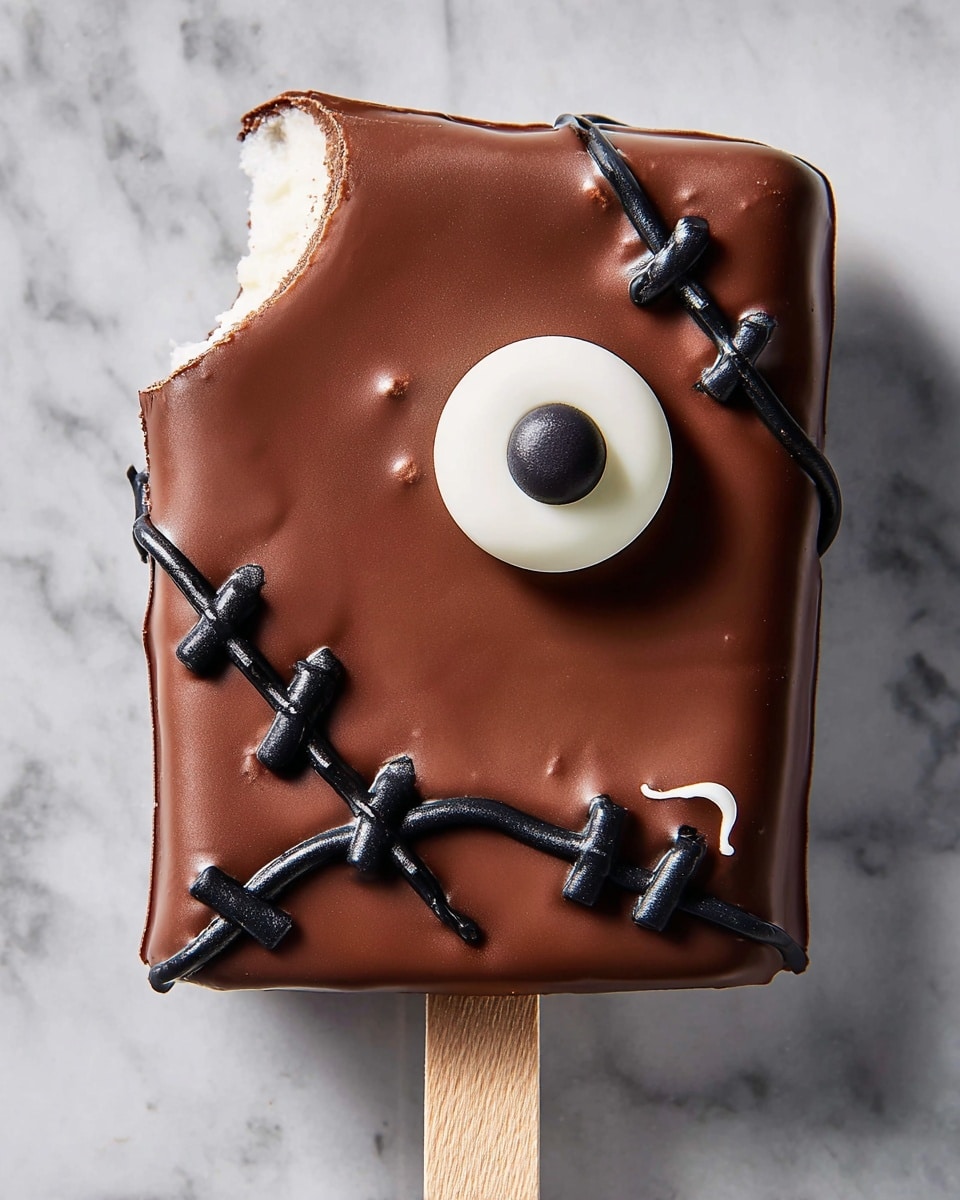
- Candy eyes: The secret to that cute, spooky look; they stick right onto the melted chocolate so easily.
- Black cookie frosting: This frosting lets you draw the little details that make the pops look like tiny spell books with stitches and more.
Variations
What I love most about the Hocus Pocus S’mores Pops Recipe is how easy it is to customize. Depending on what you have at home or your dietary preferences, you can make these your own. Adding little personal touches makes hosting Halloween even more fun.
- Gluten-Free Version: Swap in gluten-free graham crackers, and use dairy-free chocolate chips to keep it friendly for everyone. I’ve done this for a friend with celiac disease, and nobody missed the regular grahams!
- Nutty Twist: Sprinkle crushed toasted nuts like almonds or pecans on the melted chocolate before it sets for an added crunch—I like this twist for a little texture surprise.
- White Chocolate Coating: Use white chocolate instead of semisweet for a sweeter look, especially fun if you’re going for a “ghostly” vibe.
- Mini Pops: Make smaller versions by breaking graham crackers into quarters instead of halves for bite-sized treats kids love at parties.
How to Make Hocus Pocus S’mores Pops Recipe
Step 1: Assemble Your S’mores Sandwiches
Start by spreading about a tablespoon of marshmallow crème on half of your halved graham crackers. This not only adds that signature gooey marshmallow flavor but also works like glue to hold your popsicle stick in place—place the stick halfway on the crème so it sticks out like a handle. Then top with the other graham cracker half to make a perfect little sandwich. I always line them up on parchment paper and pop them into the freezer for about 10 minutes; this step is key because it firms them up, making the chocolate dip much easier.
Step 2: Make the Chocolate Coating
Next, in a microwave-safe bowl, combine your semisweet chocolate chips and coconut oil. Microwave in short 20-second bursts, stirring between each, until smooth and glossy, about a minute total. This melty magic coats your pops nicely, and the coconut oil keeps the chocolate from hardening too fast. If you don’t stir well, you might end up with lumps, so be patient here!
Step 3: Dip and Decorate Your Pops
Carefully dip each frozen s’mores sandwich into your melted chocolate, making sure every side is covered completely. I use a butter knife or a silicone spatula to help spread the chocolate along the edges—it ensures a clean, even coating. Before the chocolate sets, place one candy eye on the far right side of each “book,” about halfway down the graham cracker. Then, place your pops on the baking sheet and chill them in the fridge. After a few minutes, use your black cookie frosting to draw circles around the eyes, add two semicircles to the book’s corners, plus little “stitches” on the chocolate coating. These details? They bring so much character, and I always get compliments on the cute spooky look!
Step 4: Let Them Set and Enjoy
Pop your decorated pops back into the fridge for at least 15 minutes to let everything firm up nicely. Once set, they’re ready to serve! I find chilling them well makes handling easier and keeps the marshmallow crème nice and gooey inside without getting messy.
Pro Tips for Making Hocus Pocus S’mores Pops Recipe
- Freeze Before Dipping: I learned that popping the assembled sandwiches in the freezer makes them firm enough to dip without falling apart or making chocolate a sticky mess.
- Use Coconut Oil for Shine: Adding coconut oil melts the chocolate with a glossy finish and a smoother texture, which really makes your pops look professionally done.
- Work Quickly When Decorating: Chocolate hardens fast in the fridge, so have your candy eyes and frosting ready to decorate immediately after dipping.
- Parchment Paper is Your BFF: Always place pops on parchment paper while setting to prevent sticking and make cleanup a breeze.
How to Serve Hocus Pocus S’mores Pops Recipe
Garnishes
I like to keep the garnishing simple but impactful. Those candy eyes and black cookie frosting details are enough to make these pops pop visually. If you’re feeling extra festive, sprinkle a tiny bit of edible glitter on top of the chocolate before it sets—it adds a little enchanting sparkle that’s super fun for kids and adults alike.
Side Dishes
These s’mores pops pair perfectly with cozy fall drinks like hot apple cider or a spiced pumpkin latte. For a party, set them alongside a candy buffet or other simple finger foods like caramel popcorn or pumpkin-shaped cookies. They’re rich, so a light, fruity side keeps things balanced.
Creative Ways to Present
For a Halloween bash, I love sticking each pop upright in a block of floral foam wrapped in spooky fabric or decorated with fake spider webs—this makes a fun centerpiece that’s 100% edible. You could also place them in mini treat bags tied with black and orange ribbons if you want to send guests home with a sweet souvenir.
Make Ahead and Storage
Storing Leftovers
I store leftover pops in an airtight container in the fridge—they keep well for up to 3 days. Just be sure to layer them with parchment paper to avoid chocolate sticking together. I always remind myself to keep them chilled so the marshmallow doesn’t get too soft.
Freezing
Believe it or not, these pops freeze pretty well! To freeze, wrap each pop individually in plastic wrap and place them in a freezer-safe bag. When you want to serve, thaw them in the fridge for a few hours; this helps keep the chocolate coating intact without condensation ruining the look.
Reheating
Because this is a cold treat, reheating isn’t necessary—or recommended—but if you want the marshmallow cream softer, leaving the pops at room temperature for 10-15 minutes before eating does the trick nicely.
FAQs
-
Can I use regular marshmallows instead of marshmallow crème in this recipe?
You could try using regular marshmallows, but marshmallow crème spreads more evenly and acts like a glue to hold your popsicle sticks in place. If you want to use marshmallows, you’d likely need to melt or toast them first to get the gooey consistency needed.
-
What if I don’t have coconut oil—can I skip it?
Coconut oil helps the chocolate stay smooth and glossy when melted. If you don’t have it, you can try vegetable oil or shortening, but coconut oil’s mild flavor pairs best here. Skipping it entirely might result in a thicker, less shiny chocolate coating.
-
How long can I store these s’mores pops?
Stored in an airtight container in the fridge, they keep fresh for about 3 days. For longer storage, freezing is your friend—just thaw in the fridge before enjoying.
Final Thoughts
I discovered the Hocus Pocus S’mores Pops Recipe a few years back when looking for a Halloween treat that was both kid-friendly and unique—and it quickly turned into a family obsession. Every time I make these, my kids’ faces light up, and guests always ask for the recipe. The best part? It’s simple enough that you can enjoy making it together and tweak it however you like. If you’re looking for a crowd-pleaser that’s tasty, easy, and dripping with Halloween charm, you absolutely have to try this recipe—it’s like a little bite of magic on a stick!
Print
Hocus Pocus S’mores Pops Recipe
- Prep Time: 15 minutes
- Cook Time: 0 minutes
- Total Time: 45 minutes
- Yield: 6 s’mores pops
- Category: Dessert
- Method: No-Cook
- Cuisine: American
Description
Celebrate Halloween with these fun and festive Hocus Pocus S’mores Pops. Made with graham crackers, marshmallow crème, melted chocolate, and spooky candy eyes, these no-bake treats are perfect for parties and easy to assemble. The chocolate coating is decorated with black cookie frosting to create fun Halloween-themed designs that kids and adults will love.
Ingredients
Graham Cracker Sandwiches
- 12 graham crackers, halved
- 1/2 cup marshmallow crème
- 6 popsicle sticks
Chocolate Coating
- 2 cups semisweet chocolate chips
- 3 tablespoons coconut oil
Decorations
- 1 bag candy eyes
- 1 container black cookie frosting
Instructions
- Prepare the S’mores Pops: Spread about 1 tablespoon of marshmallow crème on half of the graham cracker halves. Insert a popsicle stick halfway into the marshmallow crème so it extends out like a handle. Top with the remaining graham cracker halves to form sandwiches. Place the assembled s’mores on a parchment-lined baking sheet and freeze while preparing the chocolate sauce.
- Melt the Chocolate Coating: In a medium heatproof bowl, microwave the semisweet chocolate chips and coconut oil in 20-second increments, stirring after each, until fully melted and smooth, approximately 1 minute total.
- Dip and Decorate: Dip each graham cracker sandwich completely into the melted chocolate, ensuring all sides are coated. You can use a butter knife or silicone spatula to help cover the sides evenly. Before the chocolate sets, place one candy eye on each s’mores pop on the far right side halfway down. Place them back on the baking sheet.
- Set the Chocolate: Refrigerate the chocolate-coated s’mores pops for about 15 minutes or until the chocolate hardens.
- Add Frosting Details: Use the black cookie frosting to draw a circle around each candy eye, add two semicircles on the corners of the graham cracker “book,” and create stitching patterns over the chocolate coating to enhance the spooky effect.
- Final Chill: Refrigerate the decorated s’mores pops for at least another 15 minutes to set all decorations firmly before serving.
Notes
- These s’mores pops are a simple and fun Halloween dessert perfect for parties and kids’ treats.
- Freezing the sandwich before dipping helps the chocolate set quickly and keeps the marshmallow in place.
- Use any variation of chocolate chips for a different flavor, such as milk or white chocolate, if desired.
- Store any leftovers in an airtight container in the refrigerator for up to 3 days.
Nutrition
- Serving Size: 1 s’mores pop
- Calories: 1065
- Sugar: 120g
- Sodium: 302mg
- Fat: 57g
- Saturated Fat: 29g
- Unsaturated Fat: 28g
- Trans Fat: 0g
- Carbohydrates: 143g
- Fiber: 8g
- Protein: 7g
- Cholesterol: 0mg


