If you’ve ever wanted to bring a guaranteed crowd-pleaser to your next gathering or just want a tasty, nostalgic snack, let me share with you my Easy Classic Deviled Eggs Recipe. This little gem is one of those simple dishes that somehow tastes fancy and comforting at the same time. I absolutely love how this turns out every single time – creamy, tangy, with just the right hint of kick from the mustard and vinegar. Stick with me, and by the end of this post, you’ll see why this recipe has become my go-to whenever I want to wow guests or just treat my family to a savory classic.
Why You’ll Love This Recipe
- Simple Ingredients: You probably already have these staples in your fridge, making this recipe super easy to whip up at a moment’s notice.
- Perfect Texture: The filling is creamy and smooth without being runny, thanks to just the right balance of mayo and mustard.
- Versatile for Any Occasion: Whether it’s a holiday, picnic, or weeknight snack, these deviled eggs fit right in.
- Great for Beginners: The step-by-step method ensures your eggs turn out perfect without any stress.

Ingredients You’ll Need
These ingredients combine to create that classic deviled egg flavor you recognize and love. I always recommend picking the freshest eggs you can find for the best peeling experience, and quality mayo and mustard really make a difference in taste.
- Large eggs: Fresh but not super fresh—eggs about a week old peel more easily after boiling.
- Mayonnaise: Use your favorite kind, but I like a good quality full-fat mayo for richness.
- Dijon mustard: Adds just the right tang and depth; feel free to swap for yellow mustard if you prefer milder.
- Apple cider vinegar: Gives the filling a subtle zesty brightness that balances the creaminess.
- Kosher salt and ground black pepper: Season to taste; kosher salt gives a nice pure saltiness.
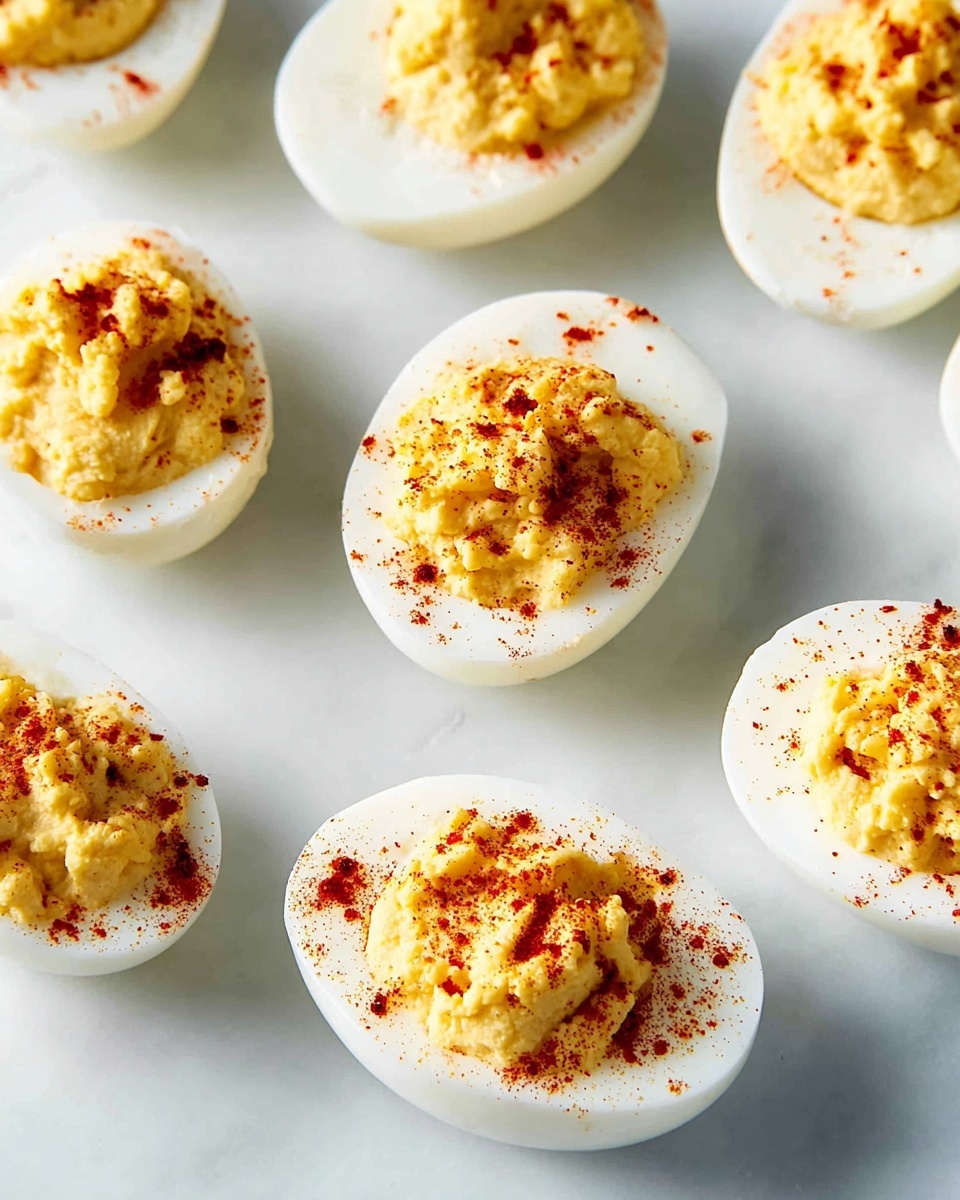
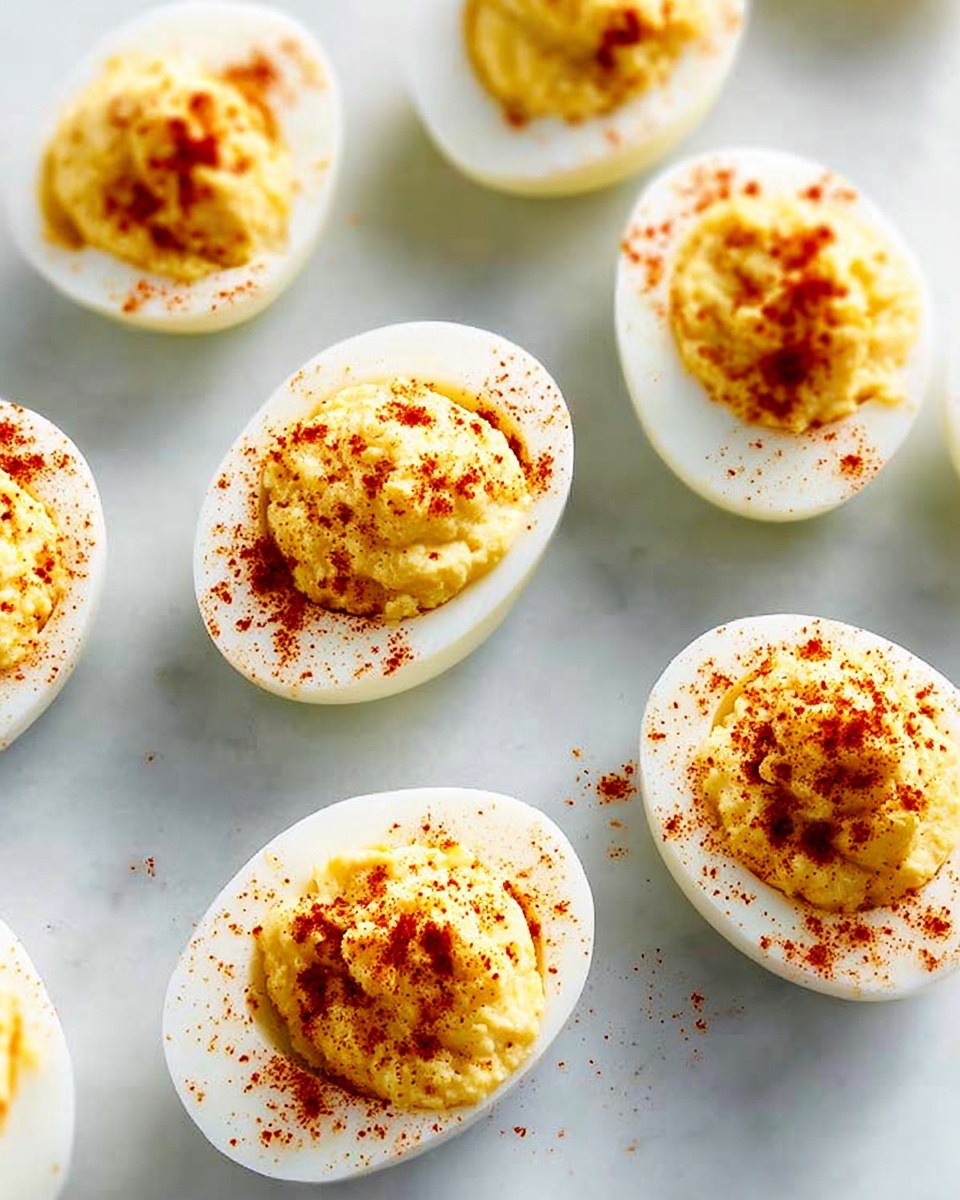
- Paprika: A little dusting on top adds color and a hint of smoky flavor, finishing the look perfectly.
Variations
I love that this Easy Classic Deviled Eggs Recipe is a great foundation for experimenting. Over time, I found adding little tweaks here and there can really make these eggs your own – it’s so fun to customize!
- Spicy Kick: I sometimes add a dash of hot sauce or sprinkle cayenne pepper into the filling for a bit of heat that wakes up the flavor.
- Herb Twist: Fresh chopped chives or dill give it a refreshing herbal note that my family really enjoys, especially during spring and summer.
- Avocado Deviled Eggs: For a creamy, slightly healthier spin, I swap half the mayo for ripe avocado — it’s dreamy and has a lovely green hue.
- Bacon Crumble: Toss crispy bacon bits on top right before serving – my guests go crazy for this savory crunch!
How to Make Easy Classic Deviled Eggs Recipe
Step 1: Perfectly Boil Your Eggs
Start by bringing a pot of water to a boil. Once it’s bubbling, reduce the heat so the water is calm (either low or off) and gently lower your eggs in using a skimmer or spoon—this prevents cracking. Then bump the heat back to high and start a timer for exactly 14 minutes. I’ve found that this timing hits the sweet spot for firm but not rubbery yolks.
Step 2: Chill in an Ice Bath
While the eggs are boiling, fill a large bowl with ice water. When the timer dings, immediately transfer the hot eggs into the ice bath. This shock cools them quickly, preventing overcooking and making peeling much easier—trust me, I learned the hard way when I skipped this step!
Step 3: Peel and Prepare the Eggs
Once cooled completely, crack and peel the eggs. A nifty tip is to gently tap and roll each egg on the counter to loosen the shell. Slice each egg in half lengthwise, removing the yolks carefully with a small spoon—you don’t want to puncture the whites. Arrange the whites on a plate, ready for filling.
Step 4: Make the Creamy Filling
Pop those yolks into a bowl and mash them up with a fork. Add the mayo, Dijon mustard, apple cider vinegar, salt, and pepper and mix well until smooth. A trick I picked up recently: use a hand mixer for about 20 seconds if you want the filling extra fluffy and silky—just like the deli versions!
Step 5: Fill and Garnish
Spoon the yolk mixture back into the hollowed-out egg whites. For a neater presentation, use a piping bag or a zip-top bag with the corner snipped off. Finally, dust some paprika on top for that classic finishing touch that adds color and a subtle smoky note.
Pro Tips for Making Easy Classic Deviled Eggs Recipe
- Egg Boiling Precision: Keeping the water at a gentle simmer after placing the eggs helps avoid cracked shells and uneven cooking.
- Peeling Hack: Older eggs peel way more easily, so don’t use eggs right from the store – let them sit about a week if possible.
- Smooth Filling: Use a hand mixer for the filling if you want restaurant-quality fluffy texture.
- Avoid Overmixing: Blend just enough to mix well—overmixing can make the filling a bit too soft and tricky to pipe neatly.
How to Serve Easy Classic Deviled Eggs Recipe
Garnishes
I always keep it simple with a sprinkle of classic paprika, which adds that gorgeous color and a gentle smoky flavor. But I sometimes switch it up with freshly chopped chives or a tiny pinch of cayenne for a little heat—your call! A few crispy bacon bits on top can really elevate these when you want to impress.
Side Dishes
Deviled eggs are incredibly versatile, but my go-to sides tend to be light and fresh – think crunchy celery sticks, a crisp green salad, or even some sweet potato chips. They also pair wonderfully with classic picnic fare like BBQ chicken or a cold pasta salad.
Creative Ways to Present
For special occasions, I love arranging the eggs on a bed of fresh lettuce leaves or a platter sprinkled with edible flowers for a pop of color and elegance. Another fun idea is to serve the filling in mini phyllo cups as bite-sized hors d’oeuvres—everyone’s always curious and impressed!
Make Ahead and Storage
Storing Leftovers
I usually keep leftover deviled eggs covered tightly in the fridge for up to two days. To keep them fresh, I store the egg whites and filling separate if I know I won’t eat them right away, then fill right before serving—this helps avoid sogginess.
Freezing
Honestly, I don’t recommend freezing deviled eggs because the texture of the egg whites changes quite a bit when thawed and can become watery or rubbery. It’s best to enjoy them fresh or within a couple of days.
Reheating
Since deviled eggs are best served cold or at room temperature, reheating isn’t really needed. If you prefer them less chilly, just take them out of the fridge about 15 minutes before serving and let them come to room temp naturally.
FAQs
-
How do I make sure my hard boiled eggs peel easily for deviled eggs?
I’ve found that using eggs that aren’t ultra fresh, about 7 to 10 days old, helps the shells come off more cleanly. Also, shocking the eggs in an ice bath right after boiling stops the cooking and prevents sticking. Rolling the eggs gently on the counter to crack the shell all over before peeling works wonders, too.
-
Can I make deviled eggs ahead of time?
Absolutely! You can boil and peel the eggs a day ahead, and even prepare the filling. My trick is to keep the filling and whites separate until just before serving so the whites don’t get soggy. Then, fill them up fresh for that perfect bite.
-
What can I use instead of mayonnaise?
If you want a lighter version or need an alternative, mashed avocado, Greek yogurt, or even cream cheese can blend nicely with the yolks and mustard. I recommend experimenting to find what texture and flavor profile you prefer.
-
Why does my deviled egg filling sometimes turn out grainy?
This often happens if the yolks are overcooked or mashed too roughly. Using a hand mixer or thoroughly mashing with a fork ensures smooth filling. Also, adding vinegar and enough mayo helps keep everything creamy.
Final Thoughts
This Easy Classic Deviled Eggs Recipe is more than just a side dish—it’s a nostalgic flavor that brings people together. I’ve made these for all sorts of occasions, and people always ask for the recipe afterward. It’s comforting, approachable, and endlessly customizable, which makes it perfect for both newbies and seasoned cooks. I hope you’ll try it soon and discover how effortlessly delicious deviled eggs can be when you follow these tips and tricks!
Print
Easy Classic Deviled Eggs Recipe
- Prep Time: 20 min
- Cook Time: 15 min
- Total Time: 35 min
- Yield: 6 servings (2 deviled eggs per serving)
- Category: Appetizer
- Method: Boiling
- Cuisine: American
- Diet: Low Fat
Description
This classic Best Deviled Eggs recipe features perfectly hard-boiled eggs filled with a creamy, tangy mixture of egg yolks, mayonnaise, Dijon mustard, and apple cider vinegar, seasoned with salt, pepper, and a sprinkle of paprika. It’s an easy-to-make appetizer or snack that’s smooth, flavorful, and always a crowd-pleaser.
Ingredients
Eggs
- 6 large eggs
Filling
- 3 tablespoons mayonnaise
- 1 teaspoon Dijon mustard
- 1 teaspoon apple cider vinegar
- Kosher salt, to taste
- Ground black pepper, to taste
Garnish
- Paprika (for garnish)
Instructions
- Boil the eggs: Bring a pot of water to a boil. Reduce the heat to low or off so that the water is no longer boiling or bubbling. Using a skimmer, gently place the eggs into the water. Then, increase the heat back to high and set a timer for 14 minutes to hard boil the eggs perfectly.
- Make an ice water bath: While the eggs are boiling, prepare a large bowl with ice and cold water. After the 14 minutes are up, carefully remove the eggs from the hot water and immediately place them into the ice water bath to cool and stop the cooking process.
- Peel and slice the eggs: Once the eggs have cooled completely, peel off the shells and slice each egg in half lengthwise. Use a small spoon to carefully remove the yolks and place them into a mixing bowl. Arrange the egg whites on a serving plate.
- Make the filling: Mash the yolks with a fork until crumbly. Add mayonnaise, Dijon mustard, apple cider vinegar, kosher salt, and ground black pepper. Stir or mix until the mixture is smooth and creamy. For an extra fluffy texture, you can use a hand mixer to blend the filling thoroughly.
- Fill and serve: Spoon or pipe the yolk mixture back into the cavities of each egg white. Finish each deviled egg with a sprinkle of paprika for color and a subtle smoky flavor. Serve immediately or chill until ready to serve.
Notes
- Deviled eggs are hard-boiled eggs where the yolk is mixed with creamy ingredients like mayonnaise and mustard for a tender, flavorful filling.
- Using an ice water bath immediately after boiling stops the cooking process and makes peeling easier.
- Feel free to adjust the amount of mayonnaise or mustard to your preferred taste and texture.
- Sprinkling paprika is a traditional garnish that adds a hint of color and mild spice.
- Watch tutorial videos online if you want to see the peeling and filling technique in action.
Nutrition
- Serving Size: 1 serving (2 deviled eggs)
- Calories: 125.3 kcal
- Sugar: 0.6 g
- Sodium: 125.7 mg
- Fat: 10.5 g
- Saturated Fat: 2.4 g
- Unsaturated Fat: 7.7 g
- Trans Fat: 0 g
- Carbohydrates: 0.7 g
- Fiber: 0 g
- Protein: 6.4 g
- Cholesterol: 189.4 mg


