I absolutely love how vibrant and fresh this Easy Beetroot Hummus with Tahini (Dairy-Free) Recipe turns out every single time. It’s a beautiful spin on traditional hummus with that subtle earthiness from the beets, plus the creamy texture thanks to tahini. Whether you’re looking for a healthy snack, a colorful party dip, or just something to brighten up lunch, this recipe fits the bill perfectly.
When I first tried making beetroot hummus myself, I was amazed at how simple it was to whip up, yet it felt so fancy and delicious. You’ll find that this Easy Beetroot Hummus with Tahini (Dairy-Free) Recipe is not only dairy-free but also super versatile — perfect for a cozy night in or impressing guests without hours in the kitchen.
Why You’ll Love This Recipe
- Bright, Vibrant Flavor: The beetroot gives a naturally sweet, earthy kick that makes it stand out.
- Dairy-Free & Allergy Friendly: Perfect for anyone avoiding dairy but still wanting creamy, delicious hummus.
- Super Simple & Quick: Minimal ingredients and easy prep make this a go-to snack or appetizer.
- Make Ahead Friendly: You can roast beets in advance and homemade hummus stays fresh in the fridge for days.

Ingredients You’ll Need
Each ingredient in this Easy Beetroot Hummus with Tahini (Dairy-Free) Recipe plays a key role in building rich aroma and silky texture. Here are some tips to help you pick and prep them for the best outcome.
- Fresh Red Beets or Canned Beets: Fresh roasted beets give the best flavor, but canned or vacuum-sealed pre-roasted are great shortcuts.
- Chickpeas: Use good-quality canned chickpeas that are well rinsed for creaminess without any tinny taste.
- Tahini: A smooth, well-stirred tahini adds that classic nutty depth important in any hummus.
- Lemon Juice: Freshly squeezed lemon juice brightens and balances the sweetness from the beets beautifully.
- Garlic Cloves: Fresh garlic brings the perfect bite, but adjust amount if you prefer milder flavors.
- Olive Oil: Use extra virgin for richness; a little drizzled on top makes the presentation pop.
- Salt and Pepper: Essential for seasoning and making flavors shine.
- Chopped Parsley (Optional): Adds fresh color and an herby note when sprinkled before serving.
Variations
I like to play around with this Easy Beetroot Hummus with Tahini (Dairy-Free) Recipe depending on the season or mood. Personalizing the flavors can make it your own and keep it exciting every time you serve it.
- Add Spices like Cumin or Smoked Paprika: I often add a pinch of smoked paprika to give it a smoky depth, which my family adores.
- Swap Lemon for Lime: Lime juice adds a zesty twist I discovered works beautifully when you want a slightly sharper citrus note.
- Use Roasted Garlic Instead of Raw: For a milder, sweeter garlic flavor, roasting the garlic beforehand is a delicious twist I recommend.
- Mix in Toasted Nuts or Seeds: A sprinkle of toasted pine nuts or sesame seeds on top gives an addictive crunch and nutty flavor.
How to Make Easy Beetroot Hummus with Tahini (Dairy-Free) Recipe
Step 1: Roast Your Beets to Sweet Perfection
If you’re using fresh beets, preheat your oven to 375°F. I like to wrap the beets tightly in foil with a drizzle of olive oil and a pinch of salt to help them steam-roast beautifully. Roast for about an hour until a fork slides in with ease. When they’re cool enough to handle, slip off the skins using gloves or gently rubbing with your hands—it comes off surprisingly easily! If you’re short on time, canned or vacuum-packed roasted beets work just as well and save you a step.
Step 2: Blend the Magic Ingredients
Once the beets are ready, toss them into your food processor along with drained chickpeas, tahini, fresh lemon juice, and garlic cloves. Blend for about 30 seconds until the mixture looks chunky but coming together. At this point, scrape down the edges to make sure everything gets mixed smoothly.
Step 3: Add Olive Oil for Creaminess and Whip Until Fluffy
With the food processor running, slowly pour in your olive oil. This is the step that transforms the hummus into a luxuriously smooth and fluffy dip. Stop and taste it – this is when you adjust salt, pepper, or lemon juice to your liking. Sometimes I add a bit more lemon for brightness or an extra clove of garlic if I’m feeling bold!
Step 4: Serve with Your Favorite Dippers
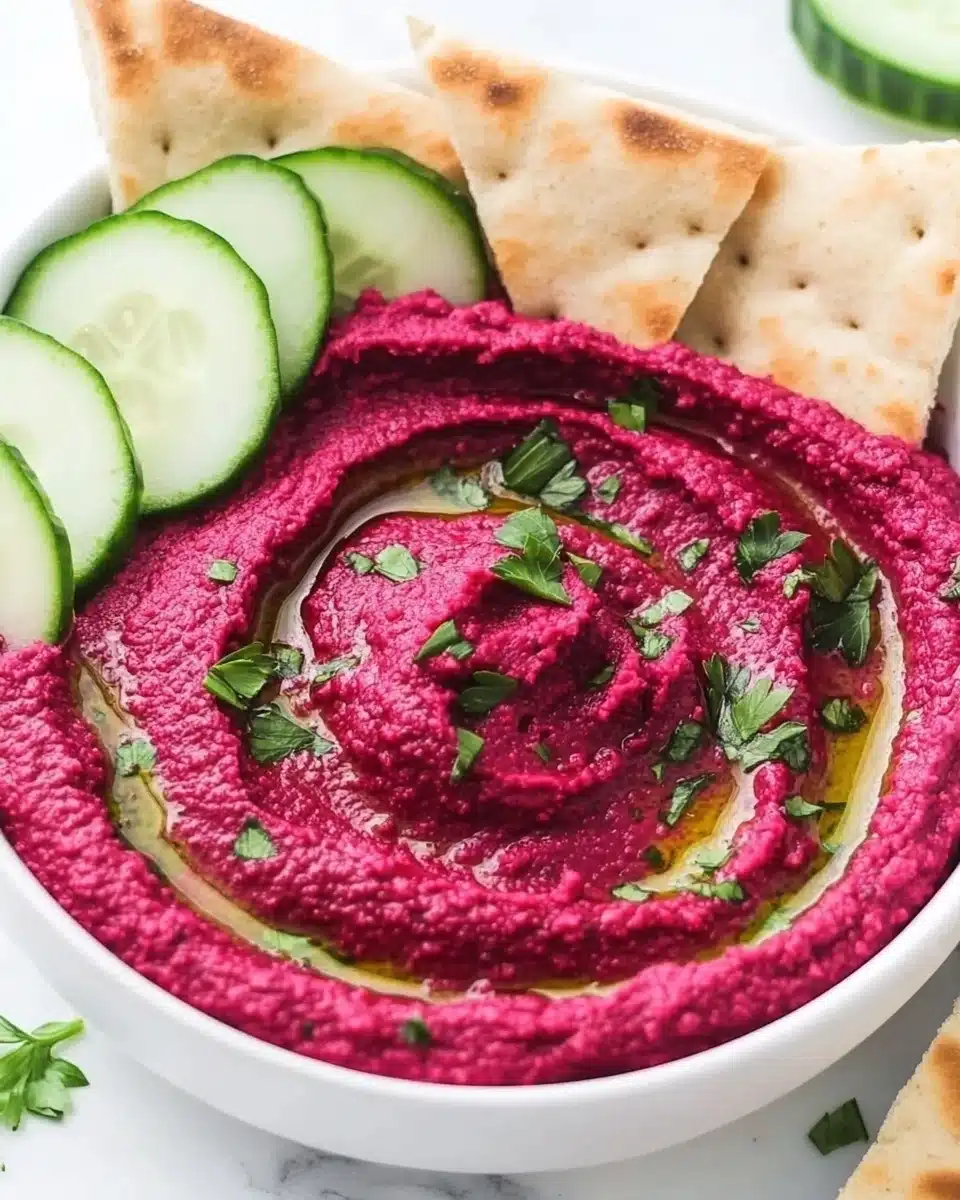
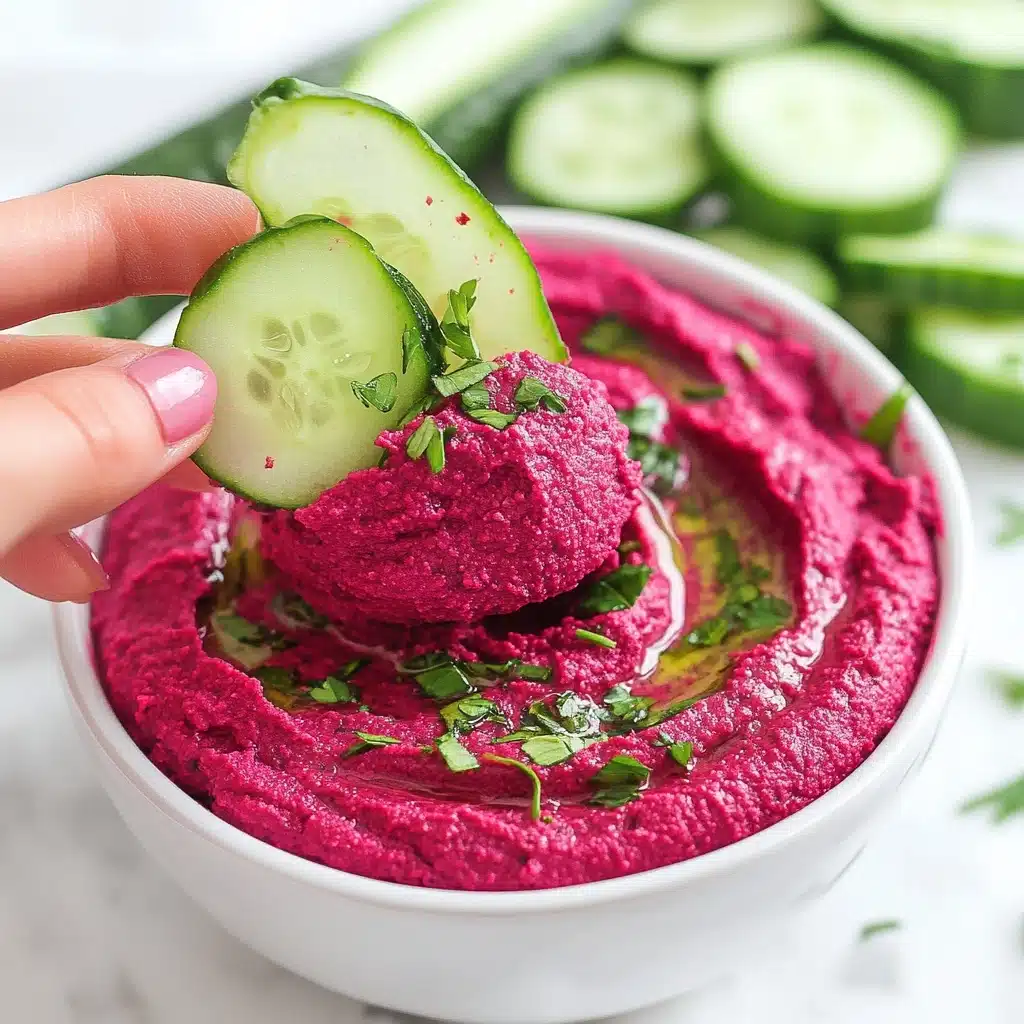
Spoon the hummus into a shallow bowl and drizzle with olive oil, a sprinkling of freshly chopped parsley, and a pinch of salt and pepper on top. I love serving mine with warm pita wedges and fresh crisp veggies like cucumber and bell peppers. It’s a guaranteed crowd-pleaser at parties or a wholesome snack for busy afternoons.
Pro Tips for Making Easy Beetroot Hummus with Tahini (Dairy-Free) Recipe
- Don’t Skip Roasting: Roasting the beets yourself unlocks a deeper, sweeter flavor you won’t get from canned, though canned is fine in a pinch.
- Use Fresh Lemon Juice: Bottled lemon juice just doesn’t have the bright, fresh zip that makes this recipe pop in flavor.
- Pulse First Before Adding Oil: I learned that pulsing first helps get the mixture blended evenly so the olive oil incorporates smoothly and it ends up luxuriously creamy.
- Taste and Adjust Throughout: Hummus is super forgiving — I always taste after adding lemon and salt and tweak until it’s perfectly balanced to my family’s taste.
How to Serve Easy Beetroot Hummus with Tahini (Dairy-Free) Recipe
Garnishes
I’m a big fan of keeping garnishes simple but fresh. Chopped parsley adds a pop of green that contrasts beautifully with the deep pink of the beets. A final drizzle of good-quality olive oil on top makes it look glossy and inviting. Sometimes I sprinkle a bit of toasted sesame seeds or sumac for extra texture and tang.
Side Dishes
This beetroot hummus pairs wonderfully with cucumber slices, bell pepper strips, carrot sticks, or warm pita bread. I also love serving it alongside falafel or grilled veggies for a Mediterranean-inspired spread that’s hearty and healthy.
Creative Ways to Present
For special occasions, I’ve served this Easy Beetroot Hummus with Tahini (Dairy-Free) Recipe in a hollowed-out bread bowl — the color contrast wowed my guests and made for easy dipping. Layering it on a beautiful platter with dollops of labneh (or your favorite dairy-free yogurt) and olives makes a stunning appetizer centerpiece. You can even swirl in a little pesto or chili oil for a decorative and flavorful touch.
Make Ahead and Storage
Storing Leftovers
I store any leftover hummus in an airtight container in the fridge, and honestly, it tastes even better the next day once the flavors have melded together. It will keep fresh and creamy for up to 4 days without any issues.
Freezing
I’ve frozen this beetroot hummus several times without a drop in quality. Just pop it in a freezer-safe container and thaw overnight in the fridge. Give it a good stir before serving to bring back the silky texture.
Reheating
You really don’t need to reheat hummus, but if you want it a bit warm, I gently warm it in a bowl over some simmering water or briefly in the microwave—just be careful not to overdo it or it might separate. Stir well to keep it creamy and smooth.
FAQs
-
Can I make this Easy Beetroot Hummus with Tahini (Dairy-Free) Recipe without a food processor?
While a food processor gives you the smoothest, creamiest hummus, you can use a strong blender or even a hand blender in a deep bowl. Just make sure to blend thoroughly and add olive oil gradually to achieve that silky texture.
-
How do I know when the beets are roasted perfectly for this hummus?
Beets are done when a fork or skewer slides into them easily without resistance. They should be tender but not mushy, which helps keep the hummus smooth with great texture.
-
Can I use canned chickpeas straight from the can?
I recommend draining and rinsing canned chickpeas well under cold water to remove any excess salt or canning liquid. This improves flavor and helps create a creamier hummus.
-
Is this hummus suitable for meal prep?
Absolutely! This Easy Beetroot Hummus with Tahini (Dairy-Free) Recipe stores beautifully in the fridge for a few days, making it great for pre-made snacks or adding to lunches throughout the week.
-
How can I make this hummus spicier?
Try adding a pinch of cayenne pepper, a small fresh chili, or some chili flakes when blending. Start small and adjust according to your heat preference.
Final Thoughts
I love how this Easy Beetroot Hummus with Tahini (Dairy-Free) Recipe always manages to brighten my table and delight my family and friends. It’s one of those recipes that feels fancy but is so straightforward you can whip it up anytime. I hope you give it a try — you’ll enjoy how fresh, colorful, and naturally tasty this beet hummus is. Trust me, once you make it, it’ll quickly become your new favorite dip to reach for.
Print
Easy Beetroot Hummus with Tahini (Dairy-Free) Recipe
- Prep Time: 10 minutes
- Cook Time: 1 hour
- Total Time: 1 hour 10 minutes
- Yield: 2.5 cups
- Category: Dip
- Method: Baking
- Cuisine: Middle Eastern
- Diet: Vegan
Description
This Easy Beetroot Hummus with Tahini is a vibrant, dairy-free twist on traditional hummus. Made by blending roasted or canned beets with chickpeas, tahini, lemon juice, garlic, and olive oil, it offers a creamy, flavorful dip with beautiful pink color. Perfect for serving with pita bread or fresh vegetables, this healthy and nutrient-rich hummus is suitable for plant-based diets and adds a colorful, delicious option to your snack or appetizer lineup.
Ingredients
Roasted Beetroot Hummus Ingredients
- 2 small red beets (or about 2/3 cup drained canned sliced beets or pre-roasted vacuum sealed beets)
- 1 15–oz can chickpeas, drained and rinsed
- 1/3 cup tahini
- Juice of 1 lemon (about 1/4 cup)
- 2 cloves garlic
- 1/2 cup olive oil, plus more for roasting the beets and garnishing
- Salt and pepper to taste
- Chopped parsley, optional, for garnishing
Instructions
- Roast the Beets: Preheat the oven to 375°F (190°C). Place beets on a sheet of foil in a small baking dish. Drizzle lightly with olive oil and season with a pinch of salt and pepper. Wrap the beets tightly in foil and roast for about 1 hour until they are tender when pierced with a fork. Allow to cool. Using gloved hands or a paper towel, peel off the skin and discard it. This step can be done in advance; store cooked beets in a sealed container in the refrigerator for up to 5 days.
- Combine Ingredients in Food Processor: Add the roasted (or canned) beets, drained and rinsed chickpeas, tahini, lemon juice, and garlic cloves to a food processor. Blend until mixture is smooth and thick.
- Add Olive Oil: With the food processor running, slowly stream in the 1/2 cup of olive oil until the hummus is smooth, creamy, and fluffy. Stop to scrape down the sides as needed to ensure even blending.
- Season and Serve: Taste and season the hummus with salt and pepper as desired. Transfer to a serving bowl and drizzle a little extra olive oil over the top. Garnish with chopped parsley if using. Serve alongside pita wedges and fresh vegetables for dipping.
Notes
- Storage Tips: Store hummus in an airtight container in the refrigerator for up to 4 days.
- Freezing: You can freeze the beetroot hummus for up to 2-3 months. Thaw it overnight in the refrigerator before serving.
- Using Canned Beets: If short on time, canned or pre-roasted vacuum-sealed beets are great alternatives and eliminate the roasting step.
- Gloved Hands for Peeling: Roasted beet skins can stain hands, so using gloves or a paper towel for peeling is recommended.
- Adjust Consistency: Add additional olive oil or a splash of water if you prefer a thinner consistency.


