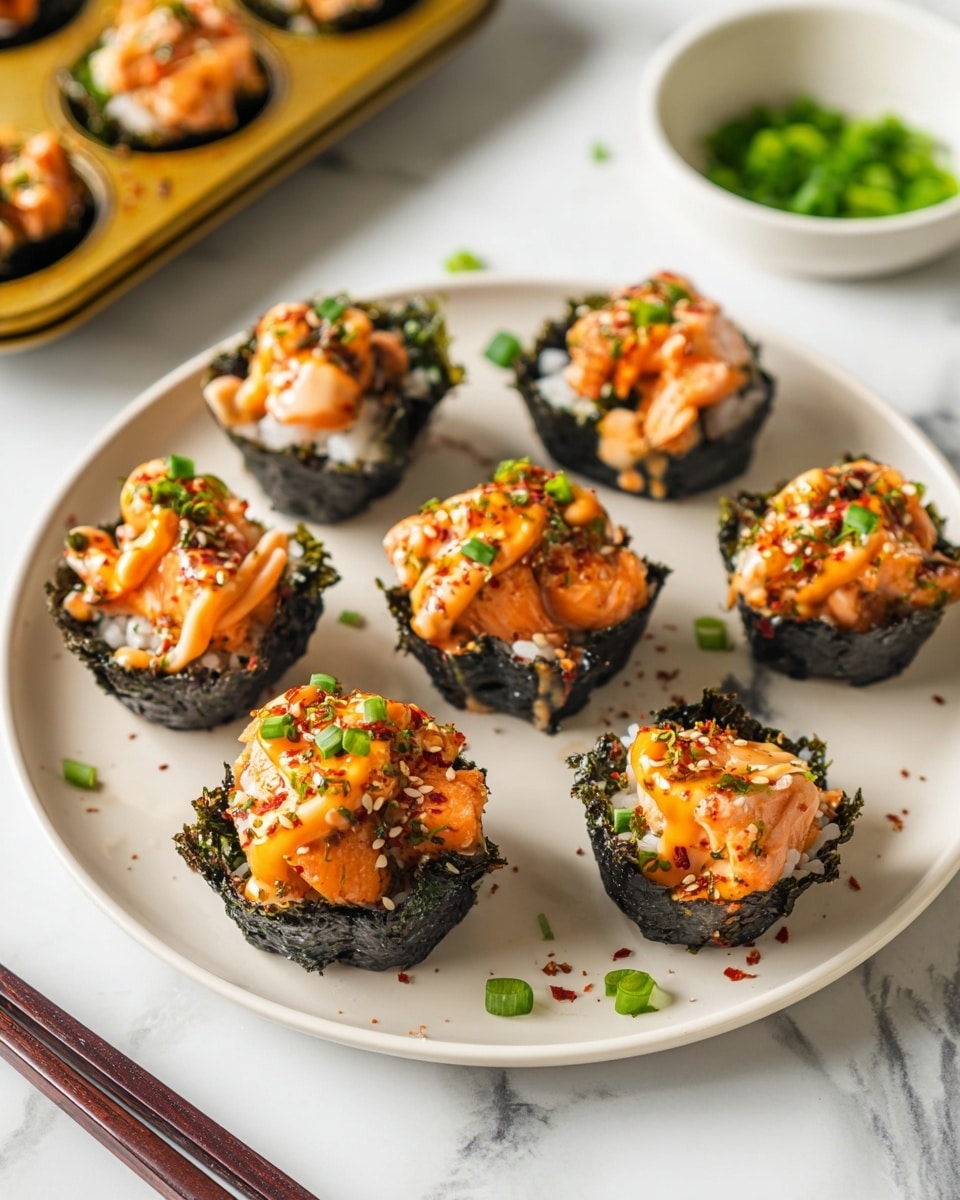
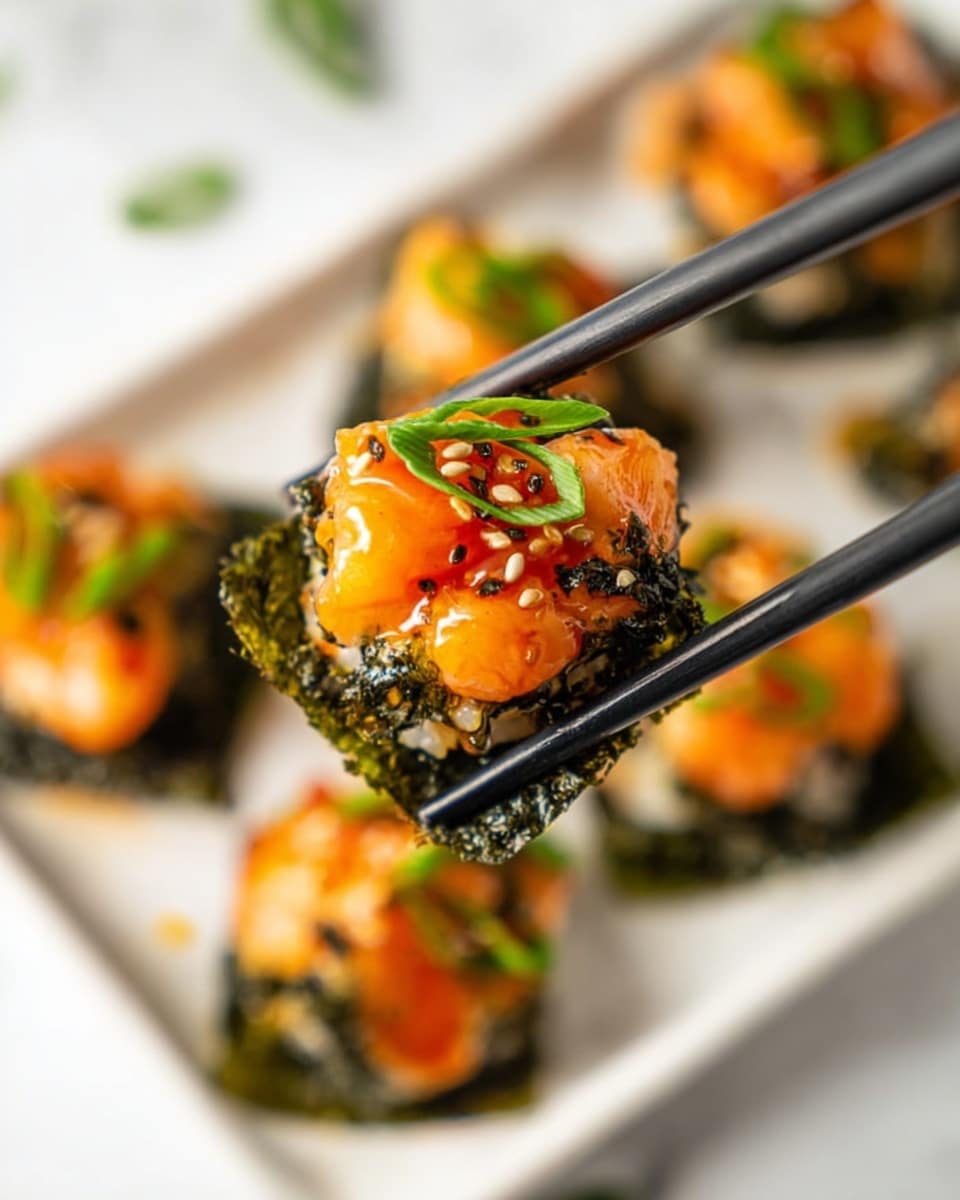
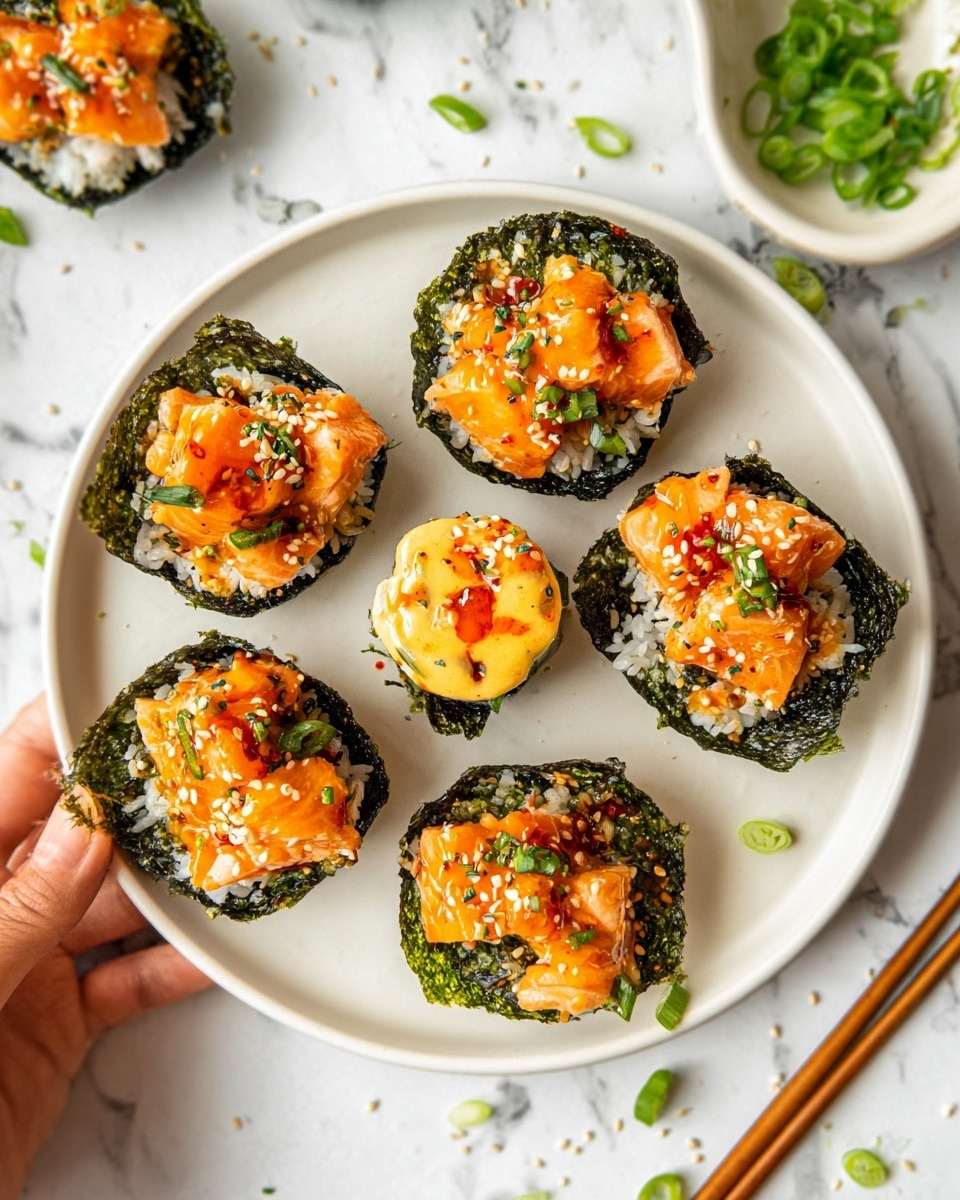
If you’re like me and love sushi but don’t always want to fuss with rolling and assembling, you’re going to fall head over heels for this Easy Baked Salmon Sushi Cups (Viral Recipe) Recipe. It’s basically all the best sushi flavors turned into a fun, handheld baked treat that’s as impressive as it is simple. Seriously, the combination of tender salmon, perfectly seasoned sushi rice, and that hint of spice will make you feel like you’re indulging in something fancy without any of the stress.
What I adore about this recipe is how well it fits any occasion – from casual weeknight dinners to crowd-pleasing appetizers at your next party. You don’t need a sushi chef’s skills to get them right, and the bake gives the salmon such a cozy, melt-in-your-mouth quality. I’ve made these multiple times when hosting friends, and they always disappear fast. This Easy Baked Salmon Sushi Cups (Viral Recipe) Recipe is definitely one to bookmark!
Why You’ll Love This Recipe
- Effortless Flavor: Combines savory salmon and tangy sushi rice for an easy yet impressive bite every time.
- Perfectly Portable: These sushi cups are perfect for parties, lunches, or anytime you want sushi without the mess.
- No Rolling Required: Skip the complicated sushi rolling and get the look and taste without the fuss.
- Customizable Heat Level: You control the spice by adjusting the sriracha and mayo to your preference.
Ingredients You’ll Need
To nail this Easy Baked Salmon Sushi Cups (Viral Recipe) Recipe, you’ll want fresh, good-quality ingredients that play nicely together. The sushi rice and vinegar give it that classic tang, while the salmon mixture packs the perfect umami punch.
- Salmon: Using fresh, sashimi-grade salmon cubed ensures both safety and flavor – plus, it cooks beautifully in the oven.
- Light Soy Sauce: Adds savory depth without overpowering the other ingredients.
- Kewpie Mayo: This Japanese mayo is creamier and subtly sweeter than regular mayo – seriously, it’s a game-changer here.
- Sriracha: Key for a kick of spicy heat, but you can dial it up or down based on your taste buds.
- Sesame Oil: Just a little bit adds that authentic nutty aroma and richness.
- Sushi Rice: The backbone for sushi; sticky and slightly sweet rice gives each cup structure and that signature sushi vibe.
- Rice Vinegar: Essential for seasoning the rice with that perfect balance of tang and sweetness.
- White Sugar: Balances the vinegar, helping the rice taste just like you’d get at your favorite sushi spot.
- Nori Sheets: Choose large sheets; they form the crispy, salty cup that holds everything together.
- Furikake: This Japanese seasoning blend takes everything to the next level with umami-packed crunch.
- Green Onion: Adds fresh, mild onion flavor and a pop of green for garnish.
- Cooking Spray: Helps the nori cups avoid sticking and come out crisp from the muffin tin.
Variations
One of the things I love about this Easy Baked Salmon Sushi Cups (Viral Recipe) Recipe is how flexible it is—you can switch up ingredients to suit your mood or dietary preferences. I often experiment, and you should too!
- Make it vegetarian: Swap the salmon for marinated tofu or avocado cubes for a fresh, plant-based twist that still feels indulgent.
- Different protein: Sometimes I swap in cooked shrimp or crab meat, which keeps that sushi vibe but adds variety.
- Adjust the spice: If you’re heat-sensitive, start with half the sriracha or swap in sweet chili sauce for a milder touch.
- Gluten-free option: Just use tamari instead of soy sauce, and you’re good to go!
How to Make Easy Baked Salmon Sushi Cups (Viral Recipe) Recipe
Step 1: Cook and Season Your Sushi Rice
Start by cooking your sushi rice exactly according to the package directions — this is key! When I first tried this recipe, getting the rice texture right made all the difference. While the rice is still warm, mix together the rice vinegar and sugar (I zap it in the microwave for about 30 seconds to dissolve the sugar), then gently fold this seasoning into the rice. This step is what makes the rice taste just like your favorite sushi spot’s, so be patient and thorough with mixing so each grain is coated without getting mushy.
Step 2: Prepare the Flavorful Salmon Mixture
While the rice cools, combine your cubed salmon with light soy sauce, Kewpie mayo, sriracha, and a drizzle of sesame oil. I discovered this combination when I wanted a creamy, spicy coating that clings perfectly to each chunk of salmon. Make sure everything is mixed well so each bite has balanced flavor — this mixture is the star of your sushi cups!
Step 3: Shape Your Nori Sushi Cups
Cut your nori sheets into rectangles or squares that will fit snugly into your muffin tin slots. Lightly spray the muffin tin with cooking spray—I learned the hard way that without this step, the cups stick and fall apart. Then, place a piece of nori into each muffin well, add a spoonful of the seasoned sushi rice, and press it down gently to create the cup base. Repeat until your tin is full.
Step 4: Assemble and Bake the Sushi Cups
Spoon the salmon mixture evenly over each rice base. Bake at 400°F for about 15 minutes until the salmon looks cooked through and the tops start to get lightly golden. Baked salmon is so tender and juicy here – I love how the mayo and sriracha create a slight crust on top. After baking, let your sushi cups cool for a few minutes to firm up so they hold their shape when you take them out.
Step 5: Garnish and Serve
Finally, drizzle with extra sriracha or spicy mayo if you want more heat, then sprinkle with furikake and chopped green onions for that authentic touch. The crunchy seasoning and fresh green onion add a great contrasting texture and flavor punch that makes these cups even more addictive. Dig in right away while they’re warm and fresh!
Pro Tips for Making Easy Baked Salmon Sushi Cups (Viral Recipe) Recipe
- Rice Texture: Use short-grain sushi rice and rinse it well before cooking to keep it sticky but not mushy.
- Salmon Quality: Always opt for sashimi-grade salmon for safety and the best fresh taste when eating mostly raw or lightly cooked fish.
- Prevent Sticking: Generously grease your muffin tin and press the rice firmly so the nori cups hold their shape after baking.
- Customize the Heat: Start with less sriracha if you’re unsure—you can always add more as a drizzle after baking.
How to Serve Easy Baked Salmon Sushi Cups (Viral Recipe) Recipe
Garnishes
I typically stick with furikake—it’s like the secret sprinkle of magic for sushi—and freshly chopped green onions to brighten the flavors. Sometimes, I like adding pickled ginger on the side if I want that traditional palate cleanser between bites. A drizzle of extra spicy mayo or even a squeeze of fresh lime can totally elevate the experience.
Side Dishes
These sushi cups pair beautifully with a light miso soup or seaweed salad to round out the meal. My family also loves a simple cucumber sunomono salad alongside for a crunchy, refreshing counterbalance. And if I’m feeling indulgent, crispy tempura veggies on the side never hurt anyone!
Creative Ways to Present
For parties, I like to serve these Easy Baked Salmon Sushi Cups (Viral Recipe) Recipe on a wooden platter lined with shiso leaves or bamboo mats to give that authentic vibe. Adding small dipping bowls filled with extra soy sauce, wasabi, or spicy mayo lets guests customize their bites. You could even serve them in mini cupcake liners inside the muffin tin for easy grabbing and zero mess.
Make Ahead and Storage
Storing Leftovers
I usually pop leftover sushi cups into an airtight container and store them in the fridge for up to 2 days. Because of the delicate nori, they might soften a bit, so I recommend reheating briefly in a toaster oven to restore some crispness before eating.
Freezing
I’ve tried freezing these with mixed results—the salmon and rice can get a bit watery after thawing, and the nori loses its crunchiness. If you do freeze them, wrap individually in plastic wrap and transfer to a freezer-safe bag, then thaw overnight in the fridge before reheating gently.
Reheating
To reheat, I pop the sushi cups in a toaster oven or regular oven at 350°F for 5-7 minutes to warm them through and help the nori crisp back up slightly. Avoid microwaving if you want to keep the texture from getting soggy.
FAQs
-
Can I use regular mayonnaise instead of Kewpie mayo in this recipe?
Yes, you can substitute regular mayonnaise for Kewpie, but the flavor and texture will be slightly different. Kewpie mayo is creamier and sweeter, which complements the salmon and sushi rice perfectly. If you only have regular mayo, consider adding a tiny bit of rice vinegar for extra tang.
-
Is it necessary to bake the sushi cups? Can I serve them raw?
Baking the sushi cups partially cooks the salmon, giving a warm, comforting texture and melded flavors that are delicious. If you prefer raw salmon, you could assemble and serve them without baking, but be sure to use the freshest sashimi-grade fish and eat immediately for safety.
-
What kind of rice is best for this recipe?
Short-grain sushi rice is ideal because it becomes sticky and holds its shape well when packed into the nori cups. Long-grain or jasmine rice won’t work quite the same since it’s less sticky and won’t keep the cup structure.
-
Can I add vegetables inside the sushi cups?
Absolutely! Finely diced cucumber, avocado, or even thin carrot strips add great texture and freshness. I like adding avocado for creaminess, which pairs wonderfully with the spicy salmon.
-
How spicy are these sushi cups?
The spice level depends on how much sriracha you add. The recipe uses a moderate amount for a pleasant kick, but you can adjust it up or down, or even omit it if you prefer no heat at all.
Final Thoughts
I absolutely love how this Easy Baked Salmon Sushi Cups (Viral Recipe) Recipe brings the best of sushi flavors into a hands-on, bake-and-eat treat that anyone can make at home. It’s one of those recipes that impresses your guests while staying super manageable, which is a rare combo in sushi world. Try making them on a relaxed weekend or for your next get-together—you’ll find it’s a delicious way to enjoy sushi without the fuss but all the fun. Trust me, once you make these, they’ll become a quick favorite!
Print
Easy Baked Salmon Sushi Cups (Viral Recipe) Recipe
- Prep Time: 15 minutes
- Cook Time: 15 minutes
- Total Time: 30 minutes
- Yield: 12 sushi cups
- Category: Appetizer
- Method: Baking
- Cuisine: Japanese
- Diet: Halal
Description
These Easy Baked Salmon Sushi Cups are a creative and delicious twist on traditional sushi, combining tender sushi rice, flavorful salmon marinated in a spicy mayo mixture, and crispy nori sheets baked to perfection. Perfect as a fun appetizer or party snack, they offer all the flavors of sushi in a convenient, handheld form.
Ingredients
Sushi Rice
- 1 1/2 cup uncooked sushi rice
- 1 tablespoon rice vinegar
- 2 teaspoon white sugar
Salmon Mixture
- 1 lb salmon, cubed
- 1 tbsp light soy sauce
- 1 tbsp Kewpie Mayo
- 1 tbsp Sriracha
- 1 tsp sesame oil
Other Ingredients
- 3 large nori sheets
- Furikake, for garnish
- 1 green onion, for garnish
- Cooking spray
Instructions
- Cook Sushi Rice: Prepare the sushi rice according to the package instructions until fully cooked and tender.
- Prepare Vinegar Mixture: In a microwave-safe bowl, mix rice vinegar and sugar. Microwave for about 30 seconds or until the sugar dissolves completely. Pour this mixture over the cooked sushi rice and gently mix to combine. Set aside.
- Preheat Oven: Set your oven to 400℉ (204℃) and allow it to fully preheat for even baking.
- Mix Salmon: In a medium bowl, combine cubed salmon, light soy sauce, Kewpie mayo, Sriracha, and sesame oil. Stir well to evenly coat the salmon pieces, then set aside.
- Prepare Nori Sheets: Cut each nori sheet into 4 equal rectangles or squares, sized to fit into the muffin tin cups.
- Assemble Sushi Cups: Lightly grease a muffin tin with cooking spray. Place a nori square in each muffin cup, then spoon sushi rice onto the center of each nori piece. Press the rice down gently to shape it within the cup. Repeat until all cups are filled with rice. Top each with a generous layer of the salmon mixture.
- Bake: Bake the assembled sushi cups in the preheated oven at 400℉ for about 15 minutes, or until the salmon is cooked through and the tops turn slightly golden brown.
- Garnish and Serve: Remove from oven and let cool for a few minutes. Optionally drizzle with extra sriracha or spicy mayo, then garnish with furikake and finely chopped green onion. Serve immediately and enjoy!
Notes
- Use fresh, sushi-grade salmon for the best flavor and safety.
- If you don’t have Kewpie mayo, regular Japanese mayonnaise or any creamy mayo will work.
- Adjust the amount of Sriracha to your preferred spice level.
- Make sure not to overfill the muffin tins to avoid spilling during baking.
- These sushi cups are best enjoyed fresh but can be stored in the refrigerator for up to 1 day.
Nutrition
- Serving Size: 1 sushi cup
- Calories: 130
- Sugar: 2 g
- Sodium: 320 mg
- Fat: 6 g
- Saturated Fat: 1.2 g
- Unsaturated Fat: 3.5 g
- Trans Fat: 0 g
- Carbohydrates: 11 g
- Fiber: 1 g
- Protein: 8 g
- Cholesterol: 35 mg

