If you’ve ever wrestled with a dry or bland turkey, you’re going to absolutely love this Dry Brine Turkey Recipe. It’s my secret weapon for a perfectly juicy, flavorful bird every single time—not just for holidays but any time you want a show-stopping centerpiece. When I first tried dry brining, it changed how I think about turkey altogether. If you’re tired of guessing and hoping, stick with me here and you’ll have a turkey that’s downright magnificent.
Why You’ll Love This Recipe
- Juicy Every Time: Dry brining draws out moisture and then reabsorbs it, making the turkey incredibly juicy inside.
- Bold Flavor: The seasoning blend seeps deep into the meat, so it’s flavorful all the way through, not just on the skin.
- Crispy Skin Magic: Leaving the turkey uncovered in the fridge lets the skin dry out beautifully for that coveted crispy finish.
- Simple Prep: You only need a handful of pantry staples and a bit of patience—the results are so worth it!

Ingredients You’ll Need
Every ingredient in this dry brine turkey recipe is thoughtfully chosen to complement the bird’s natural flavor and help deepen it. You don’t need anything fancy—just good quality basics and fresh butter to get that golden, buttery skin.
- Turkey: Choose a fresh or fully thawed 12 to 14-pound turkey; avoid self-basting or injected varieties for best results.
- Light brown sugar: Packed for moisture and a mild sweetness that balances the saltiness.
- Kosher salt: Vital for the dry brine; it penetrates the meat without making it too salty.
- Dried thyme and sage: Classic herbs that add aromatic depth and warmth.
- Black pepper: Freshly ground for subtle heat and complexity.
- Unsalted butter: Room temperature for easy spreading and creating that beautiful golden skin.
- Yellow onion, carrots, and celery: These aromatics add flavor to the roasting pan drippings for gravy.
Variations
I love how flexible this dry brine turkey recipe can be. Once you nail the basics, feel free to tweak herbs and spices to suit your palate or what’s fresh at the market—trust me, each little twist makes the recipe uniquely yours.
- Herbal Swaps: I’ve swapped sage for rosemary or added a pinch of smoked paprika for a subtle smoky flavor that my family adores.
- Spice Kick: For a bit of heat, I’ve mixed in crushed red pepper flakes with the dry brine—great for those who like a little zip.
- Diet-Friendly Adjustments: If you want to keep it lower sodium, reduce the kosher salt slightly, but don’t skip it entirely; salt is key to juicy turkey!
- Butter Alternatives: Try using herb-infused olive oil instead of butter if you want a dairy-free option without sacrificing richness.
How to Make Dry Brine Turkey Recipe
Step 1: Prep Your Turkey Like a Pro
Start by setting up a rimmed baking sheet lined with foil and placing an oven rack on top—this lets the air circulate around the turkey, an essential step for crisp skin. Remove any trussing or skin holding the legs together; this helps the brine reach all the nooks and crannies. I like to trim off any extra fat from the neck and cavity to avoid greasy drippings later. Make sure you rinse the turkey inside and out with warm water, then thoroughly pat it dry with paper towels. Trust me, the dry skin helps the brine do its magic.
Step 2: Mix and Apply the Dry Brine
Whisk together the brown sugar, kosher salt, dried thyme, sage, and fresh black pepper until well blended. Rub this fragrant mixture all over the turkey—don’t forget inside the cavity! Give it a good massage to make sure every inch is coated. Then, place the turkey on the rack and pop it uncovered into the fridge for 24 to 48 hours. A crucial tip I learned is to keep the turkey uncovered for the last 24 hours to really dry out the skin—this is what gets it crispy and golden.
Step 3: Roast the Turkey to Perfection
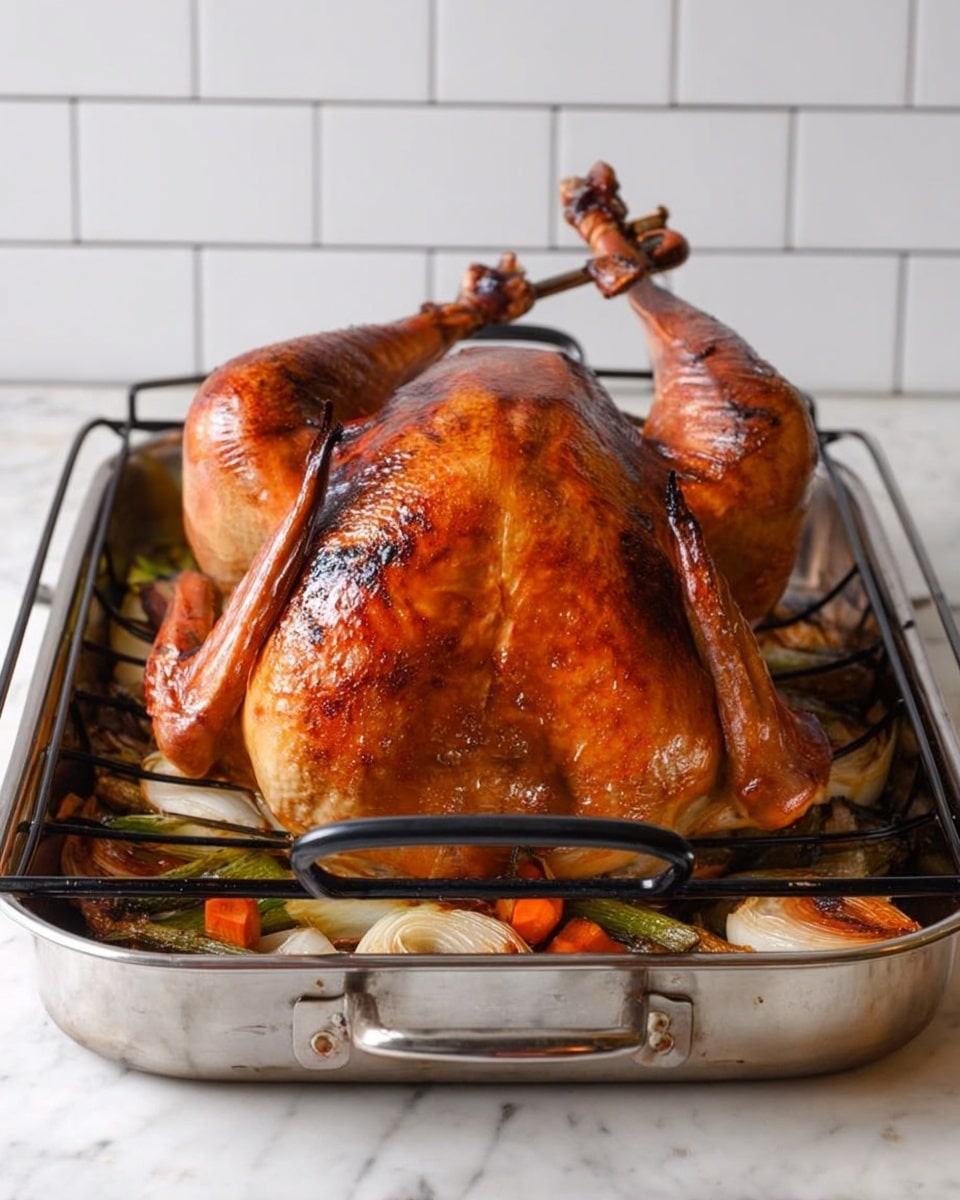
When you’re ready to roast, preheat your oven to 375°F and set the rack in the lower third. Use a damp paper towel to gently brush off the dry brine on the turkey’s outside, but leave the cavity seasoning intact. Scatter onion, carrots, and celery in a large roasting pan—this not only flavors your drippings but also acts as a flavorful roasting rack. Place the turkey on a roasting rack inside the pan, tuck the wings under, and smear softened butter all over the skin for extra moisture and color.
Roast until the skin is a beautiful golden brown and a thermometer inserted into the thickest part of both breast and thigh reads 165°F, usually between 1¾ to 2½ hours for this size turkey. Check your bird after 1½ hours—if it’s browning too fast, tent it with foil. I’ve found this step invaluable for preventing burnt skin while still getting that delicious crispiness.
Step 4: Rest and Serve
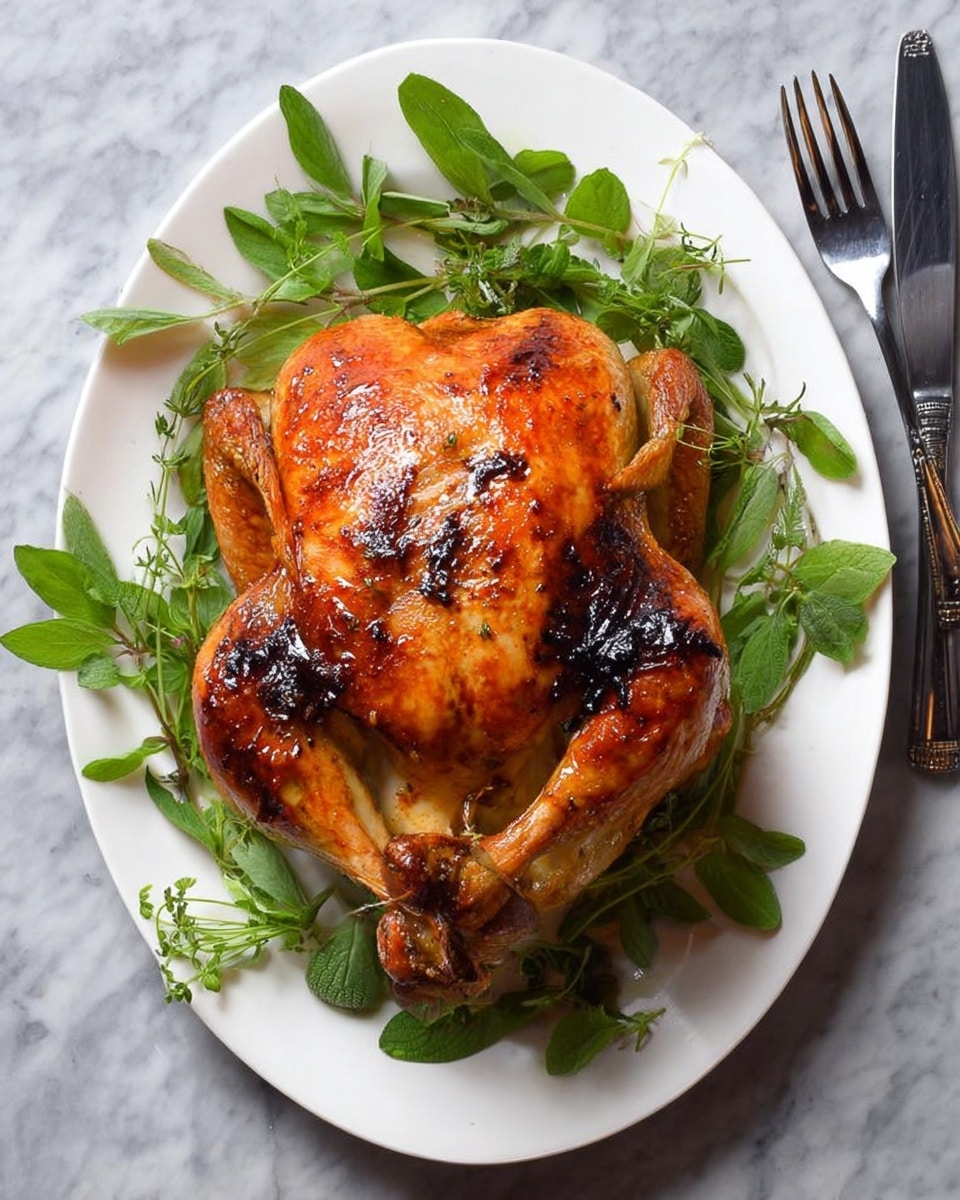
Once out of the oven, carefully tilt the turkey over the roasting pan to release any juices from the cavity—those juices are pure gold for your gravy. Transfer the turkey onto a platter, tent it loosely with foil, and let it rest for 20 to 30 minutes. This resting period lets the juices redistribute, making sure every slice is juicy. Remove the veggies from the pan, discard or save according to their texture, and reserve the drippings to make your homemade gravy. Carve up your beautifully brined turkey and serve with that gravy, and you’re ready to impress.
Pro Tips for Making Dry Brine Turkey Recipe
- Use a Leave-In Thermometer: Investing in a probe thermometer with a remote monitor lets you track temp without opening the oven and losing heat.
- Don’t Skip the Rest: I used to rush carving—I promise waiting 30 minutes really locks in the juices for the moistest slices.
- Butter Behind the Skin: For even juicier meat and richer flavor, try smearing some butter under the skin when you’re rubbing it on top.
- Avoid Over-Salting: If your turkey is already injected or self-basting, halve the salt in the dry brine to keep things balanced.
How to Serve Dry Brine Turkey Recipe
Garnishes
I’m partial to fresh herbs like rosemary sprigs and sage leaves scattered around the plating—they add that fragrant, festive touch. Slices of bright oranges or tart cranberries add pops of color and a nice tang that cuts through the richness beautifully.
Side Dishes
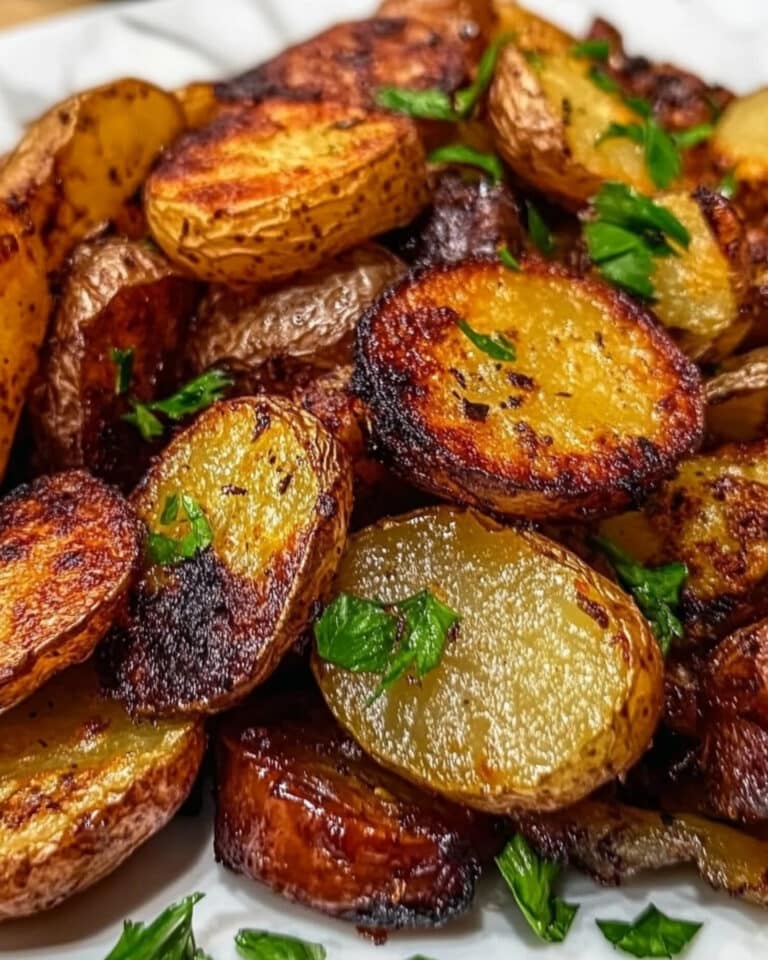
The classic combo of silky mashed potatoes and green bean almondine never disappoints with this turkey. I also love pairing it with roasted Brussels sprouts tossed with bacon and a sharp cheddar mac and cheese for a crowd-pleasing feast.
Creative Ways to Present
For holiday dinners, I like arranging the carved breast meat fan-style on a large platter with fresh herbs tucked in-between, and piling the dark meat chunks in a rustic bowl nearby. Sometimes, I drizzle a little extra gravy glaze over the slices for a glossy finish that gets oohs and ahhs every time.
Make Ahead and Storage
Storing Leftovers
I always store leftover turkey in airtight containers in the fridge and separate the gravy. That way, the meat doesn’t get soggy. I’ve found leftovers stay juicy for up to 3 days, especially if you gently reheat as described below.
Freezing
If you want to freeze leftovers, carve the turkey first and wrap portions tightly in foil or freezer bags with a little bit of gravy. It keeps well for 2-3 months, and thawing overnight in the fridge works best to keep texture intact.
Reheating
I gently reheat turkey in a covered baking dish with a splash of broth or gravy at 325°F for about 20-30 minutes. This prevents drying out and brings back that fresh-from-the-oven feel better than a microwave.
FAQs
-
What is dry brining and how is it different from wet brining?
Dry brining involves rubbing salt and seasonings directly on the turkey and letting it sit uncovered to draw out moisture that then reabsorbs back into the meat, enhancing juiciness and flavor. Unlike wet brining, which requires soaking the turkey in a saltwater solution, dry brining is simpler, takes up less space, and often results in crispier skin.
-
Can I use this dry brine recipe on a frozen turkey?
You should fully thaw your turkey before applying the dry brine. It’s important for the salt and herbs to penetrate the meat evenly, which only happens if the turkey is thawed and dry to the touch.
-
How long can I dry brine my turkey?
This recipe calls for 24 to 48 hours of dry brining. The minimum 24 hours is great for a flavorful turkey, but 48 hours can intensify the seasoning and improve skin dryness for crispiness. Just keep the turkey refrigerated at 40°F or below during this time.
-
Do I need to rinse the dry brine off before roasting?
You don’t rinse the brine inside the turkey’s cavity to keep that flavor, but gently brushing off the exterior brine helps prevent over-salting the skin. This step also helps the butter coat the skin smoothly for browning.
Final Thoughts
This dry brine turkey recipe became my go-to after I struggled for years with dry holiday birds. It’s straightforward but feels like a fancy chef’s touch that everyone notices—and asks for seconds on. I can’t recommend it enough, whether you’re cooking for family or a crowd. Give it a try—I promise your next turkey will blow you away with its juicy, savory goodness and beautifully crisp skin.
Print
Dry Brine Turkey Recipe
- Prep Time: 30 minutes
- Cook Time: 2 hours 30 minutes
- Total Time: 3 hours
- Yield: 8 servings
- Category: Poultry
- Method: Roasting
- Cuisine: American
Description
Discover the secret to a perfectly juicy and flavor-packed turkey with this easy dry brine recipe. This method enhances the natural flavors while ensuring a crispy, golden skin, making it a holiday game-changer. The turkey is dry-brined with a flavorful mix of brown sugar, kosher salt, herbs, and pepper, then roasted with butter and aromatics for an irresistible main dish.
Ingredients
Dry Brine Mixture
- ¼ cup packed light brown sugar
- 3 tablespoons Morton kosher salt (or ¼ cup Diamond kosher salt)
- 2 teaspoons dried thyme
- 2 teaspoons dried sage leaves or ground sage
- 1 teaspoon freshly ground black pepper
Turkey and Roasting
- 1 (12 to 14-pound) turkey, patted dry
- 6 tablespoons unsalted butter, at room temperature
- 1 large yellow onion, cut into wedges
- 2 carrots, cut into 2-inch pieces
- 2 stalks celery, cut into 2-inch pieces
Instructions
- Prepare the Turkey: Line a rimmed baking sheet with aluminum foil and place a wire rack on top. Remove the truss holding the turkey legs together and trim any excess fat from the neck and body cavity. Remove giblets and neck and rinse the turkey inside and out with warm water. Pat dry thoroughly with paper towels.
- Make and Apply the Dry Brine: In a small bowl, combine the brown sugar, kosher salt, thyme, sage, and black pepper. Rub and pat this dry brine mixture all over the turkey, including inside the cavity. Place the turkey on the rack and refrigerate uncovered for at least 24 hours and up to 48 hours. If brining more than 24 hours, loosely cover with plastic wrap for the first part, then uncover to dry the skin for the last 24 hours.
- Preheat the Oven and Prepare Vegetables: Preheat your oven to 375°F (190°C) and position an oven rack in the lower third of the oven. Scatter the onion wedges, carrot pieces, and celery in the bottom of a large roasting pan.
- Remove Excess Brine and Butter the Turkey: Using damp paper towels, gently brush off the dry brine from the turkey’s exterior but leave the brine inside the cavity. Place a roasting rack inside the pan with the vegetables, then set the turkey on the rack. Tuck the wings underneath the bird. Smear the softened butter evenly all over the turkey.
- Roast the Turkey: Roast the turkey in the preheated oven until the skin is deep golden and an instant-read thermometer registers 165°F in the thickest part of the breast and thigh, approximately 1¾ to 2½ hours. Begin checking at 1½ hours and if the skin browns too quickly, tent loosely with foil to prevent burning.
- Rest the Turkey and Collect Juices: Carefully tilt the turkey so any cavity juices pour into the pan. Transfer the turkey to a platter or carving board and tent with foil. Let it rest for 20 to 30 minutes to allow juices to redistribute. Remove the vegetables from the pan and discard or save for serving if still firm. Reserve the pan drippings for gravy.
- Make the Gravy and Carve: While the turkey rests, prepare homemade gravy using the reserved pan juices. Carve the turkey following a trusted guide and serve with the gravy on the side.
- Make-Ahead Instructions: If desired, roast and carve the turkey ahead, placing carved slices over a thin layer of gravy in an ovenproof dish. Cover tightly with plastic wrap and refrigerate up to two days. Reheat uncovered with foil at 325°F for 20 to 30 minutes until warmed through. Reheat remaining gravy separately.
Notes
- This dry brine method works best with turkeys that are not kosher, injected, or self-basting to avoid over-salting.
- If using kosher, injected, or self-basting turkeys, halve the salt amount in the dry brine.
- Use a digital leave-in cooking thermometer with remote monitor for the best temperature monitoring without oven opening.
- Ensure the turkey is refrigerated below 40°F throughout the dry brining period for food safety.
- Resting the turkey after roasting helps to keep it juicy and tender by allowing juices to redistribute.
Nutrition
- Serving Size: 1/8 turkey
- Calories: 1075
- Sugar: 5 g
- Sodium: 1619 mg
- Fat: 47 g
- Saturated Fat: 15 g
- Unsaturated Fat: 32 g
- Trans Fat: 0 g
- Carbohydrates: 6 g
- Fiber: 0 g
- Protein: 147 g
- Cholesterol: 513 mg


