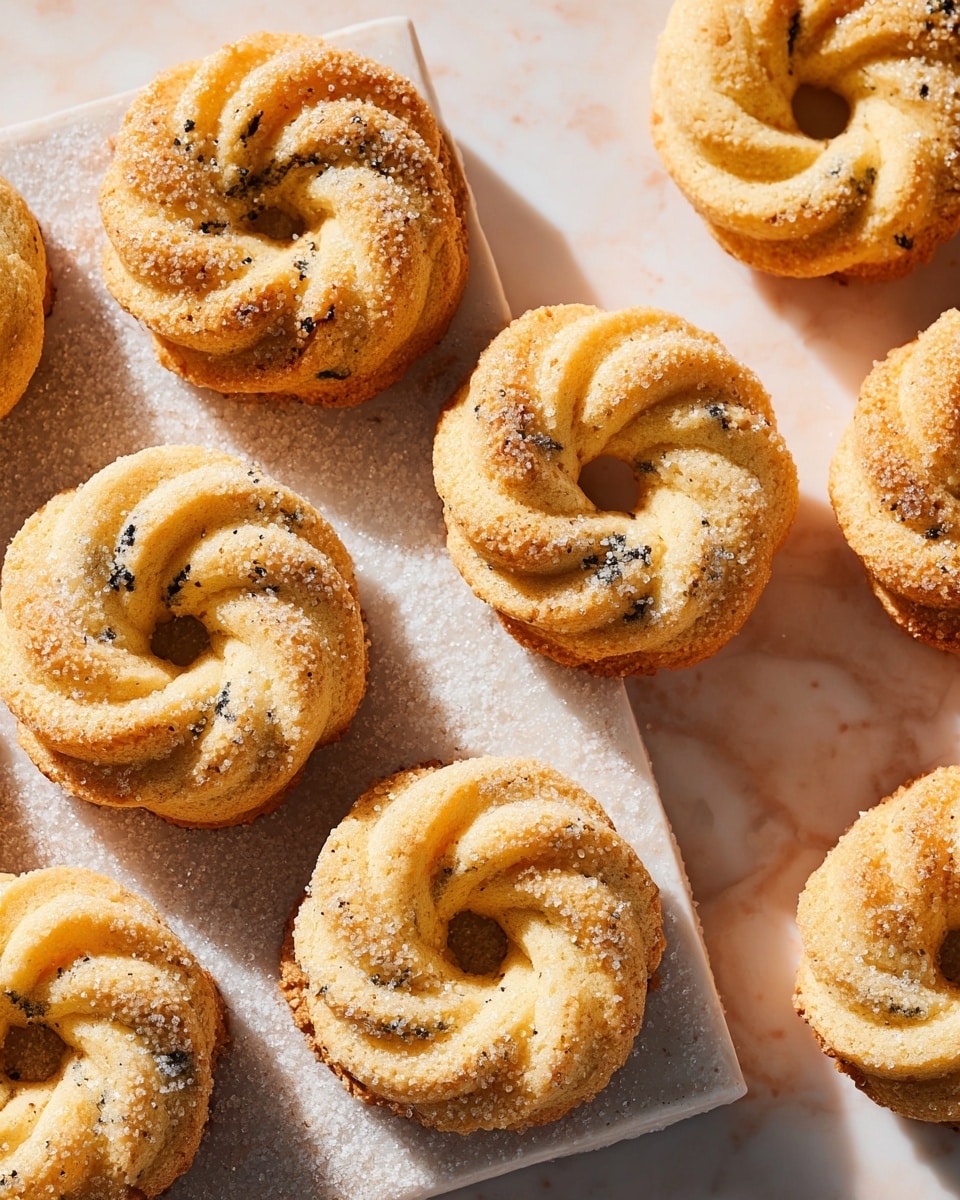
Oh, I absolutely love Danish Butter Cookies with Currants and Lemon Zest Recipe—there’s something incredibly rewarding about these buttery little delights bursting with just the right amount of tartness and brightness. Every time I make these, my kitchen fills with the scent of fresh lemon zest mixed with rich butter, making it feel like a cozy, Scandinavian bakery right at home.
You’ll find that this recipe is perfect for when you want a treat that’s not overly sweet but still rich and packed with flavor. Whether it’s a weekend afternoon with coffee, a holiday gathering, or just a little midweek indulgence, these cookies never disappoint. Trust me, once you try this Danish Butter Cookies with Currants and Lemon Zest Recipe, it’ll quickly become a staple in your baking rotation.
Why You’ll Love This Recipe
- Perfect Balance of Flavors: The fresh lemon zest brightens the rich butter and currants, creating a cookie that’s both refreshing and indulgent.
- Simple Ingredients: You only need pantry staples plus a handful of currants and lemon, making it easy to whip up anytime.
- Great Make-Ahead Option: These cookies hold up beautifully for days stored airtight, and they even freeze well for your convenience.
- Fun and Elegant Presentation: Piped with a star tip and coated with sanding sugar, they look as special as they taste—perfect to impress guests.

Ingredients You’ll Need
The magic behind this Danish Butter Cookies with Currants and Lemon Zest Recipe is all in the classic, quality ingredients coming together. Each one plays a vital role to bring out those lovely textures and flavors we know and love.
- Unsalted Butter: Make sure it’s room temperature for easy creaming and rich flavor without added salt control.
- Granulated Sugar: Sweetens gently and helps with that perfect cookie crisp.
- Large Egg: Helps bind everything while adding a tender crumb.
- Lemon Zest: Freshly grated for the brightest, most aromatic lemon flavor.
- Pure Vanilla Extract: Adds warmth and depth to complement the lemon and currants.
- All-Purpose Flour: Gives the right structure to keep the cookies tender but hold their shape.
- Dried Currants: These tiny bursts of sweetness and chewiness contrast beautifully in the buttery dough.
- Baking Soda: Just a touch for subtle leavening and a lighter texture.
- Kosher Salt: Enhances all those flavors and balances the sweetness.
- Sanding Sugar: For that sparkling sugar coating that adds crunch and sparkle before baking.
Variations
I really enjoy tweaking this Danish Butter Cookies with Currants and Lemon Zest Recipe every now and then. Feel free to tailor it to your taste or dietary needs – it’s quite forgiving and makes a great base for personalization.
- Orange Zest Variation: Swapping lemon zest for orange zest gives you a sweeter, more floral citrus twist—my family goes crazy for this version during Christmas.
- Currant Substitution: If you can’t find currants, dried cranberries or chopped raisins work well, though the tartness of currants really stands out.
- Gluten-Free Adaptation: Using a gluten-free all-purpose blend works if you’re careful with texture adjustments; it still yields a tender cookie.
- Spiced Cookies: Adding a pinch of cinnamon or cardamom to the dough is something I discovered that adds lovely warmth without overpowering the lemon.
How to Make Danish Butter Cookies with Currants and Lemon Zest Recipe
Step 1: Cream the Butter and Sugar Till Dreamy
Start by beating your room-temperature unsalted butter and granulated sugar together in a large bowl with an electric mixer on medium speed. I usually set a timer for about 3 minutes, and you’ll see the mixture change from dull to creamy and fluffy. This step is super important because it traps air, giving your cookies a tender crumb. Avoid rushing here—take your time for that perfect silky texture.
Step 2: Add the Egg, Lemon Zest, and Vanilla
Next, beat in the egg, freshly grated lemon zest, and pure vanilla extract until just combined. The lemon zest is really the star here, and I always make sure to use a fine grater and only the yellow part of the peel to avoid bitterness. This mixture should still be soft and creamy, not curdled—if your egg is cold, warm it to room temperature first to keep the batter smooth.
Step 3: Gently Fold in Dry Ingredients and Currants
Switch your mixer to low speed and slowly add the all-purpose flour, dried currants, baking soda, and kosher salt. I like to pause and scrape down the sides to make sure everything is mixed evenly, but be careful not to overmix once the flour is in. Just mix until the dough comes together and you see those tiny currants spread throughout.
Step 4: Pipe and Chill the Dough
Line a rimmed baking sheet with parchment paper. Transfer about one-quarter of your dough to a piping bag fitted with a ½-inch star tip. Pipe small rings, roughly 1¾ inches in diameter, onto the sheet. I find this method keeps the cookies uniform and pretty, but if you don’t have a piping bag, a small spoon works fine—just shape the dough into rounds. Freeze the piped cookies for about 20 minutes until firm; this step helps maintain their shape while baking.
Step 5: Prep the Oven and Sugar Coating
Now, heat your oven to 350°F (180°C) and line two rimmed baking sheets with parchment. Pour some sanding sugar into a small bowl. One by one, quickly dip the frozen cookie rings into the sugar to coat them lightly. I learned this trick after noticing my cookies lacked sparkle—the sanding sugar adds that perfect crunchy, glistening finish. Place them about 1 inch apart on your baking sheets and keep the ones you’re not using in the freezer until ready.
Step 6: Bake to Golden Perfection
Bake the cookies for 13 to 18 minutes, rotating the sheets halfway through to ensure even baking. Keep an eye on the edges—they should be golden but not browned, which is your sign they’re perfectly baked. Once done, transfer the cookies to a wire rack to cool completely. This cooling step is crucial to let them set and become delightfully crisp while remaining tender inside.
Step 7: Store or Serve Right Away
You can enjoy these straight away or store them for later. They keep wonderfully in an airtight container at room temperature for up to three days. If you want to save them longer, freezing is a great option (more on that below). This Danish Butter Cookies with Currants and Lemon Zest Recipe really shines fresh, but it’s amazing how well they hold up!
Pro Tips for Making Danish Butter Cookies with Currants and Lemon Zest Recipe
- Room Temperature Ingredients: I always make sure my butter and egg are at room temperature before starting—it helps achieve the perfect creamy dough.
- Don’t Skip Freezing: Freezing the dough after piping is a game-changer for retaining cookie shape and detail during baking.
- Use Fresh Lemon Zest: The difference between fresh zest and bottled lemon extract is huge; fresh always wins for brightness.
- Watch Baking Time Closely: Keeping a close eye prevents over-browning, which can dry out the delicate butter cookies.
How to Serve Danish Butter Cookies with Currants and Lemon Zest Recipe
Garnishes
I love to add a little extra sparkle right before serving by dusting the cookies lightly with powdered sugar or an extra sprinkle of sanding sugar for that festive touch. Sometimes, a thin slice of preserved lemon or a few fresh currants on the side add an elegant, edible garnish, especially when serving to guests.
Side Dishes
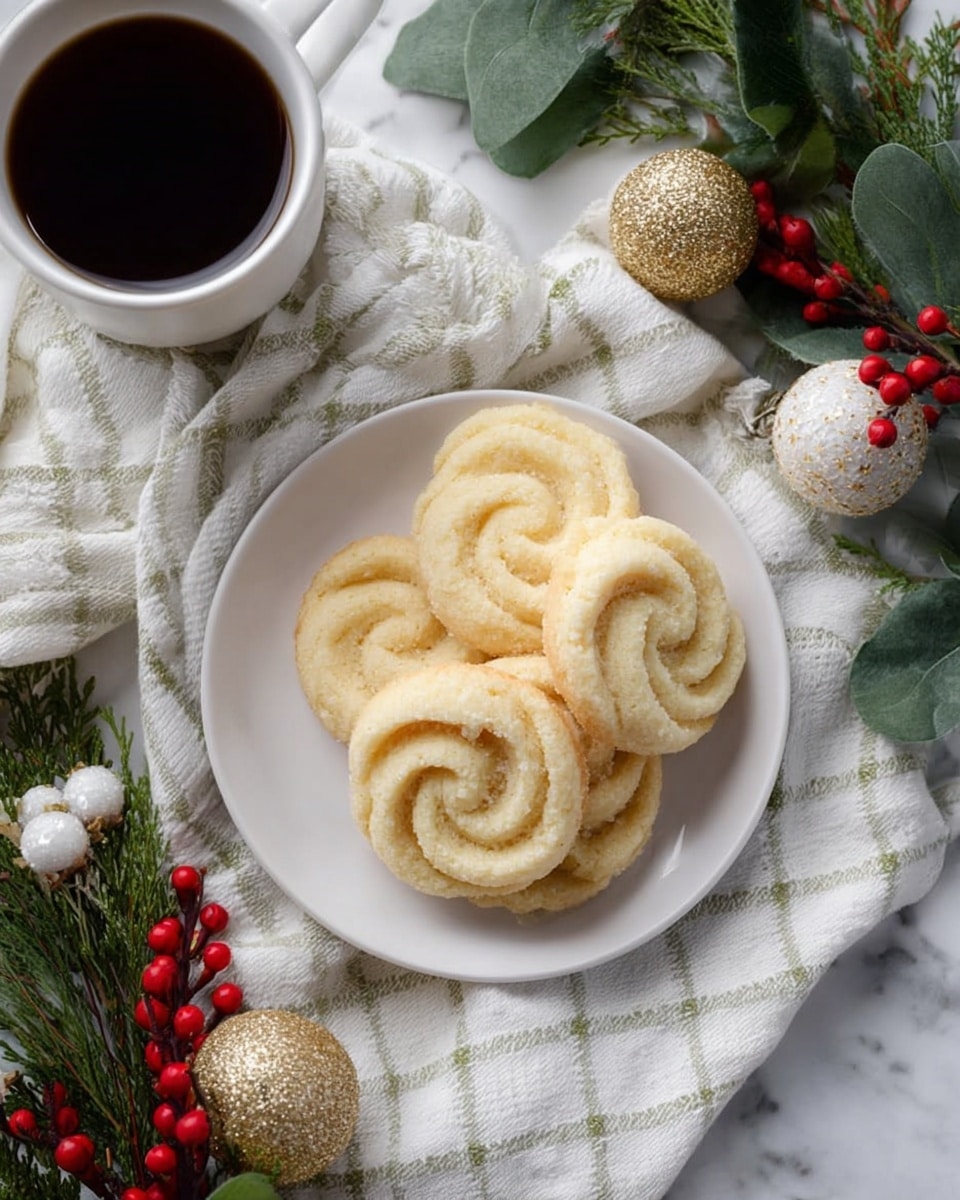
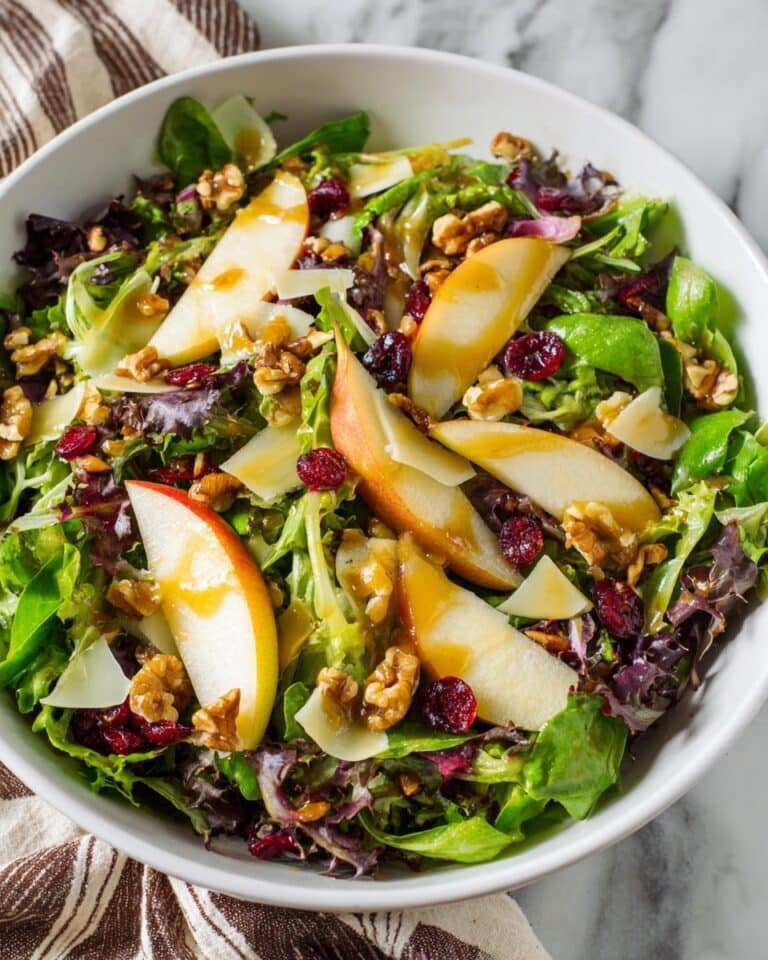
These cookies pair beautifully with a good old cup of black coffee or a floral tea like Earl Grey or chamomile. I’ve also enjoyed them alongside whipped cream and fresh berries for a simple yet impressive dessert plate.
Creative Ways to Present
For holiday gatherings, I like arranging these cookies in a pretty tin lined with parchment, adding sprigs of fresh herbs like rosemary or thyme for contrast and scent. Another idea I discovered: stacking them with thin layers of lemon curd or cream cheese frosting in between for an elevated cookie sandwich treat—guaranteed crowd-pleaser!
Make Ahead and Storage
Storing Leftovers
Whenever I made a big batch, I store leftover Danish Butter Cookies with Currants and Lemon Zest in an airtight container at room temperature. They stay fresh and crispy for about 3 days, which is usually just enough time to enjoy every last one.
Freezing
Freezing these cookies works wonderfully—just layer parchment paper between them to avoid sticking. When I prep ahead for holiday treats, freezing baked cookies up to 2 months saves me a lot of stress later. You can also freeze the shaped but unbaked dough; then bake directly from frozen, adding a couple extra minutes to cook time.
Reheating
To refresh the cookies, I pop them in a 300°F (150°C) oven for 5 to 7 minutes until warm and crisp again. This technique really revives that fresh-baked texture and flavor without drying them out.
FAQs
-
Can I substitute currants with another dried fruit in this Danish Butter Cookies recipe?
Absolutely! While currants provide a distinct tartness and texture, dried cranberries, raisins, or chopped dried cherries can be excellent alternatives. Just be mindful of the sweetness level, as some dried fruits are sweeter than currants.
-
Why is freezing the dough important before baking?
Freezing the piped dough firms it up, which helps the cookies maintain their shape and keep the pretty star-ring pattern during baking. Without freezing, the cookies may spread too much or lose definition.
-
How long do Danish Butter Cookies keep fresh?
Stored in an airtight container at room temperature, these cookies typically stay fresh and crisp for about three days. For longer storage, freezing is recommended for up to 2 months.
-
Can I make these cookies gluten-free?
Yes, you can use a gluten-free all-purpose flour blend, but results may vary slightly in texture. Make sure your blend contains xanthan gum or another binder to help hold the dough together properly.
Final Thoughts
This Danish Butter Cookies with Currants and Lemon Zest Recipe has become one of my absolute favorites to share with friends and family. It’s the kind of recipe that feels both nostalgic and special, simple yet impressive, and reliably delicious every single time. If you’re craving a cookie that’s buttery and bright with a chewy burst of currants, this is the one you’ll want to bake again and again. I can’t wait for you to try it out and make your kitchen smell as wonderful as mine does each time!
Print
Danish Butter Cookies with Currants and Lemon Zest Recipe
- Prep Time: 30 minutes
- Cook Time: 20 minutes
- Total Time: 50 minutes
- Yield: About 35 cookies
- Category: Dessert
- Method: Baking
- Cuisine: Danish
Description
These Danish Butter Cookies are classic, buttery treats featuring a tender crumb and a hint of lemon zest, studded with sweet dried currants. Piped into delicate rings and topped with sanding sugar, they bake to a golden perfection with crisp edges and a melt-in-your-mouth texture. Perfect for holidays, gifting, or everyday indulgence.
Ingredients
Cookie Dough
- 1 cup (2 sticks, 1/2 pound, or 227 grams) unsalted butter, room temperature
- 1/2 cup (100 grams) granulated sugar
- 1 large egg, room temperature
- 1 tablespoon finely grated lemon zest
- 1 teaspoon pure vanilla extract
- 2 cups (250 grams) all-purpose flour
- 5 ounces (142 grams) dried currants
- 1/2 teaspoon baking soda
- 1/2 teaspoon kosher salt
For Coating
- 1 handful sanding sugar
Instructions
- Prepare the Dough: In a large bowl, use an electric mixer on medium speed to beat the unsalted butter and granulated sugar for about 3 minutes, until combined and creamy. Add the egg, finely grated lemon zest, and pure vanilla extract, then beat until fully incorporated. Gradually add in the all-purpose flour, dried currants, baking soda, and kosher salt, beating just until the mixture comes together as a dough, being careful not to overmix.
- Pipe the Cookies: Line a rimmed baking sheet with parchment paper. Transfer about one-quarter of the dough to a piping bag fitted with a ½-inch (1.2-centimeter) star tip. Pipe small rings approximately 1¾ inches (3.6 centimeters) in diameter onto the prepared baking sheet. Repeat this process with the remaining dough. Place the baking sheet in the freezer for about 20 minutes to firm the dough.
- Preheat and Prepare for Sugar Coating: Meanwhile, preheat your oven to 350°F (180°C). Line two rimmed baking sheets with parchment paper. Pour some sanding sugar into a small bowl. Quickly dip each frozen cookie ring into the sanding sugar to coat thoroughly, then transfer them about 1 inch apart onto the prepared baking sheets. Return any unused cookie dough to the freezer until ready to use.
- Bake the Cookies: Bake the cookies in the preheated oven for 13 to 18 minutes, rotating the baking sheets halfway through baking to ensure even cooking. Bake until the edges turn golden and the cookies are crisp. Once baked, transfer the cookies on the baking sheet to a wire rack to cool completely.
- Storage and Make-Ahead: These cookies can be made up to 3 days in advance. Store them in an airtight container at room temperature to maintain freshness. For longer storage, freeze the cookies for up to 2 months, thawing at room temperature before serving.
Notes
- Use room temperature butter and egg to ensure even mixing and a smooth dough.
- Piping the dough with a star tip gives cookies their classic shape and texture.
- Freezing the dough before baking helps maintain the shape during baking and results in a crisp texture.
- Sanding sugar adds a sparkling, sweet exterior that complements the buttery dough.
- Store cookies in an airtight container to keep them fresh and crisp.
Nutrition
- Serving Size: 1 cookie
- Calories: 110
- Sugar: 5g
- Sodium: 70mg
- Fat: 7g
- Saturated Fat: 4g
- Unsaturated Fat: 3g
- Trans Fat: 0g
- Carbohydrates: 11g
- Fiber: 0.5g
- Protein: 1g
- Cholesterol: 20mg

