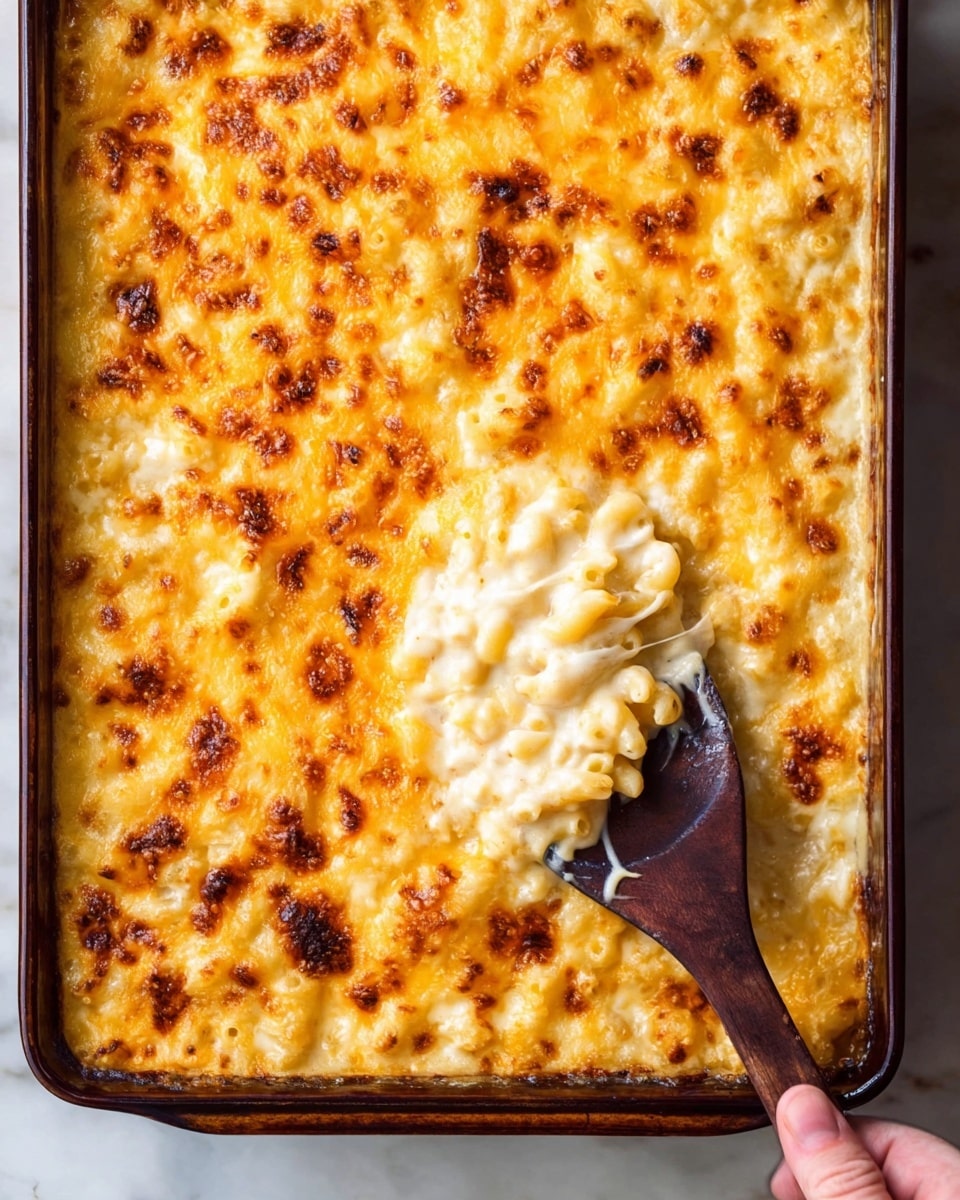
If you’re anything like me, comfort food is where the heart truly lies—especially when it’s creamy, cheesy, and downright irresistible. This Creamy Homemade Baked Mac and Cheese Recipe is one of my absolute favorites to make on a chilly evening when you want a cozy hug from your dinner plate. Trust me, this isn’t just your average mac and cheese—it’s creamy, baked to bubbly perfection, and packed with flavor that’ll make you want seconds (and thirds!). Stick with me, and I’ll walk you through every step so you get it just right.
Why You’ll Love This Recipe
- Ultra Creamy Texture: The blend of whole milk and half and half creates an irresistibly smooth cheese sauce.
- Balanced Cheese Flavor: Combining sharp cheddar with nutty Gruyere gives it depth without overwhelming your palate.
- Family-Friendly Crowd Pleaser: My kids and grown-ups alike can’t get enough of it, making dinner a breeze.
- Easy Layered Bake: The layering technique ensures gooey cheese pockets in every bite, plus a gorgeous golden crust.

Ingredients You’ll Need
Each ingredient here plays a crucial role in building that luscious texture and rich flavor you crave. When choosing cheese, I always recommend shredding your own from blocks—it melts better and tastes fresher than pre-shredded versions!
- Dried elbow pasta: Classic shape that holds sauce perfectly; cook just al dente to avoid mush after baking.
- Unsalted butter: For a clean, rich base in the roux—control the salt to taste this way.
- All-purpose flour: Thickens the sauce beautifully without any lumps if whisked properly.
- Whole milk: Adds creaminess and balances richness of the half and half.
- Half and half: Key to the recipe’s silky texture; don’t substitute with milk alone—or sauce won’t be as luscious!
- Shredded medium cheddar cheese: Brings that classic sharp cheesy punch everyone loves.
- Shredded Gruyere cheese: Adds nutty, melty goodness that pairs perfectly with cheddar.
- Salt: Enhances all the flavors, so don’t skip or skimp!
- Black pepper: Just a subtle kick to brighten up the richness.
- Paprika (smoked paprika preferred): Adds a warm, smoky hint that takes this mac and cheese from good to WOW.
Variations
One of the reasons I adore this Creamy Homemade Baked Mac and Cheese Recipe is how easy it is to tweak to your taste or dietary needs—without losing that lush, decadent texture.
- Gluten-Free: I’ve swapped the flour for a gluten-free blend with good results—just make sure it’s one that thickens well.
- Spicy Kick: Adding a bit of cayenne pepper or diced jalapeños gives this mac a fun twist that my spice-loving friends rave about.
- Extra Crunch: My family sometimes loves a buttery panko breadcrumb topping for a delightful crunch in contrast to the creamy center.
- Different Cheeses: Feel free to experiment with Parmesan or smoked gouda for a flavor twist—I’ve had great success mixing those in for special occasions.
How to Make Creamy Homemade Baked Mac and Cheese Recipe
Step 1: Prepare Pasta and Cheese
Start by preheating your oven to 325°F and greasing your baking dish—this recipe fits perfectly in a 9×13-inch pan. Boil salted water and cook your elbow pasta for one minute less than the package directions for al dente; this is key so it doesn’t get mushy after baking. I always drizzle a little olive oil on the drained pasta to stop it from sticking—just a spoonful goes a long way. While that’s happening, shred your cheddar and Gruyere cheeses and divide them into three piles: one part for the sauce, one for layering, and one for the topping. This step might take a few extra minutes, but it’s worth it to melt a perfect, creamy sauce.
Step 2: Make the Cheese Sauce
Melt the butter in a large saucepan over medium heat. Once melted, sprinkle in the flour and whisk immediately—you want a texture like very wet sand. Don’t stop whisking; cooking this for about a minute helps cook out the raw flour taste. Next comes the slow part: gradually whisk in about two cups of the half and half until the mixture smooths out. Then add the rest of the half and half plus whole milk in the same slow manner. Keep whisking on medium heat until you have a thick, velvety sauce that clings to the spoon—think slightly thinned condensed soup thickness. This step is a bit of patience, but the silky sauce you’ll end up with is absolutely worth it.
Step 3: Add Cheese and Seasonings
Remove your sauce from heat and stir in the salt, black pepper, and paprika. Then gradually add 1 1/2 cups of shredded cheese, stirring gently until melted and smooth. Add another 1 1/2 cups and keep stirring—that melty cheese combo is the secret to that rich, creamy goodness everyone will rave about. This dual addition process helps avoid clumps and ensures that gorgeous smooth texture you’re aiming for.
Step 4: Layer and Bake
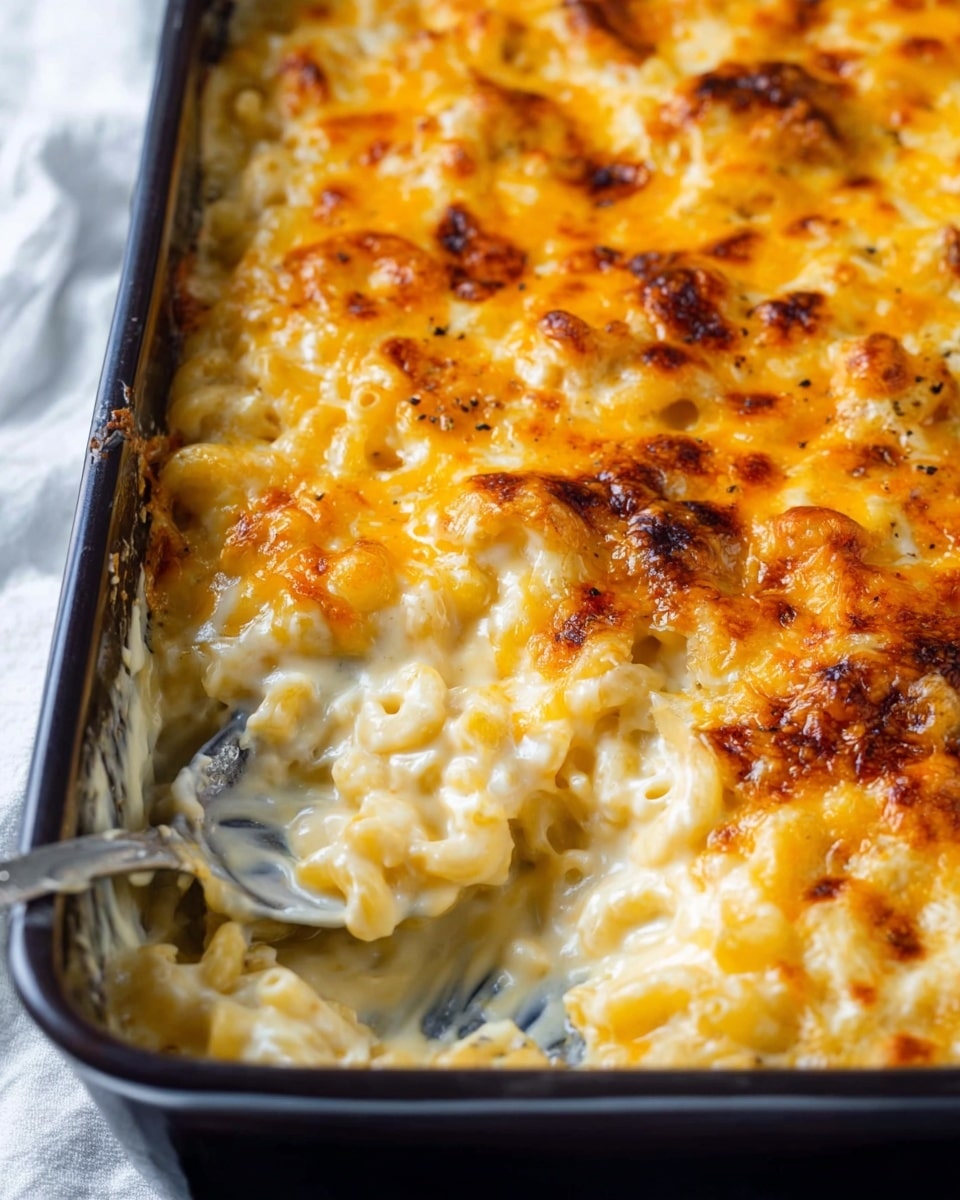
Toss your drained pasta with the cheese sauce in a large bowl, making sure every elbow is coated. Pour half the pasta mixture into your baking dish, then sprinkle over 1 1/2 cups of shredded cheese. Top with the remaining pasta mixture, then add the last 1 1/2 cups of cheese on top. Baking at 325°F for 15 minutes gets the top golden and bubbly, with melty pockets of cheese inside. When I first tried the layered cheese topping, my family went crazy over those crispy golden edges combined with creamy inside—definitely don’t skip this step!
Pro Tips for Making Creamy Homemade Baked Mac and Cheese Recipe
- Use Freshly Shredded Cheese: Pre-shredded cheese has anti-caking agents that can affect meltiness—freshly shredded cheese melts creamier.
- Don’t Overcook Pasta: Cooking pasta just shy of al dente keeps it from becoming mushy after baking.
- Whisk Constantly: When making the roux and adding milk and half and half, whisking without pause prevents lumps and ensures a silky sauce.
- Layering Cheese: Adding cheese in stages while mixing and again on top guarantees every bite is loaded with melty, gooey goodness.
How to Serve Creamy Homemade Baked Mac and Cheese Recipe
Garnishes
I usually sprinkle a bit of fresh chopped parsley or chives on top just before serving—it adds a pop of color and a fresh bite that cuts through all the creamy richness beautifully. Sometimes I dust with a little extra smoked paprika for an eye-catching, aromatic finish.
Side Dishes
This mac and cheese pairs wonderfully with crisp green salads or roasted vegetables like Brussels sprouts or green beans. For a heartier meal, I love serving it alongside grilled chicken or smoky barbecue ribs—it’s a classic combo that my family never gets tired of.
Creative Ways to Present
For a fun twist when hosting, I sometimes bake individual portions in small ramekins and sprinkle each with toasted breadcrumbs and a drizzle of truffle oil—fancy but surprisingly simple! Another time, I swirled in roasted butternut squash puree for a festive autumnal variation that looked stunning on the table.
Make Ahead and Storage
Storing Leftovers
I store leftovers in an airtight container in the fridge and find it stays creamy for up to 3 days. Before reheating, I like to stir in a splash of milk or half and half to revive that saucy consistency—otherwise, it can get a bit thick and firm.
Freezing
Freezing works great if you want to prep ahead! I freeze the baked mac and cheese in individual portions wrapped tightly in foil and placed in a freezer bag. It keeps for up to 3 months. When you’re ready, thaw overnight in the fridge, then reheat in the oven at 350°F until warmed through.
Reheating
The oven is my go-to for reheating to keep that top crispy and fresh. Cover the mac and cheese loosely with foil to prevent excessive browning while warming, and heat at 325°F for about 20 minutes, adding a touch of milk if it looks dry. Microwaving works in a pinch, but can make the cheese sauce separate if not careful.
FAQs
-
Can I use different types of pasta for this recipe?
Absolutely! While elbow pasta is traditional and holds the cheese sauce well, you can use shells, cavatappi, or even penne. Just be sure to adjust cooking times so pasta stays firm and doesn’t get mushy after baking.
-
What can I substitute for half and half if I don’t have any?
If you don’t have half and half, combine equal parts whole milk and heavy cream to mimic its richness. Using just milk will make the sauce less creamy and rich, while heavy cream alone might be too heavy and thick.
-
How do I avoid a grainy or oily cheese sauce?
To prevent graininess, always add shredded cheese off the heat or on very low heat, stirring gently until melted. Overheating cheese or melting it directly on high can cause oils to separate and create a greasy texture.
-
Can I make this recipe ahead of time and bake later?
Yes! You can prepare the mac and cheese up to the baking step, cover it tightly, and refrigerate for up to 24 hours. When ready, bake it as instructed, adding a few extra minutes if it’s cold from the fridge.
Final Thoughts
This Creamy Homemade Baked Mac and Cheese Recipe is not just food—it’s an experience I cherish every time I make it. I remember the first time I served it to my family, and how quickly it disappeared from the table, with everyone asking for seconds and the recipe. I know you’re going to love how it fills your kitchen with that comforting aroma and brings smiles around your dinner table too. Give it a try—you’ll find it becomes your go-to for all those cozy nights where you just want something deliciously satisfying.
Print
Creamy Homemade Baked Mac and Cheese Recipe
- Prep Time: 20 minutes
- Cook Time: 15 minutes
- Total Time: 35 minutes
- Yield: 8 servings
- Category: Main Course
- Method: Baking
- Cuisine: American
Description
This creamy homemade baked mac and cheese recipe features tender elbow pasta enveloped in a rich, velvety cheese sauce made with cheddar and Gruyere cheeses. Baked to bubbly, golden perfection, it’s a comforting family favorite loved by kids and adults alike.
Ingredients
Pasta
- 1 lb. dried elbow pasta
Cheese Sauce
- 1/2 cup unsalted butter
- 1/2 cup all purpose flour
- 1 1/2 cups whole milk
- 2 1/2 cups half and half
- 4 cups shredded medium cheddar cheese (divided)
- 2 cups shredded Gruyere cheese (divided)
- 1/2 Tbsp. salt
- 1/2 tsp. black pepper
- 1/4 tsp. paprika (smoked paprika preferred)
- Olive oil (for tossing cooked pasta)
Instructions
- Preheat and Prepare Dish: Preheat your oven to 325°F (163°C) and grease a 3-quart (9×13″) baking dish. Set aside for later use.
- Cook Pasta: Bring a large pot of salted water to a boil. Add the dried elbow pasta and cook for 1 minute less than the package instructions to achieve al dente texture. Drain well and drizzle lightly with olive oil to prevent sticking.
- Prepare Cheese: While the water heats, shred the cheddar and Gruyere cheeses and combine them. Divide the shredded cheese into three portions: approximately 3 cups for the sauce, 1 1/2 cups for the inner layering, and 1 1/2 cups for the topping.
- Make Roux: Melt the butter in a large saucepan over medium heat. Sprinkle in the flour and whisk until fully combined and the mixture looks like wet sand. Cook for about 1 minute, whisking frequently to avoid burning.
- Add Dairy: Slowly pour about 2 cups of the half and half into the roux while whisking continuously until smooth. Then gradually add the remaining half and half and the whole milk, continuing to whisk until fully incorporated and smooth.
- Thicken Sauce: Continue cooking the mixture over medium heat, whisking often until it thickens to a consistency similar to a semi-thinned condensed soup.
- Incorporate Spices and Cheese: Remove the sauce from heat, stir in salt, black pepper, and paprika. Add 1 1/2 cups of the shredded cheeses and stir until melted and combined. Stir in another 1 1/2 cups of cheese until the sauce is smooth and creamy.
- Combine Pasta and Sauce: In a large mixing bowl, combine the drained pasta with the cheese sauce, stirring until the pasta is evenly coated.
- Assemble in Baking Dish: Pour half of the pasta and cheese mixture into the prepared baking dish. Sprinkle with 1 1/2 cups of shredded cheese, then add the remaining pasta mixture over the top.
- Top and Bake: Sprinkle the final 1 1/2 cups of shredded cheese evenly on top. Bake in the preheated oven for 15 minutes, or until the cheese is bubbly and lightly golden brown.
Notes
- This baked mac and cheese is a beloved family recipe, loved by both children and adults alike for its creamy texture and rich flavor.
- Using a combination of cheddar and Gruyere cheeses adds depth and complexity to the flavor.
- Cooking the pasta just shy of al dente ensures it will finish cooking perfectly in the oven without becoming mushy.
- Drizzling pasta with olive oil after cooking prevents clumping and sticking before combining with the sauce.
- You can substitute smoked paprika with regular paprika or omit it if preferred.
Nutrition
- Serving Size: 1 serving
- Calories: 665 kcal
- Sugar: 3 g
- Sodium: 700 mg
- Fat: 41 g
- Saturated Fat: 25 g
- Unsaturated Fat: 14 g
- Trans Fat: 0.5 g
- Carbohydrates: 43 g
- Fiber: 1 g
- Protein: 28 g
- Cholesterol: 126 mg


