If you’ve been hunting for the perfect, silky, rich dessert to impress (or just treat yourself), this Chocolate Pie Recipe is exactly what you need. I absolutely love how this pie turns out every single time—creamy, chocolaty, and just the right balance of sweetness with a tender crust. When I first tried making chocolate pie from scratch, I struggled with the texture until I found this foolproof method. Stick with me here, and you’ll find that this recipe is my go-to for celebrations or cozy nights at home.
Why You’ll Love This Recipe
- Velvety Texture: The slow cooking and constant stirring ensure a silky pudding that sets perfectly in the crust.
- Rich Chocolate Flavor: Using bittersweet chocolate gives it that deep, satisfying cocoa taste without being overly sweet.
- Simple Ingredients: You’ll find most are pantry staples, making it easy to whip up anytime cravings hit.
- Customizable & Crowd-Pleasing: Whether for a holiday or an everyday dessert, it never fails to get rave reviews from family and friends.

Ingredients You’ll Need
Choosing quality ingredients really shines through in this chocolate pie recipe. I usually pick bittersweet chocolate with at least 60% cocoa – it adds a complexity that milk chocolate just can’t match. The cornstarch is my secret for getting that extra smooth and thick pudding texture, so don’t skip it!
- Sugar: Adds sweetness and helps balance the bitterness of the chocolate.
- Cornstarch: Acts as the thickening agent to give the filling that perfect custard-like consistency.
- Salt: Enhances all the flavors, especially the chocolate.
- Whole Milk: The creaminess here is key – I don’t recommend substituting low-fat options for the best results.
- Egg Yolks: Give richness and help set the filling firmly.
- Bittersweet Chocolate: Look for high quality and chop finely so it melts easily into the pudding.
- Vanilla Extract: Just a splash brings warmth and depth to the chocolate flavor.
- Butter: Adds that glossy, luscious finish and richness.
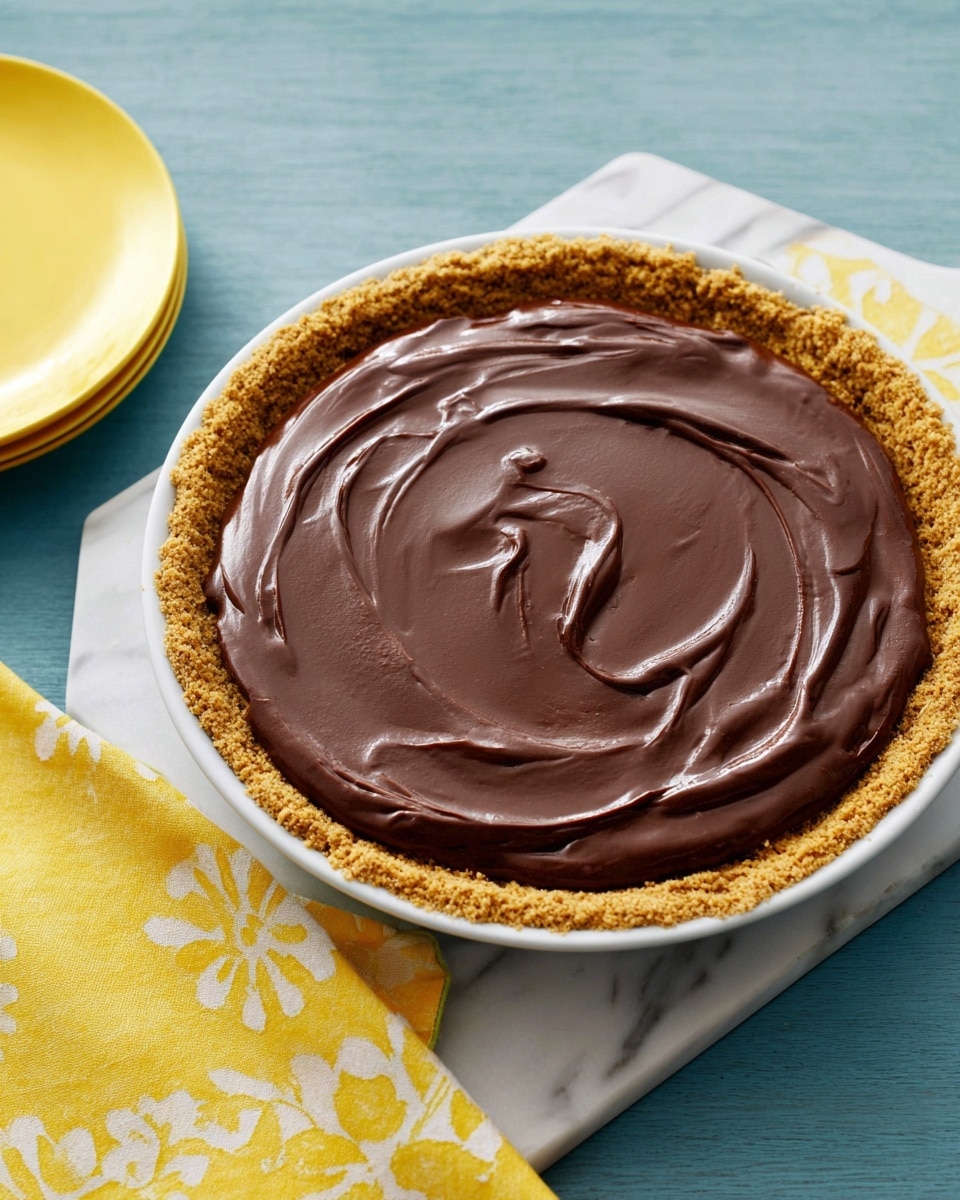
- Pie Crust: I love a homemade flaky crust, but a graham cracker or Oreo crust works wonders for a quick, delicious twist.
- Whipped Cream: To serve on top – it adds the perfect light contrast to the dense chocolate filling.
Variations
I love experimenting with this chocolate pie recipe, and I encourage you to tailor it to your taste! Whether adjusting the crust or adding mix-ins, you’ll find it fun to make it your own.
- Chocolate Type Swap: Using semi-sweet or milk chocolate creates a sweeter pie that’s great for kids or anyone with less intense chocolate cravings.
- Crust Choices: Trying a crunchy Oreo crust was a revelation for me—it adds an extra layer of chocolate goodness and texture.
- Flavor Boosts: A teaspoon of espresso powder mixed in the pudding elevates the chocolate flavor dramatically; trust me, give it a try.
- Dairy-free Version: I’ve used coconut milk instead of whole milk successfully, just make sure to adjust the thickness if needed.
How to Make Chocolate Pie Recipe
Step 1: Whisk Together the Base
Start by combining the sugar, cornstarch, and salt in a medium saucepan. Whisk them together dry so the cornstarch is fully incorporated—this helps avoid lumps in your pudding later. Then pour in the whole milk and add the egg yolks, whisking everything thoroughly to a smooth mixture. This is the moment patience starts—it might take a bit of stirring to keep the yolks from cooking too fast, so keep it steady on medium heat.
Step 2: Cook Until Silky and Thick
Keep stirring gently but constantly as the mixture heats. Around 6 to 8 minutes, you’ll notice it thickening—like a luscious pudding. The key is to catch it just as it begins to bubble; this is when you remove it from the heat. Don’t rush it or walk away, or you might end up with scrambled eggs instead of silky chocolate filling. When you see that perfect thickness, you’re golden.
Step 3: Stir in the Chocolate & Flavorings
Right off the heat, stir in the finely chopped bittersweet chocolate, vanilla extract, and butter. The residual heat melts everything into a glossy, velvety filling. If you use chunks too big, you might notice some pockets with less melted chocolate, so chopping finely really helps the texture here.
Step 4: Pour and Chill
Pour your pudding into the pre-baked pie crust—this is where the magic truly comes together. If you have any extra filling, spoon it into small cups for a little bonus treat. Then pop the pie uncovered into your fridge for at least 4 hours to set beautifully. I usually find overnight is even better because it gives that extra firm yet creamy bite everyone loves.
Step 5: Serve and Enjoy!
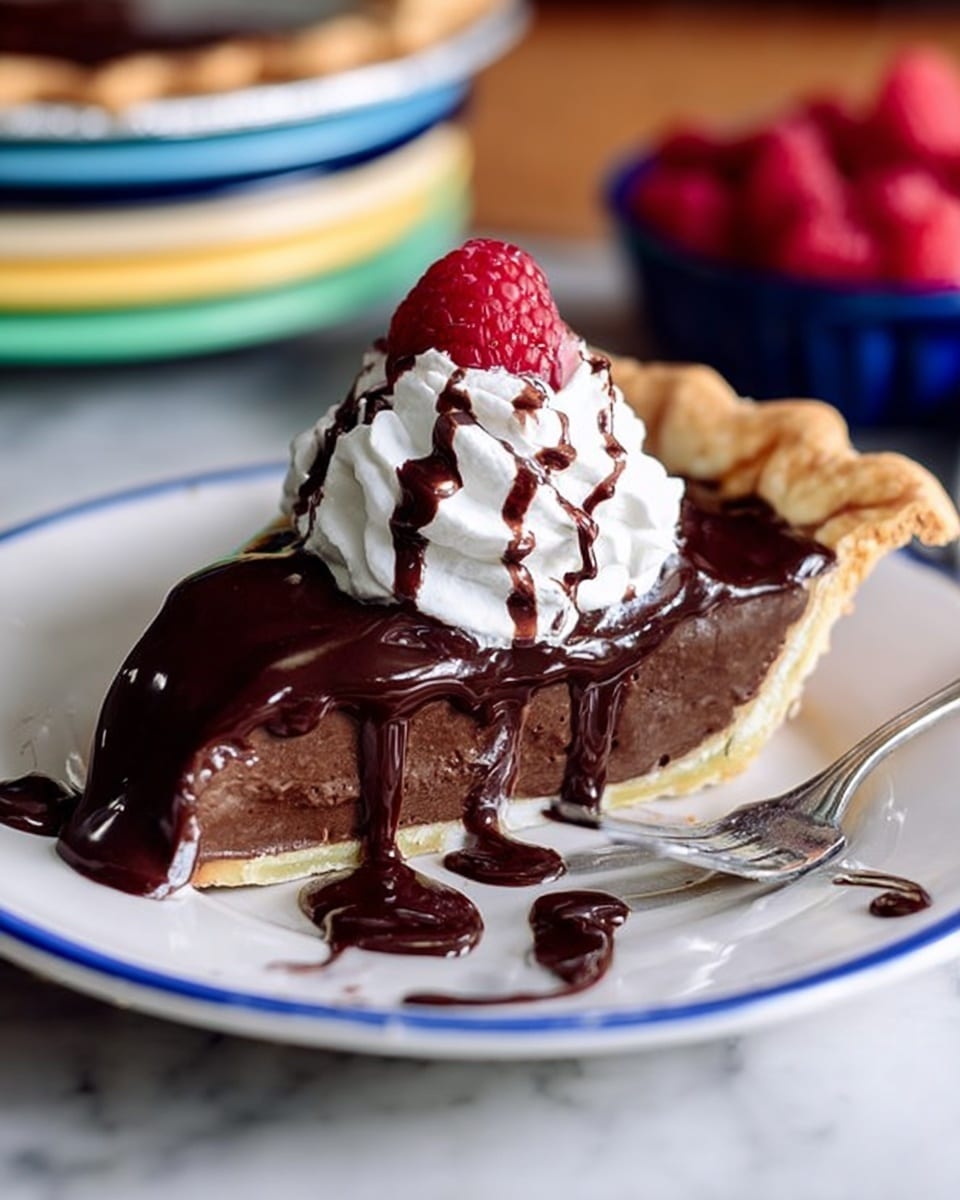
Slice into generous pieces and top with a cloud of whipped cream. The contrast between the rich chocolate and lightly sweetened cream is what makes this pie a family favorite every time.
Pro Tips for Making Chocolate Pie Recipe
- Consistent Stirring Matters: I learned the hard way that stirring constantly prevents lumps and a burnt bottom, so keep that whisk moving!
- Chop Chocolate Finely: This ensures it melts evenly and blends smoothly into the hot custard.
- Use Whole Milk: It really adds richness that low-fat milk can’t replicate, making the pie taste indulgent without adding heavy cream.
- Cool Uncovered: Let the pie chill uncovered at first to avoid condensation on top, which can water down the creamy texture.
How to Serve Chocolate Pie Recipe
Garnishes
I swear by a generous dollop of freshly whipped cream spiked with a little vanilla or even a dusting of cocoa powder. Sometimes I add toasted chopped nuts or a few fresh raspberries for a pop of color and a little tart contrast. These simple touches really elevate the presentation and taste.
Side Dishes
This chocolate pie pairs beautifully with a light fruit salad or even a scoop of vanilla ice cream for extra indulgence. I also enjoy serving it alongside coffee or a glass of milk—both help balance the richness of the pie.
Creative Ways to Present
For special occasions, I like to turn this into mini pies using tart shells, then top each with a swirl of whipped cream and chocolate shavings. It’s a crowd-pleaser and looks really impressive without extra fuss. You can also drizzle warm caramel or raspberry sauce for an eye-catching finish.
Make Ahead and Storage
Storing Leftovers
I usually cover the pie tightly with plastic wrap and keep it in the refrigerator. It stays fresh and just as delicious for up to 3 days. Just make sure it’s sealed well so it doesn’t pick up any fridge odors.
Freezing
I’ve frozen slices wrapped individually in foil and plastic wrap for up to a month. When thawed overnight in the fridge, they keep their creamy texture surprisingly well, though I don’t recommend freezing the whole pie because the crust gets soggy.
Reheating
This pie is best enjoyed cold, but if you prefer it a little warmer, I gently microwave individual slices for about 15 seconds. It softens the filling just enough without losing that luscious texture.
FAQs
-
Can I use a store-bought pie crust for this Chocolate Pie Recipe?
Absolutely! While I love a homemade flaky crust for texture and flavor, a good quality store-bought crust works wonderfully and saves time. Just be sure to bake it first before adding the chocolate filling to keep it crisp.
-
What kind of chocolate is best for this pie?
I recommend bittersweet chocolate with about 60-70% cocoa content. It provides rich chocolatey goodness without overwhelming sweetness. You can adjust to semi-sweet or milk chocolate if you prefer a sweeter pie, but the depth of flavor will differ.
-
How do I know when the pudding filling is thick enough?
You’ll want to see the mixture thicken to a consistency like thick pudding or custard—when it starts bubbling gently, that’s the cue to remove it from the heat. If you’re stirring and it coats the whisk without running off too fast, you’re right on track.
-
Can I make the pie ahead of time?
Yes! In fact, this pie benefits from chilling at least 4 hours or overnight to set fully. It makes it a great make-ahead dessert for parties or dinners.
Final Thoughts
This chocolate pie recipe has become a cherished favorite in my kitchen because it hits that perfect balance between creamy, rich, and not too sweet. It’s straightforward enough for even a beginner to tackle, yet impressive enough to serve guests. I’m confident you’ll enjoy making it as much as eating it—once you try it, this recipe will likely become your new dessert staple. So go ahead, grab your ingredients, and treat yourself to a slice of homemade chocolate heaven!
Print
Chocolate Pie Recipe
- Prep Time: 4 hr
- Cook Time: 10 min
- Total Time: 4 hr 10 min
- Yield: 10 servings
- Category: Dessert
- Method: Stovetop
- Cuisine: American
Description
This classic Chocolate Pie recipe features a rich, silky smooth chocolate pudding filling nestled in a crisp, baked pie crust. Made with bittersweet chocolate and a creamy custard base, it’s the perfect dessert to satisfy your chocolate cravings. Chilled to set and topped with whipped cream, this pie is an indulgent treat that’s easy to make and sure to impress.
Ingredients
Pie and Filling Ingredients
- 1 1/2 cups sugar
- 1/4 cup cornstarch
- 1/4 teaspoon salt
- 3 cups whole milk
- 4 egg yolks
- 6 1/2 ounces bittersweet chocolate, finely chopped
- 2 teaspoons vanilla extract
- 2 tablespoons butter
- 1 pie crust, baked and cooled (or use Oreo or graham cracker crust)
Topping
- Whipped cream, to serve
Instructions
- Prepare the Custard Base: In a medium saucepan, whisk together the sugar, cornstarch, and salt until combined. Gradually add the whole milk and egg yolks, whisking continuously to ensure a smooth mixture without lumps.
- Cook the Mixture: Place the saucepan over medium heat and stir constantly until the mixture thickens and just starts to boil. This usually takes 6 to 8 minutes but watch closely to prevent burning. When it thickens to a pudding-like consistency and bubbles appear, immediately remove from heat.
- Add Chocolate and Flavorings: Stir in the finely chopped bittersweet chocolate, vanilla extract, and butter. Mix thoroughly until the chocolate and butter are fully melted and incorporated, resulting in a glossy and smooth pudding filling.
- Fill the Pie Crust: Pour the warm chocolate pudding into the prepared baked pie crust. If there’s any extra pudding, spoon it into small dessert dishes for serving.
- Chill the Pie: Place the pie uncovered in the refrigerator and chill for at least 4 hours to allow the filling to set properly.
- Serve: Once chilled and set, slice the pie and serve each portion with a generous dollop of whipped cream.
Notes
- This chocolate pie is a timeless dessert, loved for its rich, creamy filling and buttery crust.
- Using bittersweet chocolate balances the sweetness and adds depth of flavor.
- The pie crust can be homemade or store-bought; alternatively, use an Oreo or graham cracker crust for a different texture.
- Make sure to chill the pie long enough for the pudding to set; overnight chilling is ideal.
- Whipped cream topping adds a light, airy contrast to the dense, chocolaty filling.
Nutrition
- Serving Size: 1 slice (1/10 of pie)
- Calories: 403
- Sugar: 44 g
- Sodium: 189 mg
- Fat: 17 g
- Saturated Fat: 9 g
- Unsaturated Fat: 7.5 g
- Trans Fat: 0 g
- Carbohydrates: 59 g
- Fiber: 2 g
- Protein: 5 g
- Cholesterol: 72 mg


