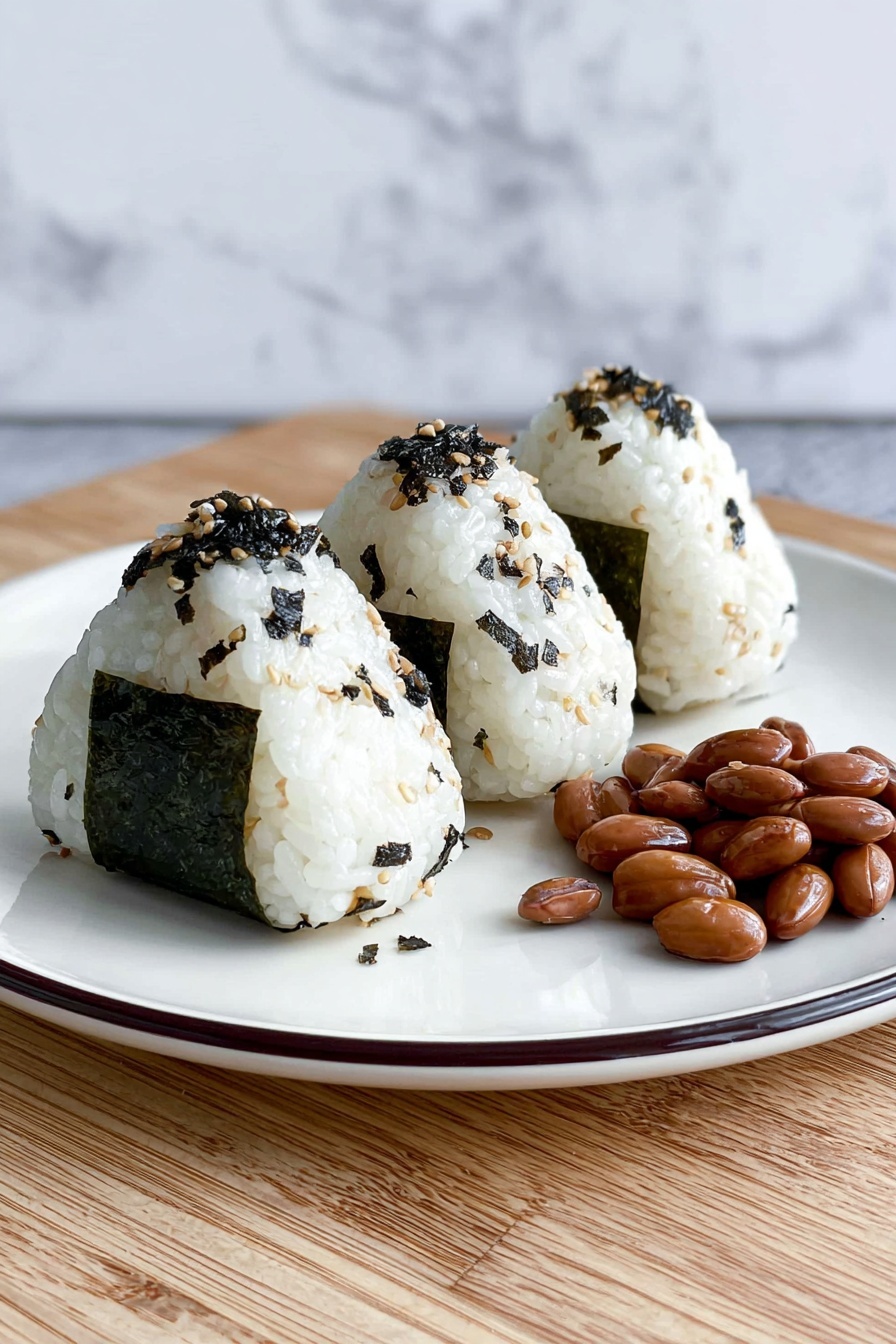
If you’re craving a delicious handheld snack that’s packed with flavor and perfect for lunch or a picnic, I’ve got you covered with my fantastic Chicken Teriyaki Onigiri Recipe. These Japanese rice balls loaded with juicy teriyaki chicken are so comforting and easy to make at home, I promise once you try, you’ll want to make them again and again.
Why You’ll Love This Recipe
- Simple yet flavor-packed: You only need a handful of ingredients to get that perfect balance of savory and sweet teriyaki chicken inside tender rice.
- Great for meal prep: Make a batch ahead and enjoy these onigiri throughout the week — they hold up nicely even after refrigeration.
- Fun to customize: You can add furikake, swap the chicken for other proteins, or even make it vegetarian if you want.
- Perfect hand-held snack: These onigiri are great anytime you want a filling bite that’s easy to eat on the go.

Ingredients You’ll Need
To get that classic Chicken Teriyaki Onigiri taste, I recommend fresh ingredients for the best texture and flavor. The juicy, marinated chicken pairs so well with the slightly sticky sushi rice, and little touches like garlic and nori make all the difference.
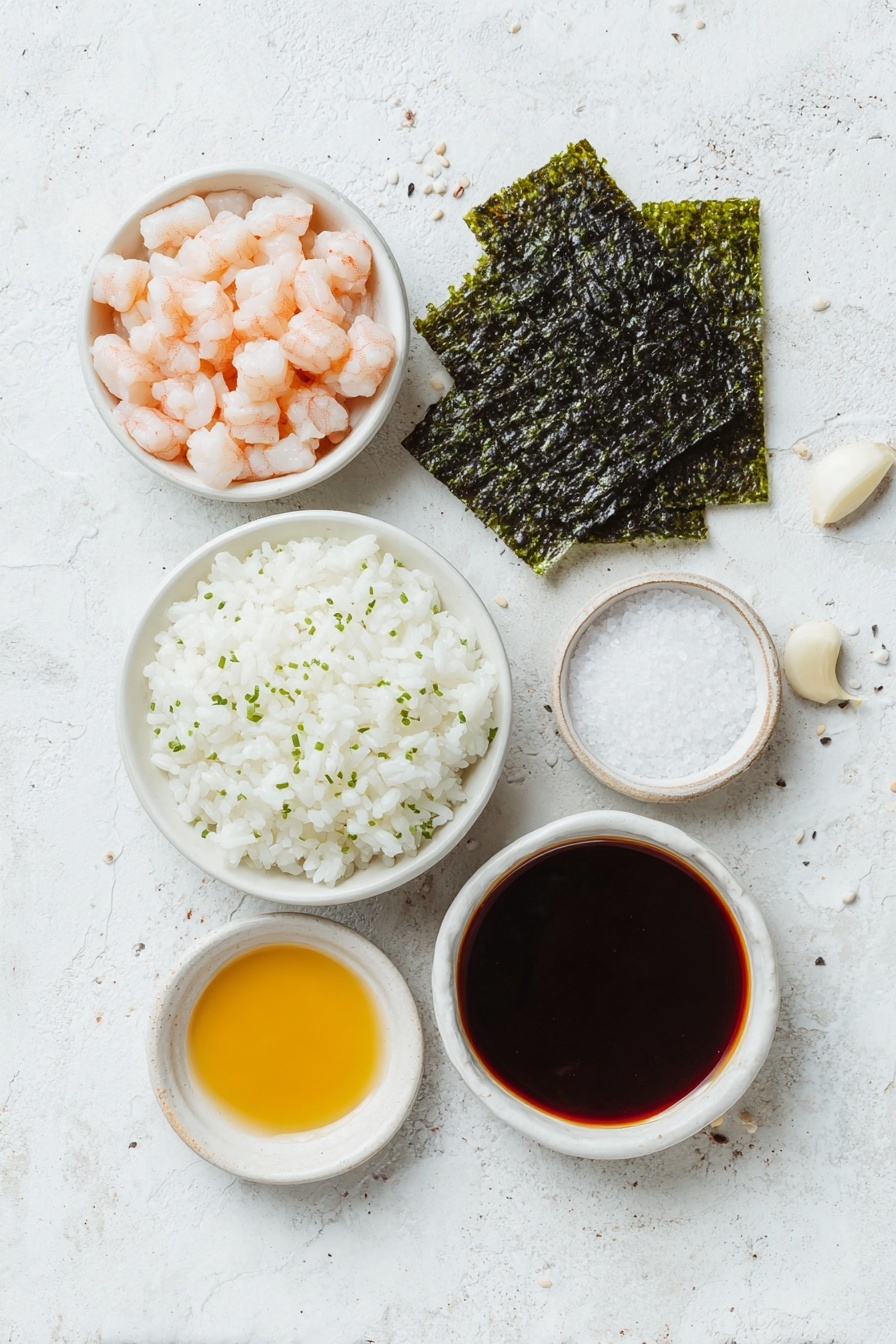
- Sushi rice: This short-grain rice is key for the perfect sticky texture that holds the onigiri shape well.
- Fine salt: Make sure to use fine salt so it mixes evenly and seasons the rice delicately.
- Furikake (optional): This Japanese rice seasoning adds extra umami and color, but it’s optional if you don’t have it handy.
- Boneless skinless chicken meat: I like using chicken drumsticks because they’re juicy, but chicken breast works too if you prefer leaner meat.
- Soy sauce: For both the marinade and teriyaki sauce, soy sauce gives that signature salty-sweet depth.
- Sake or water: The sake tenderizes the chicken while adding subtle flavor, but water is a fine substitute.
- Baking soda: This little trick makes chicken extra tender — I discovered this when trying to keep chicken juicy during quick pan-frying.
- Cornstarch: Helps the marinade cling to the chicken and thickens the teriyaki glaze nicely.
- Mirin: Sweet rice wine that balances the saltiness of soy sauce in the teriyaki glaze.
- Brown sugar: Gives the teriyaki its caramelized sweetness when cooked down.
- Oil: For cooking the chicken and garlic without sticking.
- Minced garlic: Adds a punch of flavor in the teriyaki sauce as it thickens.
- Nori sheet: Cut into small strips, it wraps the onigiri for a lovely salty finish and easier handling.
Variations
I love how versatile this Chicken Teriyaki Onigiri Recipe is—depending on what you have on hand or your dietary preferences, you can easily tweak the filling or seasonings. I’m all for making a recipe my own, and you should feel free to do the same!
- Swap protein: Try using salmon flakes or cooked shrimp for a seafood spin; your family might go crazy for these tasty tweaks.
- Vegetarian option: Replace chicken with grilled mushrooms or tofu marinated in teriyaki sauce for a satisfying plant-based onigiri.
- Add veggies: Stir in finely chopped scallions or pickled veggies to the rice or filling for a fresh crunch.
- Spicy kick: Sprinkle a little togarashi or mix in sriracha with the teriyaki sauce if you like some heat.
How to Make Chicken Teriyaki Onigiri Recipe
Step 1: Prep Your Flavored Rice
After cooking your sushi rice — and trust me, taking the time to rinse and cook it properly really pays off — mix in half a teaspoon of fine salt and two tablespoons of furikake seasoning if you have it. I used to sprinkle furikake only on top after shaping, but I discovered that mixing it directly into the rice gives every bite a little hit of umami.
Step 2: Marinate and Cook the Chicken
Cut your chicken into small, bite-sized pieces—this ensures even cooking and perfect little pockets inside your onigiri. Toss the chicken with soy sauce, sake (or water), baking soda, and cornstarch, then refrigerate for 30 minutes. That baking soda trick is from my early kitchen experiments; it makes the chicken incredibly tender and juicy. When it’s ready, heat a tablespoon of oil in a nonstick pan over medium-high heat and cook the chicken pieces until no longer pink, about 2-3 minutes.
Step 3: Make the Teriyaki Glaze
Lower the heat to medium, add minced garlic, and cook just 30 seconds until fragrant. Pour in the soy sauce, mirin, and brown sugar mixture. Let it simmer gently while stirring until it thickens into a shiny glaze that beautifully coats each chicken piece. This is my favorite part, when the kitchen starts smelling like a little slice of Japan.
Step 4: Shape Your Onigiri
Wet your hands with water to keep the rice from sticking, then scoop about ⅓ cup of rice into your palm. Make a small well in the center and add about a tablespoon of that glossy chicken filling. Cover with another ⅓ cup of rice and gently shape everything into a tight triangle. Don’t worry if it’s not perfect at first—shaping onigiri is a skill, and you’ll get better with practice! Finally, wrap each triangle with a small strip of nori for that authentic look and taste.
Pro Tips for Making Chicken Teriyaki Onigiri Recipe
- Keep your hands wet: This simple trick prevents rice from sticking, making shaping easier and keeping your hands clean.
- Marinate longer if possible: Even 30 minutes works great, but if you can let the chicken soak overnight, the flavors become even deeper.
- Don’t overfill: Use just enough chicken to have a juicy center without risking the rice breaking apart.
- Use plastic wrap: For easier cleanup and tighter shaping, wrap the rice and filling in plastic wrap and mold into triangles before unwrapping and adding nori.
How to Serve Chicken Teriyaki Onigiri Recipe

Garnishes
I love adding a sprinkle of extra furikake on top if I didn’t mix it into the rice, or a few sesame seeds for that nutty punch. Sometimes I also add a small smear of Japanese mayo inside for richness—trust me, it’s a game changer!
Side Dishes
While these Chicken Teriyaki Onigiri stand well on their own, I often pair them with a simple cucumber salad, edamame, or a bowl of miso soup to round out the meal. It’s like bringing a little bento box vibe right to your kitchen table.
Creative Ways to Present
For gathering or kids’ lunches, I arrange the onigiri in a bamboo steamer lined with lettuce leaves for a cute and eco-friendly touch. You can also cut nori into fun shapes like hearts or stars to wrap around your rice balls, making them extra festive for parties or picnics.
Make Ahead and Storage
Storing Leftovers
I store leftover onigiri in an airtight container in the fridge for up to 2 days. I found that wrapping each onigiri in plastic wrap before storing helps them retain moisture and prevents drying out. This way, they stay soft and tasty for your next snack attack.
Freezing
Freezing works well too if you want to prep in bulk. Wrap each onigiri tightly in plastic wrap and pop them in a freezer-safe bag. When you’re ready, thaw overnight in the fridge, then gently reheat. They might be a bit less crisp with the nori, but the filling stays delicious.
Reheating
For warming leftovers, I recommend microwaving wrapped in a damp paper towel to keep the rice moist. About 30-40 seconds usually does the trick. Avoid overheating or the rice can harden, and it’s best to add fresh nori strips after reheating to keep them crisp.
FAQs
-
Can I use leftover cooked chicken for this recipe?
Absolutely! If you have leftover cooked chicken, just shred or chop it finely and toss it in the teriyaki sauce to coat well. This shortcut saves time and still gives you that wonderful flavor inside your onigiri.
-
What’s the best rice to use for onigiri?
Sushi rice or any short-grain Japanese rice is best because it’s sticky enough to hold the shape. Avoid long-grain varieties like basmati or jasmine, as they don’t stick together and will make shaping difficult.
-
Can I make these gluten-free?
Yes! Just substitute the regular soy sauce with gluten-free tamari or coconut aminos, and double-check other ingredients like mirin for gluten content. The recipe will still be delicious without the gluten.
-
How do I prevent the rice balls from drying out?
Keep them wrapped tightly in plastic wrap or store in an airtight container. You can also place a damp paper towel over them when storing in the fridge to maintain moisture.
-
Is it necessary to use nori?
Nori adds a lovely flavor and helps hold the onigiri, but if you’re not a fan or don’t have any, you can absolutely skip it. The onigiri will still be yummy and portable.
Final Thoughts
This Chicken Teriyaki Onigiri Recipe has really become one of my kitchen staples because it’s practical, delicious, and brings a little joy with every bite. Whether you’re packing lunch for work, making a quick dinner, or surprising friends at a picnic, these rice balls are sure to impress. Give this recipe a try—you’ll find it’s easier than you think and so much fun to share!
Print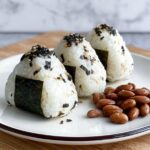
Chicken Teriyaki Onigiri Recipe
- Prep Time: 35 minutes
- Cook Time: 10 minutes
- Total Time: 45 minutes
- Yield: 4 servings
- Category: Snack
- Method: Stovetop
- Cuisine: Japanese
- Diet: Halal
Description
Delicious and savory Chicken Onigiri, a Japanese rice ball filled with flavorful teriyaki chicken and seasoned with furikake. This recipe combines tender marinated chicken glazed in a homemade teriyaki sauce, wrapped in perfectly shaped sushi rice and nori seaweed strips, making it a perfect snack or meal on the go.
Ingredients
Rice
- 4 cups cooked sushi rice
- 1/2 teaspoon fine salt
- 2 tablespoons furikake (optional)
Chicken Marinade
- 1/2 pound boneless skinless chicken meat (drumsticks preferred)
- 2 teaspoons soy sauce
- 1 tablespoon sake (or water)
- 1/4 teaspoon baking soda
- 1 teaspoon cornstarch
Teriyaki Sauce
- 1 1/2 tablespoons soy sauce
- 1 tablespoon mirin
- 1 tablespoon firmly packed brown sugar
The Rest
- 1 tablespoon oil
- 1 tablespoon minced garlic
- 1 sheet nori (cut into small rectangles)
Instructions
- Prepare the Rice: After cooking the sushi rice, mix it with ½ teaspoon fine salt and 2 tablespoons furikake. Although furikake can be sprinkled after shaping, adding it directly into the rice ensures even flavor throughout.
- Marinate the Chicken: Cut the chicken into small pieces and place them in a bowl with soy sauce, sake (or water), baking soda, and cornstarch. Mix thoroughly to combine and refrigerate for 30 minutes to enhance tenderness and flavor.
- Make Teriyaki Sauce: In a small bowl, whisk together soy sauce, mirin, and firmly packed brown sugar until the sugar dissolves, creating a smooth teriyaki sauce.
- Cook the Chicken: Heat 1 tablespoon oil in a large nonstick pan over medium-high heat. Add the marinated chicken pieces and cook for 2-3 minutes until they are cooked through and lightly browned.
- Glaze with Teriyaki Sauce: Reduce the heat to medium and add minced garlic to the pan. Sauté for 30 seconds until aromatic. Pour in the prepared teriyaki sauce mixture and cook, stirring occasionally, until the sauce thickens into a glossy glaze. Remove the pan from heat.
- Shape the Onigiri: Wet your hands with water to prevent sticking. Scoop ⅓ cup of seasoned rice into your palm, create a small well in the center, and place 1 tablespoon of the glazed chicken filling inside. Cover with another ⅓ cup of rice and gently but firmly shape the mixture into a triangle.
- Wrap with Nori: Take a small rectangle strip of nori and wrap it around the formed rice ball to hold it together and add an extra layer of flavor and texture.
Notes
- Use fine salt to ensure even seasoning of the rice without grainy texture.
- Marinating the chicken with baking soda helps tenderize the meat for juicy results.
- If you don’t have mirin, you can substitute with additional sake and a pinch of sugar.
- Keep your hands wet while shaping the onigiri to prevent rice from sticking.
- Furikake is optional but adds an authentic Japanese flavor to the rice.
Nutrition
- Serving Size: 1 onigiri (approx. 150g)
- Calories: 280 kcal
- Sugar: 5 g
- Sodium: 550 mg
- Fat: 6 g
- Saturated Fat: 1 g
- Unsaturated Fat: 4 g
- Trans Fat: 0 g
- Carbohydrates: 40 g
- Fiber: 2 g
- Protein: 15 g
- Cholesterol: 45 mg

