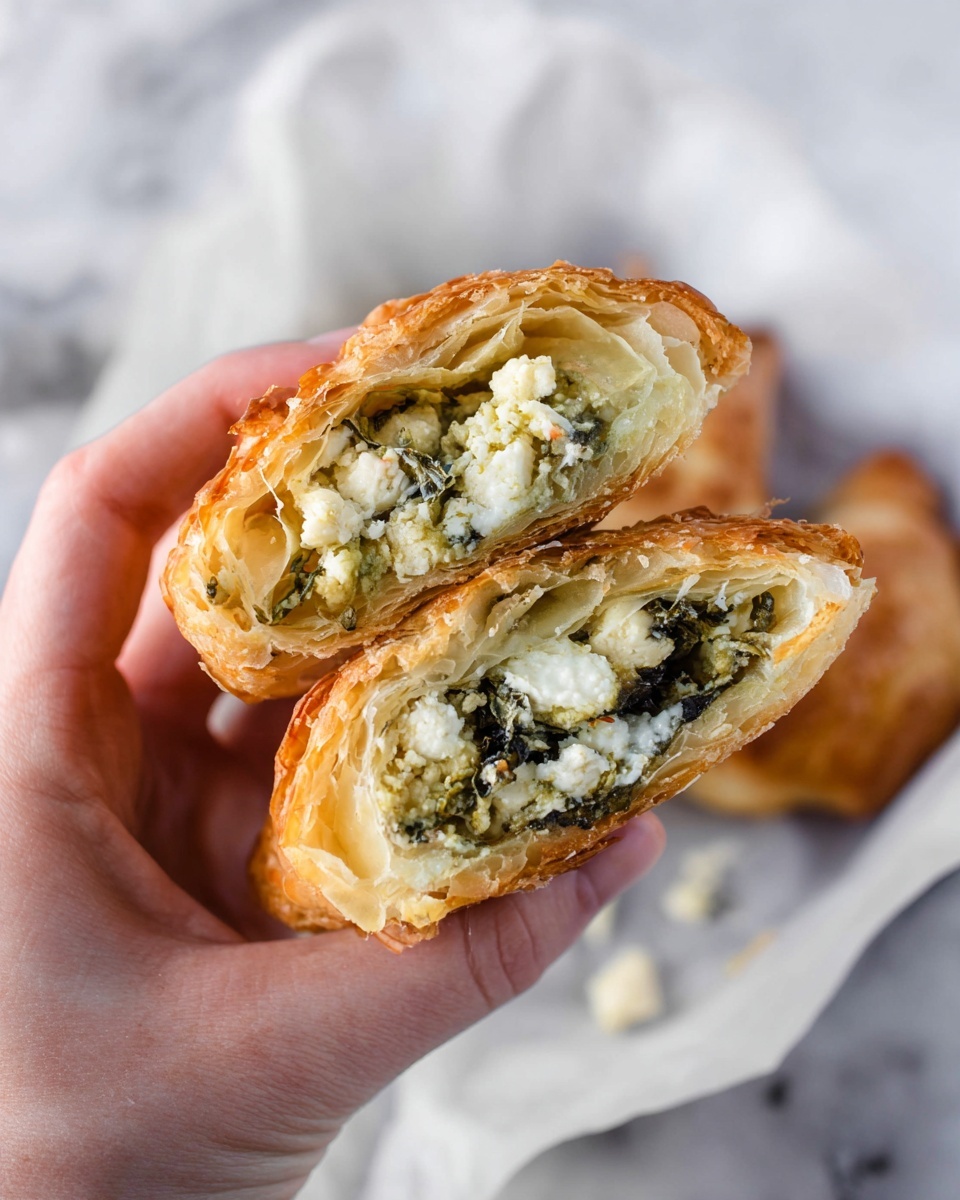
If you’re craving a snack that’s both comforting and a little bit fancy, you’ve got to try this Cheesy Chicken Hand Pies Recipe. These little golden pockets stuffed with tender chicken, creamy ricotta, tangy feta, and fresh spinach are seriously addictive. I love how easily they come together and, trust me, once you try making them, they’ll become your go-to for an impressive yet effortless treat!
Why You’ll Love This Recipe
- Super Quick Prep: You can whip these up in under 30 minutes, perfect for busy days.
- Freezer Friendly: Make a batch ahead and freeze for easy grab-and-bake meals later on.
- Flavor-Packed Filling: The combo of ricotta, feta, chicken, and spinach is creamy, tangy, and fresh all at once.
- Kid-Approved: My family goes crazy for these, and they’re perfect for lunchboxes or snacks.

Ingredients You’ll Need
These ingredients come together in a way that feels both indulgent and wholesome. Using puff pastry keeps the process simple while layering in creamy cheeses and fresh spinach adds a great balance. Here’s a quick rundown of the must-haves so you can shop smart.
- Cooked Chicken: I like to use leftover roast chicken — it’s flavorful and tender, but rotisserie chicken works great too.
- Fresh Spinach: It adds a nice pop of color and freshness; no need to cook it beforehand since it wilts beautifully inside the pies.
- Ricotta Cheese: This keeps the filling creamy without being too dense, lending a mild sweetness.
- Feta Cheese: Adds a salty tang that balances the mild ricotta — I always go for block feta crumbled by hand for better texture.
- Puff Pastry Sheets: Look for high-quality frozen puff pastry in the freezer aisle, then thaw just enough to work with.
- Egg: For brushing on top to get those pies beautifully golden and shiny.
Variations
I love that this Cheesy Chicken Hand Pies Recipe is a blank canvas — you can easily switch things up depending on what’s in your fridge or your mood that day. It’s always fun to make it your own, and I encourage you to try these twists.
- Spinach Swap: I once replaced spinach with kale for a heartier texture, and it made for such a satisfying bite.
- Cheese Mix: Sometimes, I swap out feta for goat cheese for a slightly tangier, creamier filling.
- Herbs: Adding fresh thyme or basil brings a fragrant lift — just sprinkle a little in the filling before sealing.
- Veggie Boost: Roasted red peppers or caramelized onions make great add-ins when you want to make these hand pies even more special.
How to Make Cheesy Chicken Hand Pies Recipe
Step 1: Prepare the Filling Mix
Grab a large bowl and toss together your cooked, chopped chicken, roughly chopped spinach, ricotta cheese, and crumbled feta. I like to gently fold the ingredients—not overmix—to keep a nice texture where you can tell all the components apart. This is the flavor-packed heart of your pies, so don’t be shy with the cheeses!
Step 2: Cut and Fill the Puff Pastry
Unroll one sheet of puff pastry on a lightly floured surface and cut it into four equal squares. Spoon a generous amount of the filling into the center of each square—don’t overfill, though, or it can get messy when sealing. You’ll want enough to get a deliciously full bite every time without the filling leaking out.
Step 3: Fold and Seal the Hand Pies
Fold each square over diagonally to form a triangle. This is where I discovered that brushing the edges lightly with a bit of water helps seal them tight, preventing any filling from escaping in the oven. Then press the edges firmly with a fork—this crimping also adds a cute, rustic look.
Step 4: Brush with Egg Wash and Bake
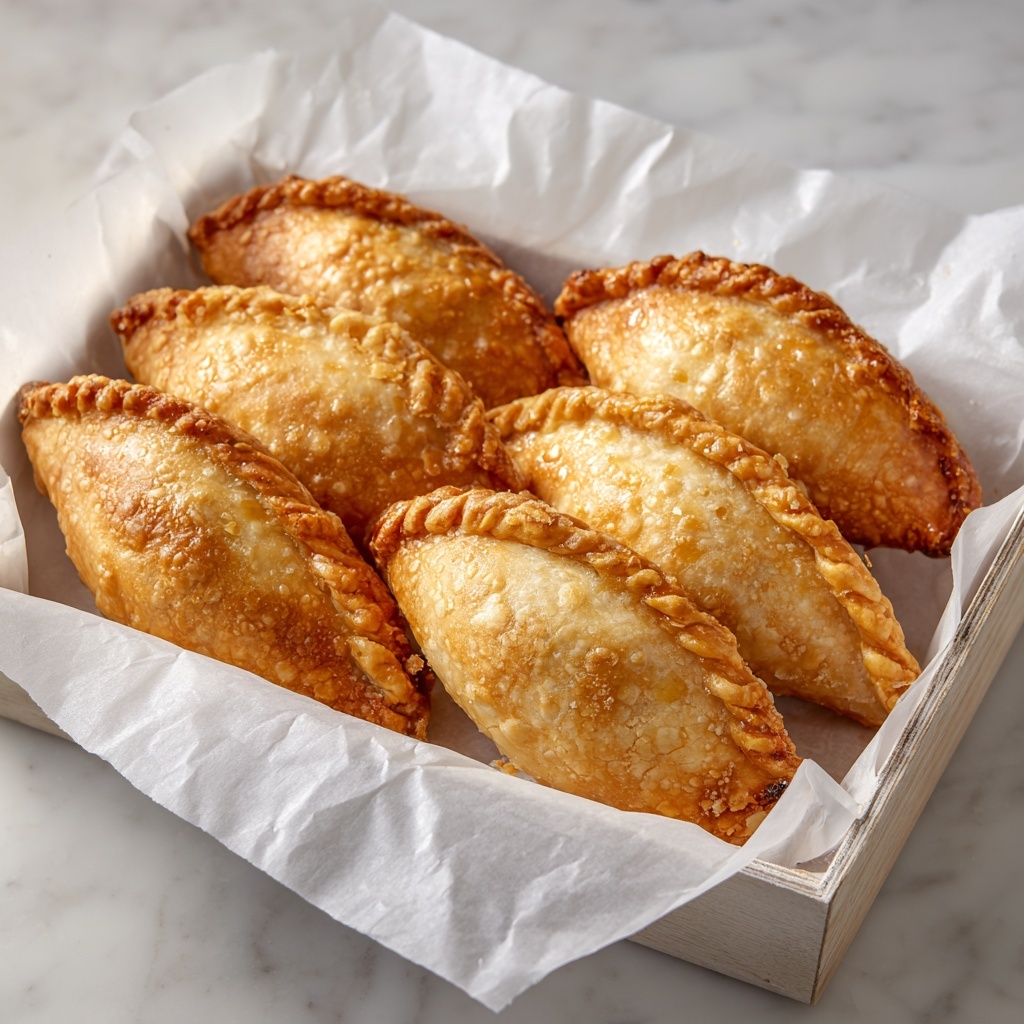
Whisk your egg and use a pastry brush to coat the top of each hand pie. This simple step gives you an irresistible golden shine and crisp texture once baked. Arrange them on a parchment-lined baking sheet and pop them into a preheated oven at 400°F (200°C) for about 15 minutes until puffed up and beautifully golden.
Pro Tips for Making Cheesy Chicken Hand Pies Recipe
- Don’t Overfill: A little extra filling is tempting, but too much makes sealing tricky and the pies might burst in the oven.
- Chill Before Baking: If you have time, pop the assembled pies in the fridge for 15 minutes — this helps the pastry hold its shape better.
- Use a Fork for Sealing: Firmly pressing the edges with a fork creates both a tight seal and a charming decorative edge you can be proud of.
- Egg Wash is Your Friend: It’s the key to those pies looking like they came from a bakery — don’t skip it!
How to Serve Cheesy Chicken Hand Pies Recipe
Garnishes
I usually sprinkle freshly chopped parsley or a bit of finely grated Parmesan right after baking; it adds that little something extra. For a subtle kick, a light drizzle of garlic aioli on the side is fantastic — it’s become my family’s favorite dipping sauce with these hand pies.
Side Dishes
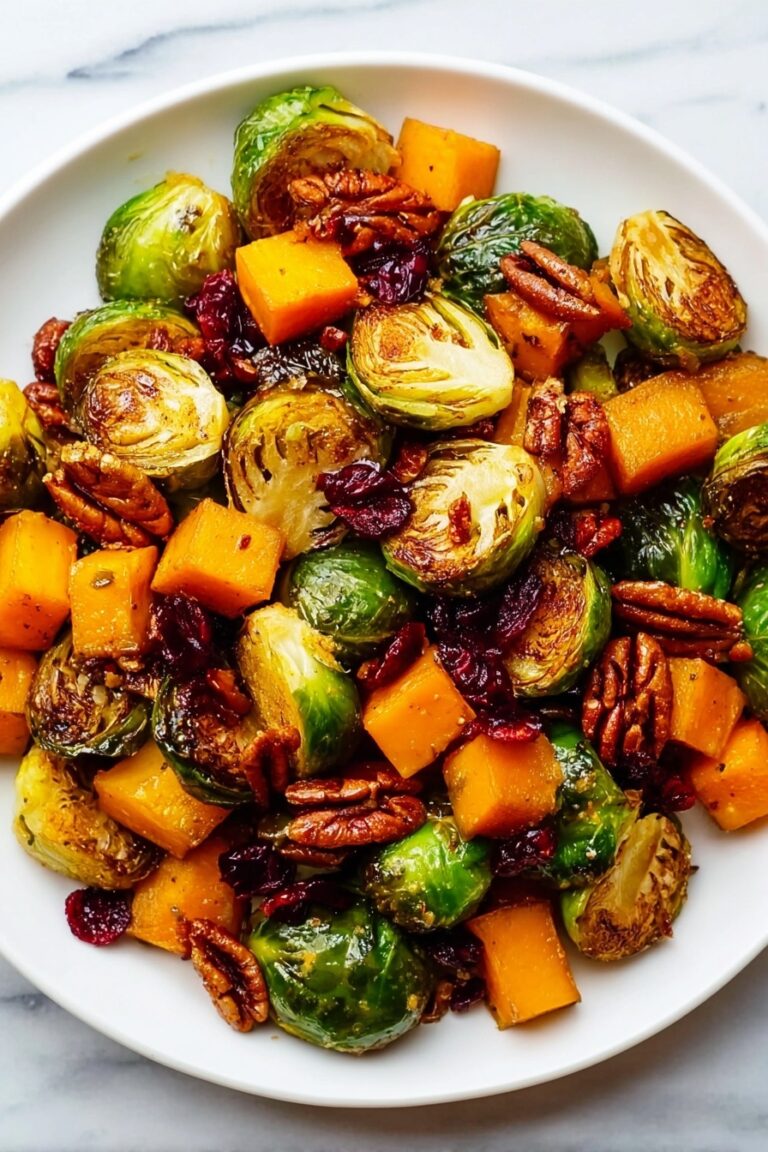
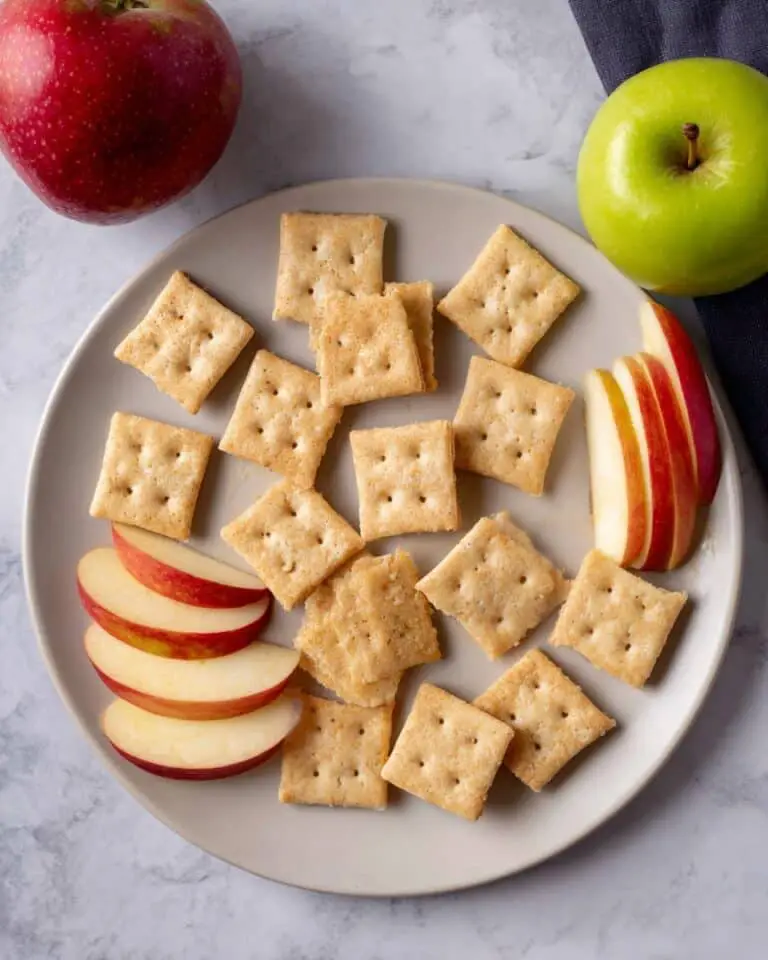
When serving these pies, a crisp green salad or a bright tomato salad balances the richness perfectly. I also love pairing them with a simple cucumber yogurt sauce or some quick pickled veggies to cut through the cheese.
Creative Ways to Present
For parties, I’ve arranged these hand pies on a rustic wooden board with little bowls of condiments like pesto, spicy mustard, and even a honey drizzle. They always become the star of the snack table! Wrapping them individually in parchment paper makes grabbing a warm pie effortless and mess-free, perfect for casual gatherings.
Make Ahead and Storage
Storing Leftovers
I keep leftovers in an airtight container in the fridge and they stay fresh for about 3 days. Reheating in the oven (rather than microwave) helps keep that puff pastry flaky instead of soggy—trust me, it makes all the difference.
Freezing
One of the best things about this Cheesy Chicken Hand Pies Recipe is how well it freezes. I prepare a batch, bake half, and freeze the rest raw on a tray before transferring them to a freezer bag. Then when I’m ready, I bake them frozen—just add a few extra minutes to baking time and you have a fresh-tasting snack anytime.
Reheating
To reheat, I pop them into a 350°F oven for about 10 minutes until warmed through and crisp again. It’s the best way to enjoy that flaky texture and melty cheese like they’re freshly baked.
FAQs
-
Can I use store-bought rotisserie chicken for this recipe?
Absolutely! Using rotisserie chicken is a fantastic shortcut that adds great flavor and saves time. Just make sure to chop it into bite-sized pieces to make the filling easy to scoop and eat.
-
Is it necessary to use both ricotta and feta cheeses?
While using both cheeses balances creaminess and tang, you can customize the filling by using just one type or mixing in other cheeses like goat cheese or mozzarella, depending on what you have on hand.
-
Can I make these hand pies gluten-free?
Definitely! Substitute the puff pastry with a gluten-free version available at many specialty stores or make your own gluten-free dough to keep the pies accessible for all diets.
-
What’s the best way to prevent the pies from leaking during baking?
Don’t overstuff the pies, and make sure to seal the edges well with water and crimp firmly using a fork. Also, chilling the pies before baking helps the pastry hold together better.
-
Can these be cooked in an air fryer?
Yes! Air frying is a great alternative to baking. Cook at 375°F for about 12-15 minutes, checking for a golden, puffed crust, and rotate halfway to ensure even cooking.
Final Thoughts
This Cheesy Chicken Hand Pies Recipe is one of those treasures I keep coming back to. It’s straightforward, versatile, and always hits the spot whether for a quick snack, lunch, or party appetizer. I remember the first time I brought these to a family gathering — they disappeared faster than I expected! I really hope you’ll enjoy making and sharing these as much as I do. Don’t forget to keep a batch in your freezer for those “I need something yummy now” moments.
Print
Cheesy Chicken Hand Pies Recipe
- Prep Time: 8 minutes
- Cook Time: 15 minutes
- Total Time: 23 minutes
- Yield: 8 hand pies
- Category: Snack
- Method: Baking
- Cuisine: American
Description
Delicious freezer-friendly savoury chicken and cheese hand pies made with flaky puff pastry, packed with a flavorful filling of cooked chicken, spinach, ricotta, and feta cheese. Perfect for a quick breakfast, snack, or light meal, these hand pies are easy to prepare and can be cooked in either the oven or an air fryer for convenience.
Ingredients
Filling
- 1.5 cups cooked chicken, chopped into small pieces
- 1 cup spinach, chopped roughly
- 1/2 cup ricotta cheese
- 1/2 cup feta cheese
Pastry and Egg Wash
- 2 sheets puff pastry (10×10 inches each)
- 1 egg, beaten (for egg wash)
Instructions
- Prepare the filling: In a large bowl, combine the cooked chicken, chopped spinach, ricotta cheese, and feta cheese. Mix well until all ingredients are evenly incorporated.
- Cut the pastry: Unroll one sheet of puff pastry on a clean surface and cut it into 4 equal squares. Repeat for the second sheet so you have 8 squares in total.
- Fill and shape the hand pies: Place a portion of the chicken and cheese filling onto the center of each pastry square. Fold the pastry over the filling diagonally to form a triangle. Carefully seal the edges by pressing down firmly with a fork or your fingers to prevent the filling from leaking out during baking.
- Apply egg wash: Brush the top surface of each hand pie generously with the beaten egg. This will give the pastry a beautiful golden-brown finish once baked.
- Cook the hand pies: For oven baking, preheat the oven to 375°F (190°C) and bake the pies on a parchment-lined baking sheet for 15 minutes or until the pastry is puffed and golden brown. For air frying, place the hand pies in a single layer in the air fryer basket and cook at 350°F (175°C) for 12-15 minutes until crisp and golden.
Notes
- These hand pies are freezer friendly; freeze uncooked and bake directly from frozen, adding a few extra minutes to the cooking time.
- You can use either an oven or an air fryer to cook these hand pies depending on your preference and available equipment.
- Ensure the pastry edges are sealed well to avoid filling leakage while cooking.
- For extra flavor, you can add herbs like thyme or parsley to the filling mixture.
- Let the pies cool slightly before eating as the filling will be very hot.
Nutrition
- Serving Size: 1 hand pie
- Calories: 220
- Sugar: 1 g
- Sodium: 290 mg
- Fat: 14 g
- Saturated Fat: 6 g
- Unsaturated Fat: 7 g
- Trans Fat: 0 g
- Carbohydrates: 15 g
- Fiber: 1 g
- Protein: 12 g
- Cholesterol: 50 mg


