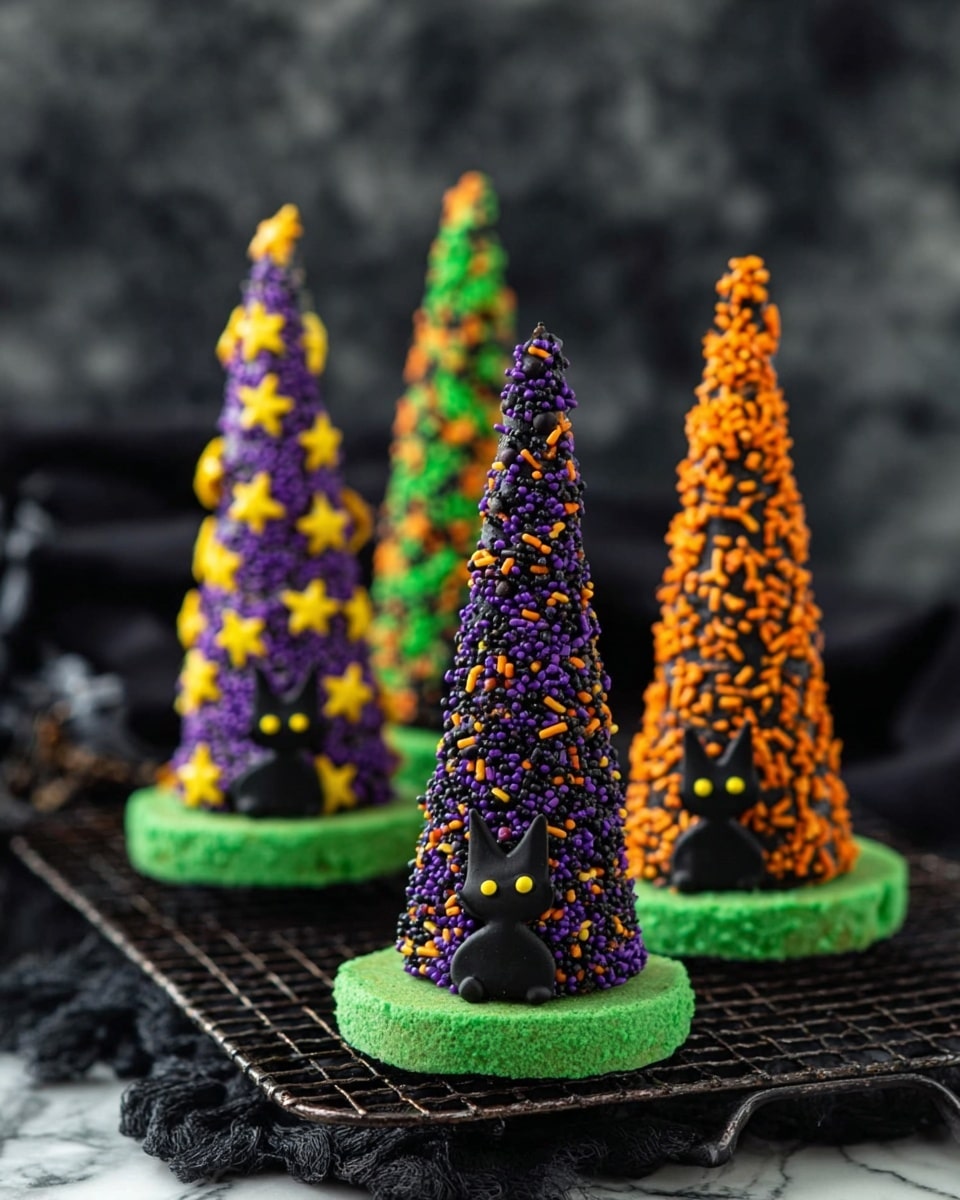
If you’re looking for a Halloween treat that’s as fun to make as it is to eat, you’ve got to try this Candy-filled Witch Hats Recipe. I absolutely love how these witch hats come together — crisp waffle cones turned into little magic hats filled with candy surprises inside. When I first tried this recipe, it was a hit with my family and friends, and I promise you’ll find that everyone adores them at any spooky gathering!
Why You’ll Love This Recipe
- Easy to Make: No fancy baking skills required; perfect for getting the kids involved.
- Impressive Presentation: Looks adorable on any Halloween table, bringing festive cheer instantly.
- Customizable Candy Fillings: You can fill them with any Halloween goodies your crowd loves.
- Perfect for Parties: Makes a fun grab-and-go snack that’s always a crowd-pleaser.

Ingredients You’ll Need
For this Candy-filled Witch Hats Recipe, using simple yet festive ingredients really brings the magic together. The crunchy waffle cones paired with smooth chocolate and playful decorations create a treat everyone loves. Here’s what you’ll want to gather before you start:
- Waffle ice cream cones: The perfect base for the witch hat — sturdy and deliciously textured.
- Chocolate melting wafers: Melting easily for smooth coverage, these make the hats look polished and hold everything in place.
- Chocolate cookies: These form the brim of the witch’s hat and add extra chocolatey goodness.
- Green sour belts: A fun, tangy twist to decorate the hats’ edges and add color.
- Black cat icing decorations: These add character and are a cute Halloween touch—but optional if you want to keep it simple.
- Halloween sprinkles: To add sparkle and festive vibes.
- Candy: Your favorite Halloween candies to fill inside — think mini chocolates, gummies, or whatever you love!
Variations
I love making the Candy-filled Witch Hats Recipe my own by swapping up the decorations and candy fillings depending on the occasion or who I’m making them for. You can get really creative here, and personally, I think it’s more fun when you do!
- Chocolate Types: I’ve tried using white chocolate wafers for a snowy witch’s hat, which adds a totally different vibe and taste that my family loved.
- Dietary Swaps: Going gluten-free? Use gluten-free waffle cones and cookies to keep the indulgence accessible to all guests.
- Candy Alternatives: Instead of traditional candy, sometimes I use nuts, dried fruit, or mini marshmallows for a less sweet option.
- Seasonal Twists: Change sprinkles and icing for different holidays—think red and green for Christmas witch hats or pastels for a fun birthday party twist.
How to Make Candy-filled Witch Hats Recipe
Step 1: Melt the Chocolate and Start Coating
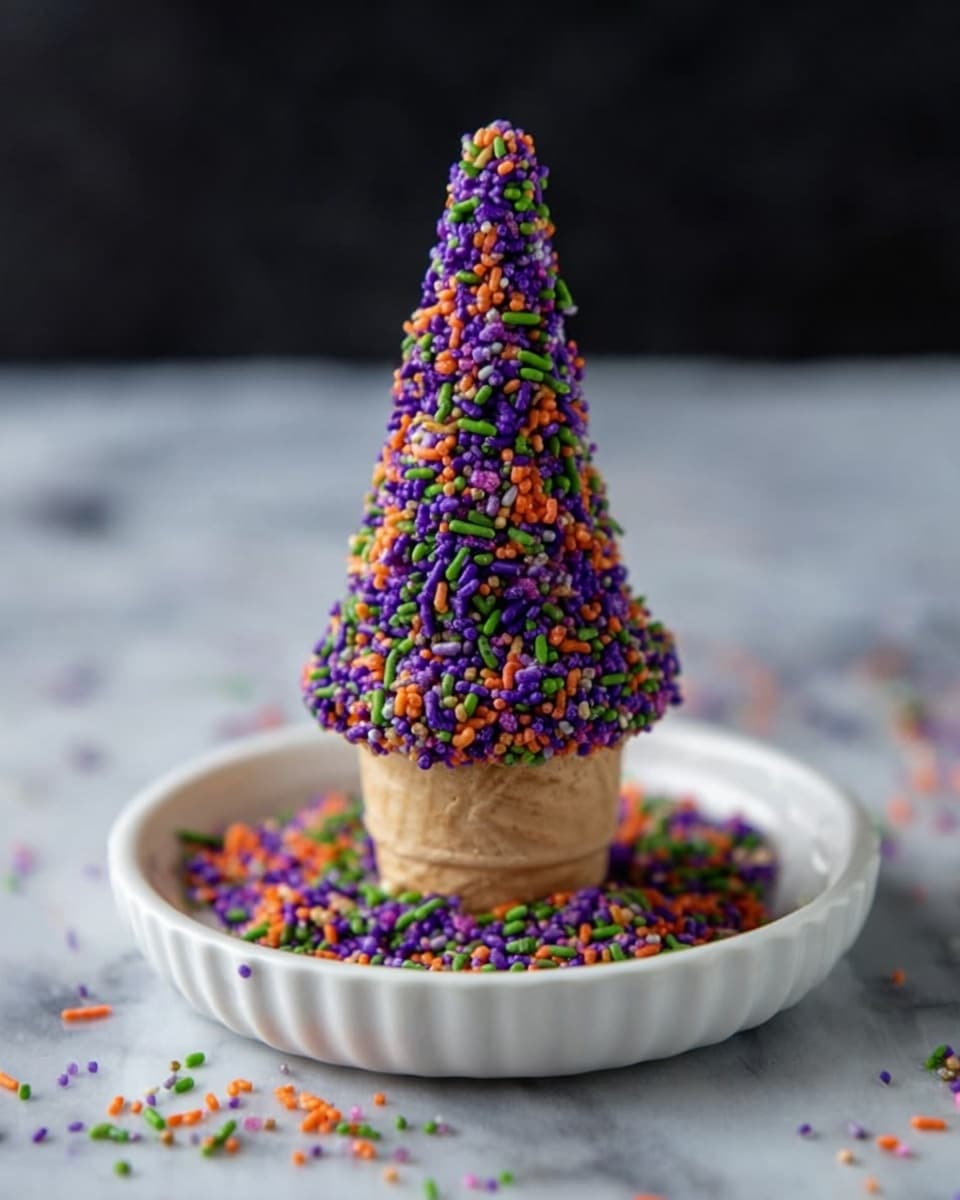
Begin by melting your chocolate wafers according to the package directions — usually a quick melt in the microwave with short bursts and stirring in between works best. I always recommend stirring thoroughly to keep the chocolate smooth and avoid burning. Then, use a spatula to cover each waffle cone with a generous layer of melted chocolate. This step is key because it seals the cone, giving a nice glossy finish and ensuring the candy inside stays fresh. Take your time smoothing the chocolate and remove any excess so it looks neat.
Step 2: Add Festive Decorations and Let Set
While the chocolate is still wet, sprinkle on your Halloween sprinkles to give your witch hats that festive sparkle. Then, place the cones upright on a parchment-lined baking sheet and let the chocolate set completely. This usually takes about 15–20 minutes in the fridge, which makes mealtime setup so much easier because the hats hold their shape perfectly.
Step 3: Decorate the Brim
Once the cones are set, add a small dab of melted chocolate along the bottom edge of each cone and carefully press a green sour belt around it — this creates the witch hat’s “band.” If you have black cat icing decorations on hand, place one right on the front of the hat now, attaching it with a little melted chocolate for a cute finishing touch.
Step 4: Fill with Candy and Seal
Fill each cone with your favorite Halloween candies and some extra sprinkles if you like. This part’s super fun because you get to choose the goodies! Then, very carefully brush a small amount of melted chocolate around the bottom opening of the cone — watch out so you don’t get chocolate inside where the candy is! Immediately press a chocolate cookie onto the bottom to create the brim of the hat. Finally, flip the hats upside down so the chocolate can set and hold the cookie in place. Once firm, transfer them to an airtight container until you’re ready to serve.
Pro Tips for Making Candy-filled Witch Hats Recipe
- Use Good Quality Melting Chocolate: I found that smoother melting chocolate helps the cones look glossy and prevents cracking.
- Chill the Cones Between Steps: Letting the chocolate set in the fridge speeds up the process and keeps the hats sturdy.
- Be Gentle When Applying the Cookie Brim: Pressing too hard can crack the cookie or the cone — just a gentle touch is enough.
- Avoid Chocolate Inside the Cone: I learned the hard way to carefully brush melted chocolate only on the outside bottom edge to keep candy filling intact and delicious.
How to Serve Candy-filled Witch Hats Recipe
Garnishes
I usually add a few extra Halloween-themed sprinkles around the base when serving to amp up the festive factor. Sometimes I drizzle a tiny bit of leftover melted chocolate on top of the cookie brim for a little extra shine. It’s such a simple touch but makes the witch hats pop on any party table.
Side Dishes
My family loves pairing these witch hats with warm apple cider or a pumpkin spice latte for the ultimate fall treat spread. If you want a savory side, simple popcorn or caramel popcorn works as a nice contrast to the sweet hats.
Creative Ways to Present
One of my favorite presentation tricks is to place the Candy-filled Witch Hats Recipe upright in a festive Halloween-themed flower pot filled with crumpled tissue paper or shredded paper filler—this keeps them secure and looks adorable as a centerpiece. You can also wrap each witch hat in clear cellophane and tie with orange or black ribbon for party favors that delight guests.
Make Ahead and Storage
Storing Leftovers
After making these, I store leftovers in an airtight container at room temperature. Make sure they’re kept out of direct sunlight and away from heat to prevent the chocolate from melting or getting sticky. They stay fresh and crunchy for about 3-4 days — unless you’re like me, and they disappear before then!
Freezing
I’ve tried freezing these once, but because of the chocolate and candy inside, I noticed the texture changed a bit — the cones lost some crunch when thawed. If you do want to freeze, wrap each hat individually in plastic wrap and place in an airtight container. Thaw slowly in the fridge before serving.
Reheating
No reheating needed here! Just bring them out at room temperature for the best texture and taste. If they’ve chilled too long in the fridge, let them sit on the counter for 10 minutes before serving to get that chocolate sheen back.
FAQs
-
Can I use regular chocolate instead of melting wafers?
Absolutely! You can use regular chocolate, but I recommend tempering it or melting with care so it stays smooth and shiny. Melting wafers are easier to melt and less likely to seize, so they’re my go-to for this recipe.
-
How do I keep the candy from falling out?
The chocolate layer on the bottom of the cone acts like glue to hold the cookie “brim” in place, which keeps the candy secured. Make sure the chocolate is fully set before handling to keep everything intact.
-
Can I make these in advance?
Yes! You can prep the witch hats a day or two ahead and store them in an airtight container. Just fill with candy close to serving to keep everything fresh and crunchy.
-
What other decorations work well?
Besides sour belts and cat icing decorations, you can use candy eyes, edible glitter, or colored sugar sprinkles. Just pick what inspires you and have fun experimenting!
Final Thoughts
This Candy-filled Witch Hats Recipe is one of those sweet little crafts I always look forward to around Halloween. There’s something so charming about turning simple cones into whimsical hats brimming with candy surprise. I love sharing these with friends and watching the smiles when they crack them open to find the goodies inside. Honestly, you’ll enjoy making (and eating) these as much as I do — it’s a fun, festive way to celebrate the season with some handmade magic.
Print
Candy-filled Witch Hats Recipe
- Prep Time: 20 minutes
- Cook Time: 15 minutes
- Total Time: 35 minutes
- Yield: 12 witch hats
- Category: Dessert
- Method: No-Cook
- Cuisine: American
Description
These Candy-filled Witch Hats are a festive and fun Halloween treat made with waffle ice cream cones coated in chocolate, decorated with sprinkles and sour belt bands, and filled with Halloween candy. Topped with chocolate cookies, these whimsical treats are perfect for parties or as spooky snacks.
Ingredients
Cones and Coating
- 12 waffle ice cream cones
- 12 oz chocolate melting wafers
Decorations
- Halloween sprinkles
- 12 green sour belts
- 12 black cat icing decorations (optional)
- 12 chocolate cookies
Filling
- Assorted Halloween candy (about 1-2 cups depending on cone size)
Instructions
- Melt the Chocolate: Melt the chocolate melting wafers according to the package directions, using a microwave or double boiler until smooth and glossy.
- Coat the Cones: Using a spatula, cover the outside of each waffle cone evenly with melted chocolate, smoothing and removing any excess chocolate for a clean finish.
- Decorate the Cones: While the chocolate is still wet, sprinkle Halloween-themed sprinkles over the cones to decorate. Place the cones upright on a parchment-lined baking sheet and allow the chocolate to set slightly.
- Add Sour Belt Bands: Dab a small amount of melted chocolate around the bottom edge of each cone and gently press a green sour belt around the cone’s base to create a belt effect. Optionally attach a black cat icing decoration to the front of each belt using melted chocolate as glue.
- Fill the Cones: Once the cones have set enough to handle, carefully fill each with assorted Halloween candy and additional sprinkles.
- Seal with a Cookie: Cover the open bottom of each cone with a thin layer of melted chocolate to act as glue, then place a chocolate cookie on top as the hat’s brim. Hold the cookie in place briefly and flip the cone over so the chocolate can harden completely and seal the candy inside.
- Set and Store: Allow the witch hats to set fully at room temperature or in the refrigerator until the chocolate is firm. Transfer to an airtight container to keep fresh until serving.
Notes
- Use high-quality chocolate melting wafers for easy melting and smooth coating.
- The sour belts add a fun tangy flavor and create a distinct belt look on the cones.
- Be careful when coating the bottom of the cone with chocolate to avoid dripping inside, which could make it sticky inside.
- These treats can be stored at room temperature in an airtight container for up to 3 days.
- Customize the candy fillings according to your preference or dietary needs.
Nutrition
- Serving Size: 1 witch hat
- Calories: 250
- Sugar: 28g
- Sodium: 85mg
- Fat: 12g
- Saturated Fat: 7g
- Unsaturated Fat: 4g
- Trans Fat: 0g
- Carbohydrates: 34g
- Fiber: 2g
- Protein: 2g
- Cholesterol: 5mg


