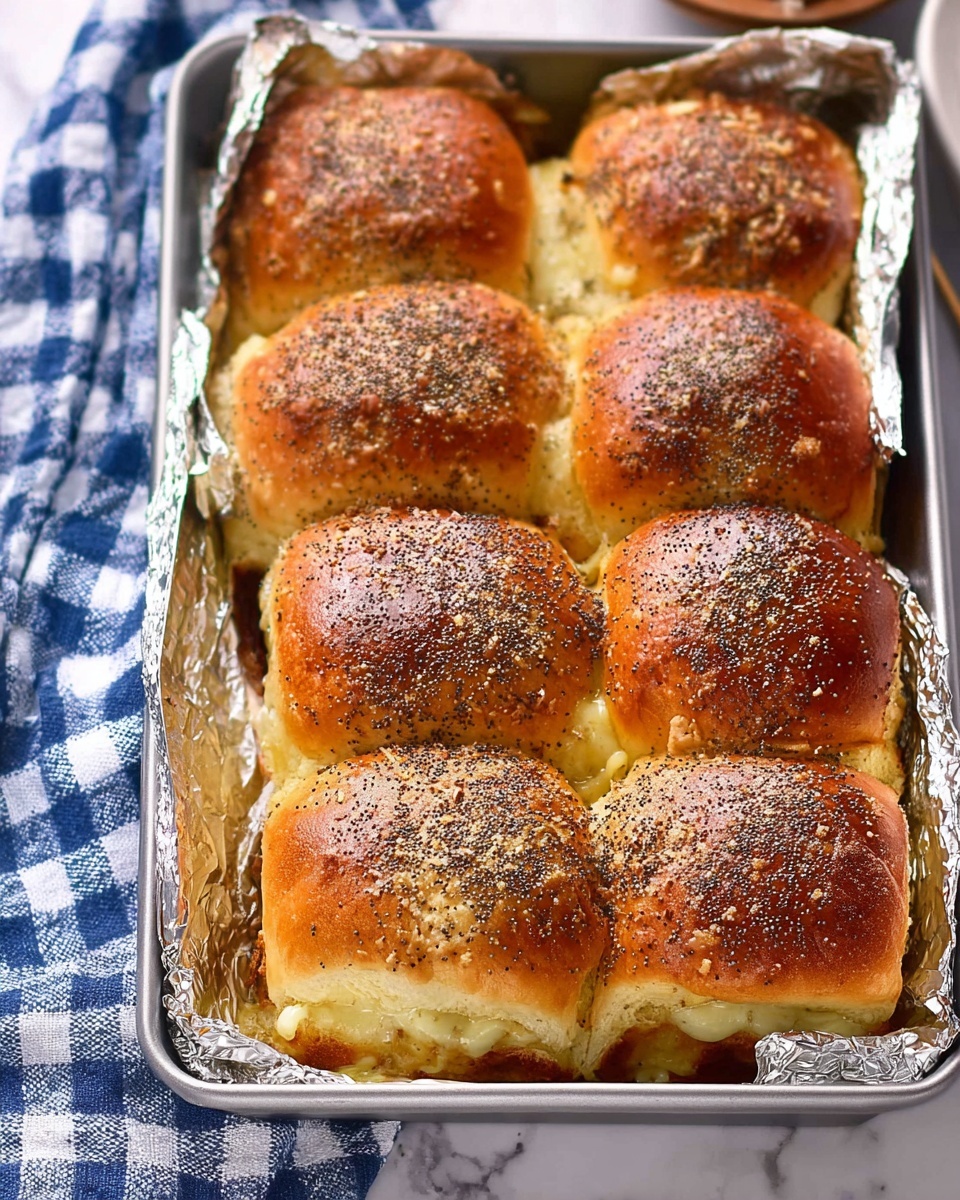
If you’re on the hunt for a snack that’s easy, crowd-pleasing, and downright delicious, you’re going to adore this Baked Turkey and Cheese Sliders Recipe. These sliders are perfect for game day, casual dinners, or just because — they’re buttery, cheesy, and packed with savory turkey flavor that melts right into every bite. I love how effortlessly the ingredients come together, and you’ll find that the overnight marination step really amps up the flavor, making them taste like they’ve slow-cooked all day. Let me show you how to make these irresistible sliders that my family can’t get enough of!
Why You’ll Love This Recipe
- Quick and Easy Prep: You can whip these sliders together in just 10 minutes and toss them in the fridge till you’re ready to bake.
- Make-Ahead Friendly: The overnight soak means the flavors sink in beautifully—and you can prep them a day ahead for less stress.
- Perfect Party Food: Bite-sized, cheesy, and savory — these sliders always disappear fast when guests are around.
- Family Favorite: Trust me, my kids and friends go crazy for these — a real crowd-pleaser every time.

Ingredients You’ll Need
Each ingredient in this Baked Turkey and Cheese Sliders Recipe plays a special role—soft buns embrace savory turkey and melted provolone, while the buttery glaze with brown sugar and Worcestershire sauce adds that divine sweet-savory pop. Here’s a little guidance so you get the best results.
- Small sandwich buns: I use classic slider buns—soft and slightly sweet—which hold everything together perfectly without overpowering the filling.
- Deli turkey: Freshly sliced turkey from your deli counter is best—look for lean, flavorful varieties that aren’t too salty.
- Provolone cheese slices: Thinly sliced provolone melts beautifully and adds a subtle sharp creaminess that compliments turkey fabulously.
- Butter: Unsalted butter gives you full control over seasoning in the glaze and ensures the buttery flavor shines through.
- Brown sugar: Adds a touch of caramelized sweetness that contrasts nicely with savory turkey and cheese.
- Worcestershire sauce: A little splash amps up the umami and deepens the flavor of the glaze.
- Dried mustard: This ingredient adds just the right bite without overwhelming the sliders.
- Poppy seeds: For a subtle crunch and that classic look—don’t skip these if you want authentic slider vibes!
Variations
Though I love this classic version, I’ve found that playing around with fillings or toppings can be super fun—and tasty. You can easily tweak the Baked Turkey and Cheese Sliders Recipe to fit your mood or dietary needs.
- Different Meats: Swap turkey for ham, roast beef, or even chicken to change things up; each one gives a unique flavor profile my family has enjoyed.
- Cheese Variations: Try Swiss, cheddar, or mozzarella to tailor the cheese melt to your liking—I personally enjoy sharp cheddar for a punchier taste.
- Dietary Adjustments: Use gluten-free buns or dairy-free cheese to accommodate special diets without losing the slider magic.
- Extra Veggies: Adding a thin layer of sautéed onions or bell peppers inside the sliders brings a fresh crunch if you want to sneak in some veggies.
How to Make Baked Turkey and Cheese Sliders Recipe
Step 1: Assemble Your Sliders
Start by slicing your sandwich buns in half. Lay the bottom halves out on a rimmed baking sheet lined with foil for easy cleanup. Then, divide your deli turkey evenly among each bun base, followed by a slice of provolone. Top with the bun lids and get ready for the glaze step. I like to press them gently so everything stays snug and ready to soak up the buttery goodness.
Step 2: Make the Buttery Glaze
In a small saucepan, melt the butter over medium heat, then whisk in brown sugar, Worcestershire sauce, dried mustard, and poppy seeds until everything is combined and starts to bubble. This glaze is the heart of the flavor—once it’s hot and aromatic, remove it from heat and pour it generously over the assembled sliders. You’ll want every bun drenched to soak up all those sweet-savory notes.
Step 3: Chill Overnight for Maximum Flavor (If You Can!)
Here’s what I learned: letting the sliders rest in the fridge overnight under foil really lets the glaze seep deep into the bread and turkey, resulting in juicy, flavorful bites. If you’re pressed for time, you can skip this step—but the difference is noticeable. When I’ve done the overnight method, I swear these sliders taste restaurant-worthy.
Step 4: Bake to Gooey Perfection
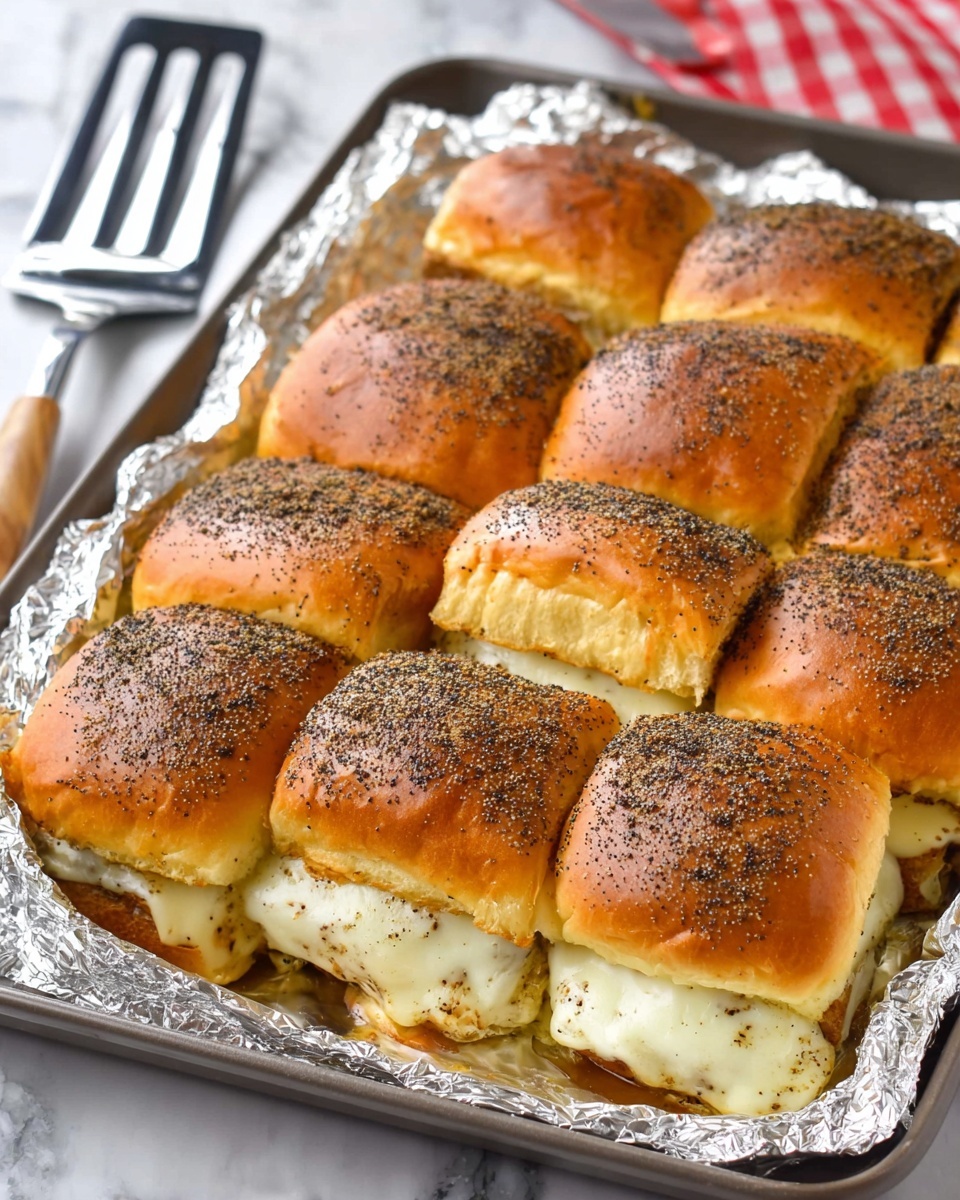
Preheat your oven to 350°F (175°C). Remove the foil and bake the sliders for about 20 minutes, or until the cheese is melted and edges are golden. Watch closely to avoid drying out—those last few minutes are magic as the butter mixture caramelizes and the cheese bubbles. You’ll want to serve them hot, fresh from the oven, to enjoy the full gooey, savory experience.
Pro Tips for Making Baked Turkey and Cheese Sliders Recipe
- Use Fresh Buns: I learned the hard way that day-old buns can get soggy, so fresh, soft slider buns make all the difference.
- Foil Helps Retain Moisture: Covering the sliders tightly while chilling or baking keeps everything tender and moist.
- Don’t Overbake: Keep an eye on the sliders in the oven—overbaking dries them out and loses that melt-in-your-mouth texture.
- Customize the Glaze: Feel free to add a pinch of garlic powder or smoked paprika to the glaze for an extra flavor boost I discovered one evening—it’s amazing.
How to Serve Baked Turkey and Cheese Sliders Recipe
Garnishes
When I serve these sliders, I like to sprinkle some sliced green onions or finely chopped fresh parsley on top—that fresh pop of color and mild onion flavor balances the richness perfectly. Sometimes, a dab of spicy mustard or a light drizzle of ranch dressing on the side is a game-changer for dipping.
Side Dishes
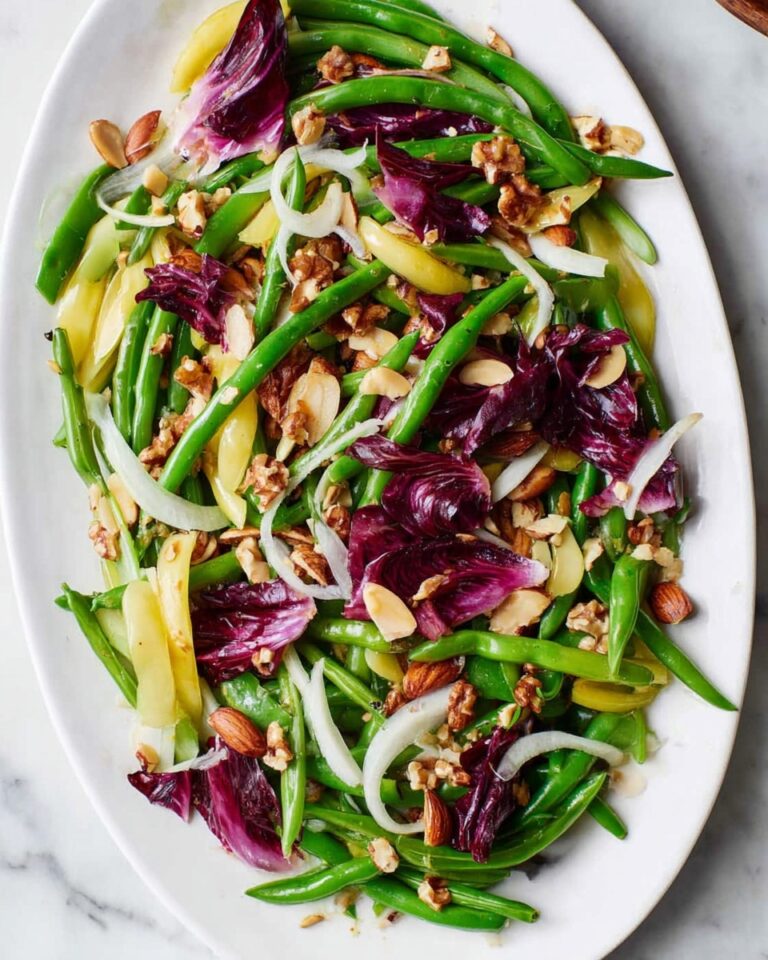
These sliders pair beautifully with simple sides like crisp baby carrots and celery sticks, a tangy coleslaw, or even homemade potato chips. When it’s game day, I often go with a bowl of chili or baked beans for that hearty, comforting combo everyone loves.
Creative Ways to Present
For parties, I like to arrange these sliders in a circular tray with dipping sauces laid out in the middle—it makes serving a breeze and looks so festive. I once did a slider bar with different toppings and sauces alongside this recipe, and it was a total hit with the crowd!
Make Ahead and Storage
Storing Leftovers
After enjoying fresh sliders, I wrap leftovers tightly in plastic wrap or foil and keep them in the fridge for up to 3 days—just be sure to cool them completely before wrapping to avoid sogginess. I like to reheat just what I need to keep them delicious.
Freezing
Freezing works well if you want to prep sliders ahead of time. Assemble them up to the glazing stage, wrap tightly in foil, and freeze. When ready, thaw overnight in the fridge and bake as usual. This trick saved me on busy nights more than once!
Reheating
To keep the sliders moist and cheesy when reheating, cover them with foil and warm in a 350°F oven for about 10-15 minutes. Avoid microwaving if you want that melty cheese and soft bun—oven reheating gives the best texture.
FAQs
-
Can I use a different type of cheese for the Baked Turkey and Cheese Sliders Recipe?
Absolutely! While provolone is great for its melt and mild flavor, you can easily swap it with Swiss, cheddar, mozzarella, or even pepper jack for a bit of spice. Just make sure to use thin slices so they melt evenly without overpowering the sliders.
-
Is it necessary to refrigerate the sliders overnight?
Refrigerating overnight is highly recommended because it lets the buttery glaze soak deeply into the bread and meat, enhancing flavor and moisture. However, if you’re short on time, you can bake them right after assembly—the flavor will still be delicious, just a bit less infused.
-
Can I make these sliders ahead and freeze them?
Yes! Assemble the sliders, apply the glaze, then wrap them tightly in foil or plastic wrap and freeze. When ready to eat, thaw overnight in the fridge and bake as directed. Freezing works great and keeps the sliders fresh for up to a month.
-
What’s the best way to reheat leftover baked turkey and cheese sliders?
I recommend reheating in a preheated oven at 350°F, covered loosely with foil, for about 10-15 minutes. This helps restore the melty cheese and moist buns without drying them out. Avoid using the microwave if you want to keep the texture just right.
Final Thoughts
This Baked Turkey and Cheese Sliders Recipe quickly became a go-to in my house, especially when friends or family stop by last minute. It’s that perfect mix of simple ingredients, incredible flavor, and effortless prep that makes you feel like you really nailed entertaining without stress. I’d encourage you to give it a try exactly as written—but don’t be afraid to make it your own with your favorite fillings and toppings. Once you try these sliders, I have a feeling you’ll find yourself making them over and over, just like I do!
Print
Baked Turkey and Cheese Sliders Recipe
- Prep Time: 10 minutes
- Cook Time: 20 minutes
- Total Time: 30 minutes
- Yield: 12 sliders
- Category: Main Dish
- Method: Baking
- Cuisine: American
Description
Delicious and easy-to-make Baked Turkey & Cheese Sliders featuring tender deli turkey and melted provolone cheese piled on soft sandwich buns, topped with a flavorful buttery glaze infused with brown sugar, Worcestershire sauce, dried mustard, and poppy seeds. Perfect for game day, parties, or a quick family meal, these sliders can be prepared ahead for convenience and baked to golden perfection.
Ingredients
Sliders
- 12 small sandwich buns
- 1 pound deli turkey
- 12 thin slices provolone cheese
Butter Glaze
- 1 stick butter (½ cup)
- 2 Tbsp. brown sugar
- 1 Tbsp. Worcestershire sauce
- 1 Tbsp. dried mustard
- 1 Tbsp. poppy seeds
Instructions
- Prepare the sandwiches: Slice the sandwich buns horizontally and evenly divide the deli turkey and provolone cheese slices among them, assembling each sandwich with turkey topped by cheese within the buns.
- Arrange on baking sheet: Line a rimmed baking sheet with aluminum foil and place all assembled sandwiches on it in a single layer.
- Make the butter glaze: In a small saucepan, combine the butter, brown sugar, Worcestershire sauce, dried mustard, and poppy seeds. Bring the mixture to a gentle boil over medium-high heat, stirring occasionally to fully melt and blend the ingredients, then remove from heat.
- Apply glaze and refrigerate: Pour the warm glaze evenly over the sandwiches, making sure to coat them thoroughly. Cover the baking sheet tightly with foil and refrigerate the sandwiches overnight for best flavor absorption. (This step can be skipped if short on time, but flavor will be less developed.)
- Bake the sliders: Preheat the oven to 350 degrees Fahrenheit. Uncover the foil-covered sandwiches and bake for 20 minutes until cheese is melted, buns are toasted, and the glaze is bubbly and caramelized.
Notes
- These Baked Turkey & Cheese Sliders are a family favorite and can be made ahead of time for convenient game day, dinner, or party servings.
- If you skip the refrigeration step, bake immediately after glazing but flavor may be less intense.
- Use different cheeses like Swiss or cheddar for variation if desired.
- Make sure to cover tightly with foil during refrigeration to keep sliders moist.
Nutrition
- Serving Size: 1 slider (approximate)
- Calories: 367 kcal
- Sugar: 4 g
- Sodium: 1073 mg
- Fat: 19 g
- Saturated Fat: 10 g
- Unsaturated Fat: 7 g
- Trans Fat: 0 g
- Carbohydrates: 32 g
- Fiber: 2 g
- Protein: 17 g
- Cholesterol: 60 mg


