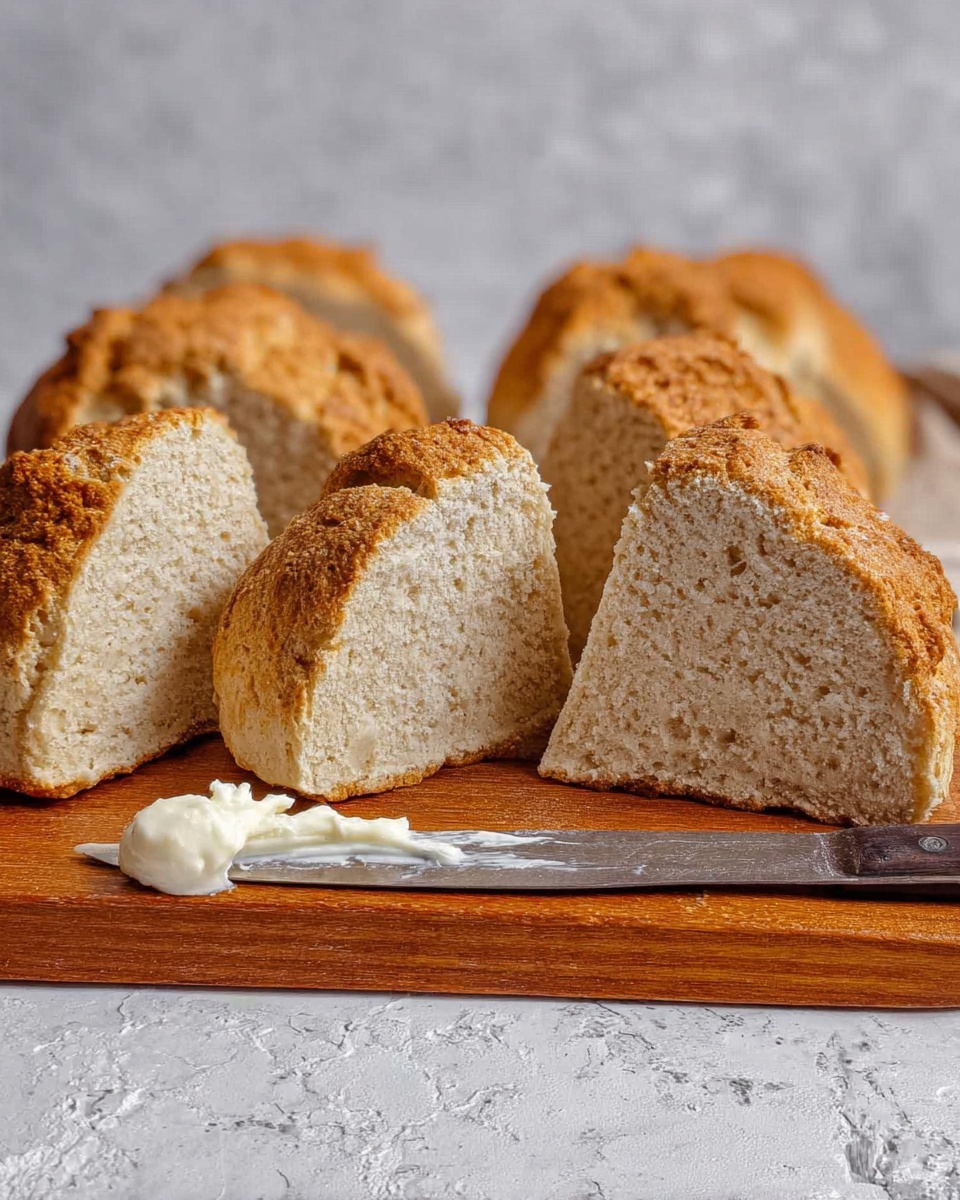
If you’ve never tried baking traditional Australian bread, you’re in for a treat with this easy and utterly charming Australian Damper Bread Recipe. It’s rustic, it’s simple, and honestly, it’s one of those breads that makes you feel like you’re right there around a campfire, even if you’re just in your cozy kitchen. I love this recipe because it only uses a handful of ingredients, yet the result is a crunchy, golden outside with a soft, dense crumb inside that’s perfect for butter or a jammy spread. Stick with me, and I’ll walk you through exactly how to get this delicious damper on your table without any fuss!
Why You’ll Love This Recipe
- Simple Ingredients: You only need a few pantry staples to make this authentic Aussie bread.
- Perfect for Beginners: No complicated kneading or special equipment necessary – it’s foolproof!
- Delicious Versatility: Pairs beautifully with both sweet and savory toppings.
- Rustic Charm: Gives you that true campfire bread vibe, even if you’re baking in your oven.

Ingredients You’ll Need
These ingredients come together to make the simplest, most comforting Australian Damper Bread you can imagine. I love that it relies on basic stuff, so you can whip it up anytime without hunting for fancy pantry items.
- Self raising flour: This is your base, and it’s key because it already includes baking powder, so your damper will rise nicely without extra fuss.
- Milk (I use dairy-free): Helps bind everything together and keeps the crumb tender. You can use any milk you prefer, even plant-based ones.
- Butter (dairy-free works too): Adds richness and tenderness. Using cold butter and rubbing it into the flour creates that lovely sandy texture before you add milk.
- Salt: Just a teaspoon to bring out the flavors and give the bread a subtle savory note.
Variations
I love how customizable this Australian Damper Bread Recipe is. Whether you want to tweak it for your dietary preferences or add a bit of extra flavor, there’s room to play without losing its signature rustic charm.
- Add herbs or spices: I sometimes toss in freshly chopped rosemary or thyme for a fragrant twist – it makes a fantastic savory snack.
- Use wholemeal or gluten-free flour: When I’m feeling healthy or catering to gluten sensitivities, swapping in these flours still works great—just keep an eye on consistency.
- Add cheese: Mixing in a handful of grated cheddar or vegan cheese amps up the gooey factor, and my family always gobbles it up fast.
- Sweet version: You can add a teaspoon of sugar and some dried fruit for a lightly sweet damper that’s fantastic with morning tea.
How to Make Australian Damper Bread Recipe
Step 1: Create That Sandy Dough Texture
Start by grabbing a large mixing bowl and adding your self raising flour and cold butter. Use your fingers to rub the butter into the flour until the mixture looks crumbly and sandy—think coarse breadcrumbs. This little step is what gives the damper its wonderful texture. I found this is easier if you chill the butter beforehand and work quickly so it doesn’t get too soft.
Step 2: Mix in the Milk and Form the Dough
Next, make a well in the center and pour in the milk. Use a fork at first to combine it with the flour-butter mixture, then switch to your floured hands to knead gently until it forms a soft dough. It should be just moist and hold together without being sticky. I usually knead it a minute or so to bring it all together—just enough to make it smooth but not overwork it.
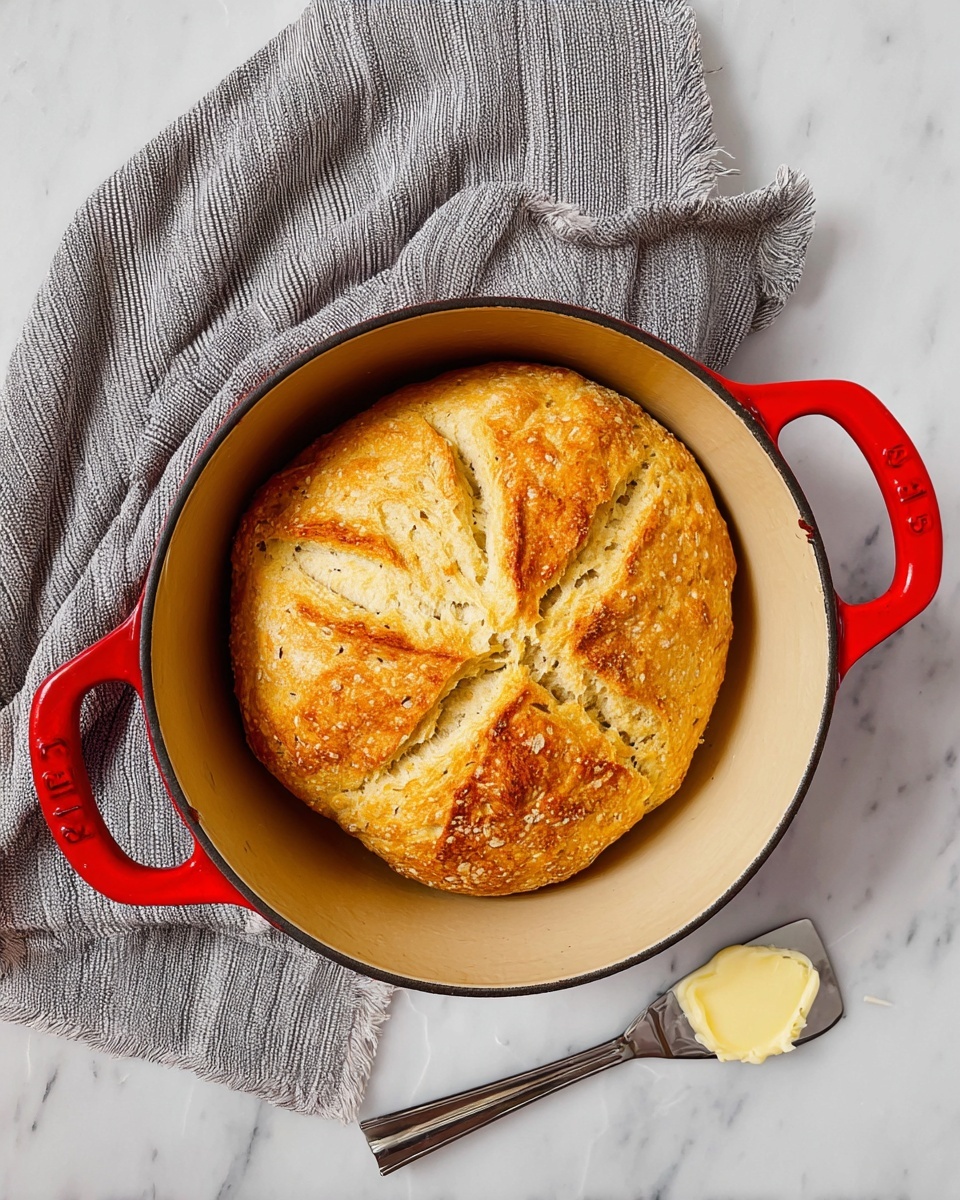
Step 3: Shape and Bake in Your Dutch Oven
Grease your trusty cast iron Dutch oven or similar heavy lidded pot and place the dough inside. Score the top with a knife into 8 wedges—this helps it bake evenly and gives that classic damper look. Pop the lid on and bake in a preheated 200°C (392°F) oven for about 35 to 40 minutes. You’ll know it’s done when the crust is golden brown and sounds hollow when you tap it. You can’t beat that comforting crackle sound.
Step 4: Rest Before Serving
Once baked, let your damper rest for 5 minutes in the pot with the lid off—this ensures the inside sets perfectly and the crust stays crisp. Resist the urge to slice it too soon! I learned this trick after my first batches came out a bit gummy inside; now it’s my golden rule for damper success.
Pro Tips for Making Australian Damper Bread Recipe
- Cold Butter Matters: Rubbing cold butter in gives you that perfect crumbly texture – don’t let it melt!
- Don’t Over-knead: The dough just needs a gentle knead to come together; too much will make your damper tough.
- Use a Heavy Lidded Pot: Baking in a Dutch oven traps heat and moisture, resulting in an amazingly crisp crust.
- Let It Rest: Waiting before slicing ensures your crumb isn’t gummy – always worth the extra 5 minutes!
How to Serve Australian Damper Bread Recipe
Garnishes
When my damper comes out of the oven, I love spreading on some creamy butter that melts right into the soft crumb. Sometimes I add a smear of golden honey or my favorite tangy jam—both complement the bread’s subtle savory flavor beautifully. If I’m feeling fancy, a sprinkle of flaky sea salt on top of the butter is irresistible.
Side Dishes
This bread really shines alongside a steaming bowl of hearty soup—mine often is creamy pumpkin or lentil. For casual meals, I serve it with grilled sausages or a robust chutney for dipping. It also pairs wonderfully with scrambled eggs or a simple salad for brunch vibes.
Creative Ways to Present
For special occasions, I’ve served the damper as a sharing bread wheel with an assortment of dips like hummus, beetroot relish, and avocado mash arranged beautifully around it. It makes for a fun communal meal that always sparks conversation! Wrapping wedges in a clean tea towel while warm keeps it cozy for a picnic, too.
Make Ahead and Storage
Storing Leftovers
If you happen to have any damper left (which is rare in my house!), store it wrapped tightly in a clean tea towel and placed inside an airtight container at room temperature. This keeps the crust from softening too quickly overnight.
Freezing
I freeze leftover damper by slicing it first and wrapping the portions in foil and then a freezer bag. It defrosts quickly at room temp or in the toaster oven, which is perfect for busy mornings or surprise guests.
Reheating
To bring that fresh-baked magic back, I pop the damper slices in the oven or toaster oven at a moderate temperature for a few minutes—this crisps up the crust nicely while warming the bread without turning it dry. It tastes almost like it just came out of the Dutch oven again!
FAQs
-
Can I make Australian Damper Bread Recipe without a Dutch oven?
Absolutely! While a Dutch oven gives the best crust thanks to its heat retention and moisture trap, you can bake the dough on a baking sheet lined with parchment paper. Just cover it loosely with foil during the first half of baking to keep moisture in, then remove the foil to brown the crust.
-
Is it possible to make this recipe gluten-free?
Yes! Swap the self raising flour for a gluten-free self raising blend and monitor the dough’s consistency—you may need a splash more milk since gluten-free flours often absorb differently. The texture will be a bit different but still delicious and hearty.
-
Can I prepare the dough in advance?
You can prepare the dough up to the shaping stage and refrigerate it for a few hours wrapped tightly in clingfilm. Let it come to room temperature before baking to ensure even cooking, but I usually find just making it fresh is so quick it’s worth the 5-minute prep.
-
What does ‘scoring the dough’ mean?
Scoring means making shallow cuts on the surface of the dough with a sharp knife. For damper, it’s usually cut into wedge shapes before baking, which helps the dough expand and gives those classic portions to pull apart after baking.
-
How do I know when the damper is fully baked?
The best sign is when the crust is a deep golden brown and sounds hollow when you tap the bottom of the bread. Using a kitchen thermometer, the internal temperature should be about 90-95°C (195-205°F).
Final Thoughts
This Australian Damper Bread Recipe holds a special place in my heart because it’s a humble reminder that simple ingredients, a little patience, and your favorite Dutch oven can create magic. Whether you’re new to baking or just want an easy bread to impress your loved ones, this recipe checks all the boxes. I promise you’ll enjoy that satisfying crackle when you break it apart and the warmth it brings to your kitchen. So grab your bowl, get that oven warm, and give damper a go—your tastebuds will thank you!
Print
Australian Damper Bread Recipe
- Prep Time: 5 min
- Cook Time: 35-40 min
- Total Time: 40-45 min
- Yield: 8 pieces, serves 8
- Category: Bread
- Method: Baking
- Cuisine: Australian
- Diet: Vegetarian
Description
Australian Damper is a traditional rustic bread made from just three main ingredients: self-raising flour, milk, and butter. This simple bread is crunchy on the outside, soft and dense inside, and perfect for beginners looking to bake bread at home. Traditionally baked in campfire ashes, this version uses a cast iron dutch oven in the oven for ease and consistent results.
Ingredients
Dry Ingredients
- 2 cups Self-raising flour
- 1 tsp Salt
Wet Ingredients
- ¾ cup Milk (dairy free milk can be used)
- 1 tbsp Butter (dairy free butter can be used)
Instructions
- Mix Dry Ingredients: In a large mixing bowl, combine the self-raising flour and butter. Use your fingers to massage the butter into the flour until the mixture resembles coarse sand.
- Add Milk and Form Dough: Make a well in the center of the flour mixture and pour in the milk. Use a fork to combine, then use your hands dusted with flour to knead the dough gently for about one minute until it forms a smooth disk.
- Prepare for Baking: Grease a cast iron dutch oven and place the dough disk inside. Score the dough into eight sections with a knife to help portions after baking.
- Bake the Damper: Cover the dutch oven with its lid and place it in a preheated oven at 200°C (392°F). Bake for 35-40 minutes until the crust is golden brown and sounds hollow when tapped.
- Rest and Serve: Allow the damper to rest for 5 minutes before cutting and serving. This helps the bread finish setting and makes slicing easier.
Notes
- Australian Damper is traditionally baked in campfire ashes, but this recipe uses an oven and a cast iron dutch oven for convenience and consistent heat.
- The bread has a crunchy crust with a dense and slightly crumbly interior, making it perfect for serving alongside soups, stews, or with butter and jam.
- Scoring the dough before baking helps ensure even cooking and easy portioning.
- Use dairy-free milk and butter if you prefer a vegan or dairy-free option.
- Be sure the bread sounds hollow when tapped to ensure it is fully baked inside.
Nutrition
- Serving Size: 1 piece (1/8 of the bread)
- Calories: 133 kcal
- Sugar: 2 g
- Sodium: 313 mg
- Fat: 1 g
- Saturated Fat: 1 g
- Unsaturated Fat: 0.5 g
- Trans Fat: 0.004 g
- Carbohydrates: 25 g
- Fiber: 1 g
- Protein: 5 g
- Cholesterol: 3 mg


