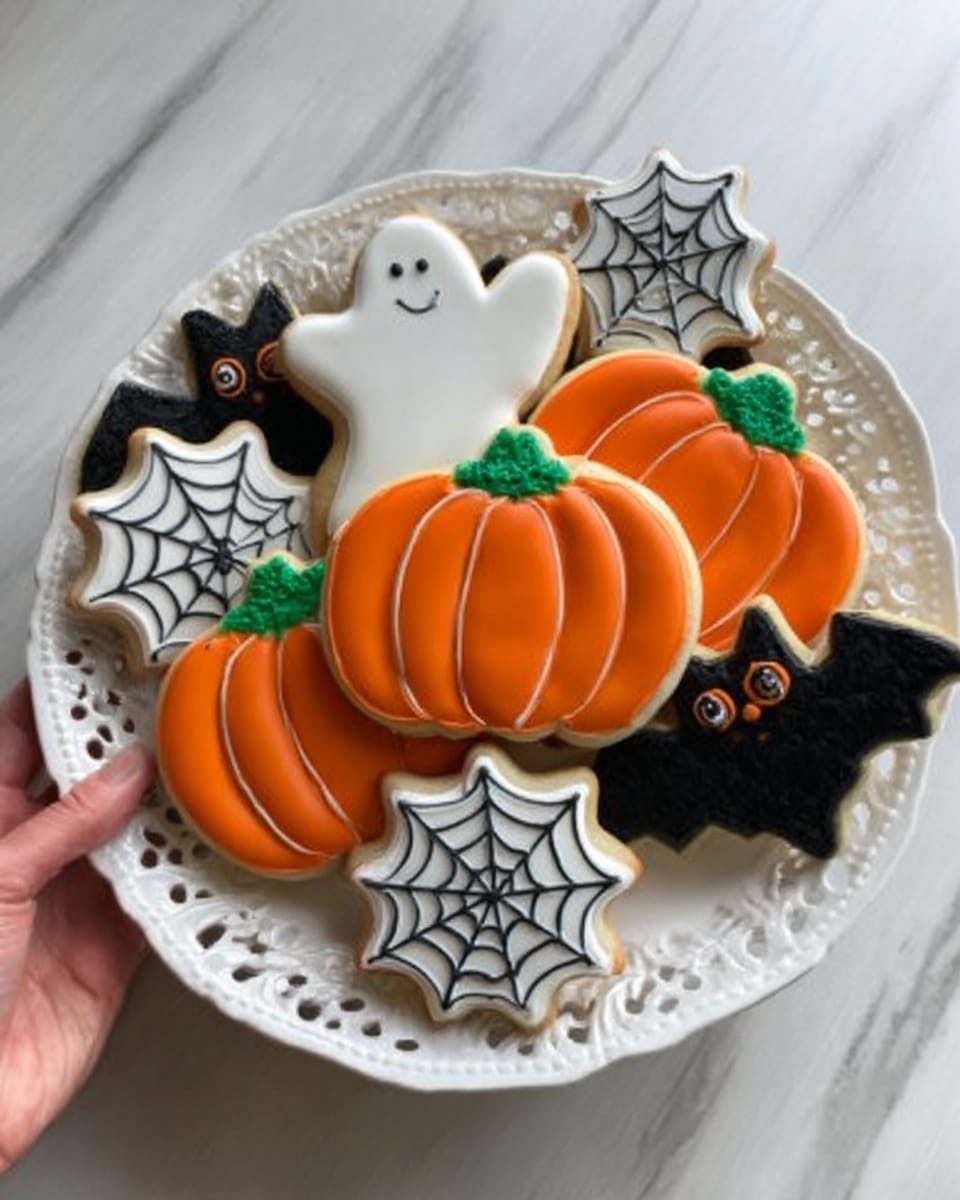
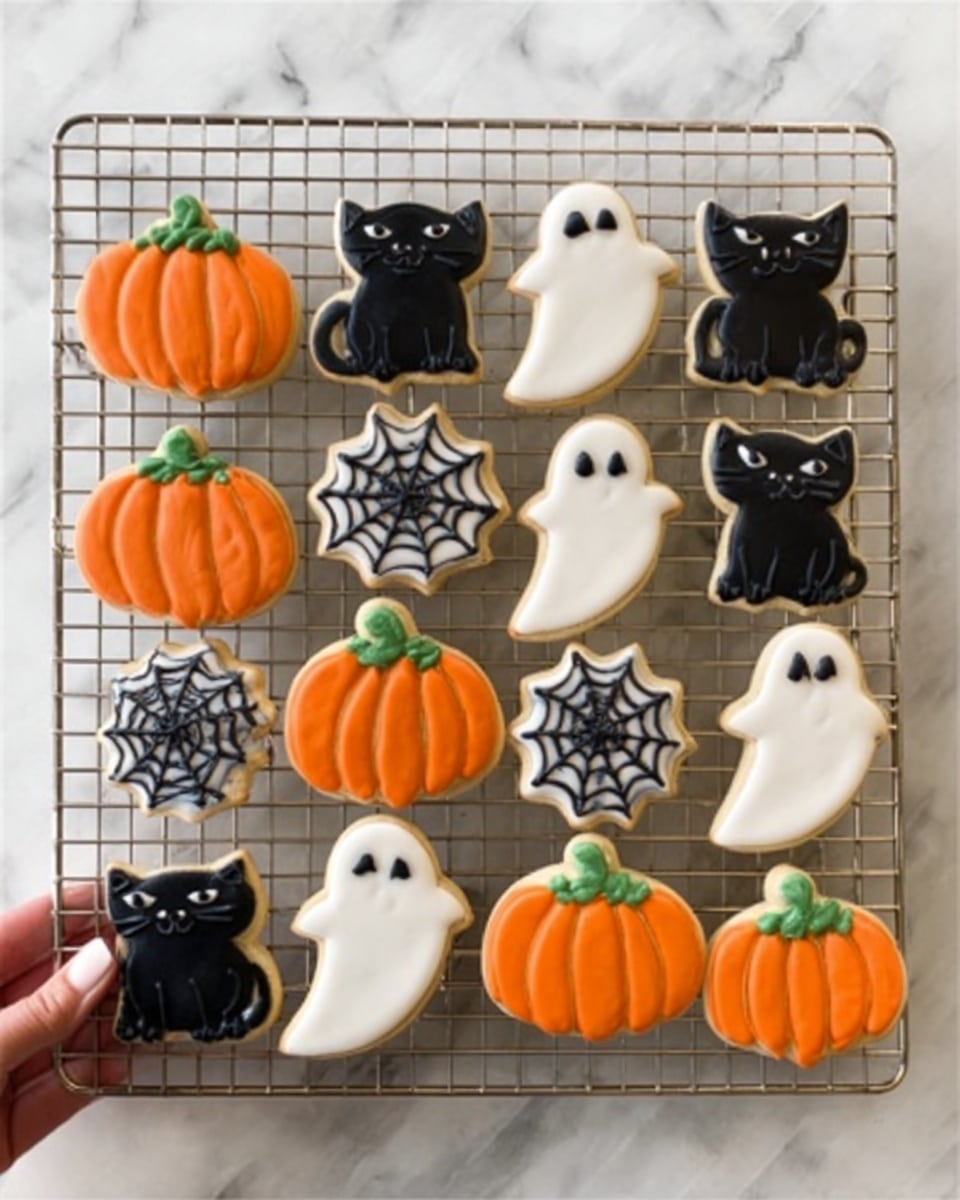
If you’re looking for a festive treat that’s fun to make and absolutely delicious, I’ve got just the thing for you: a Simple Iced Halloween Cookies Recipe that will become your go-to every spooky season. These cookies are buttery, soft with crisp edges, and decorated with easy-to-use icing that lets your creativity roam wild. Whether you’re baking with kids or just want quick-yet-impressive Halloween cookies, you’re going to love how these turn out.
Why You’ll Love This Recipe
- Easy yet impressive: This recipe lets you create bakery-quality Halloween cookies without complicated steps.
- Fun for all ages: Perfect for baking parties with kids or friends — everyone can join in decorating.
- Long-lasting freshness: These cookies keep well for up to two weeks, making them great for early holiday prepping.
- Stackable icing finish: The Betty Crocker icing dries soft but firm, so cookies stack nicely without breaking your artwork.
Ingredients You’ll Need
This Simple Iced Halloween Cookies Recipe uses classic baking staples mixed with convenient decorating supplies. The combo helps you whip up a dough that’s soft to roll, bakes evenly, and decorates like a dream.
- Unsalted butter: Using softened butter brings richness and helps create that perfectly tender crumb.
- Sugar: Granulated sugar balances moisture and sweetness for crisp edges.
- Eggs: Eggs add structure and help bond the dough together.
- Vanilla extract: Classic vanilla boosts flavor in every bite.
- Almond extract: Just a hint adds depth and a subtle nutty undertone.
- Salt: Enhances sweetness and balances flavors.
- Baking soda: Helps the cookies rise just right without spreading too much.
- All-purpose flour: The base for your dough, providing the right texture and firmness.
- White Betty Crocker cookie icing: Makes icing easy and ensures a smooth finish.
- Black Betty Crocker cookie icing: Perfect for outlining and spooky details.
- Round red sprinkles (optional): Adds a fun pop of color to your designs.
- Black edible food marker: A must-have for drawing faces and adding fine details.
- Black decorating sugar: Also called sanding sugar, adds sparkle and texture to the icing.
Variations
I love encouraging friends to put their own spin on the Simple Iced Halloween Cookies Recipe! The base dough is super versatile, so don’t hesitate to experiment with flavors or decorations that suit your vibe.
- Spice it up: I sometimes add a pinch of cinnamon or pumpkin pie spice to the dough — it gives the cookies a cozy autumn twist my family goes crazy for.
- Gluten-free option: Try swapping all-purpose flour with a gluten-free baking mix — just keep the same volume and add a teaspoon of xanthan gum if your blend doesn’t already have it.
- Colorful icing: Instead of just white and black, use orange, purple, or neon colors to make your Halloween cookies pop even more.
- Shape swaps: While ghosts and pumpkins are classic, I like to mix in bats, witches hats, and even spider webs for a fun twist.
How to Make Simple Iced Halloween Cookies Recipe
Step 1: Cream Butter and Sugar to Fluffy Perfection
Start by beating your softened butter and sugar together using an electric mixer. I love this step because it sets the texture foundation for your cookies — you want the mixture pale and fluffy, about 3 minutes or so. This adds air, so your cookies turn out tender and light rather than dense or greasy.
Step 2: Blend in Eggs and Extracts
Next, add the eggs one at a time, mixing well after each addition. Then stir in the vanilla and almond extracts. I discovered that a little almond extract goes a long way, adding that subtle flavor that makes people ask, “What’s in these?”
Step 3: Combine Dry Ingredients and Form Dough
Add the salt and baking soda, mixing just until combined. Then slowly add the flour. I like to add it in a few batches, beating gently so the dough stays smooth but not overworked—this helps keep your cookies tender.
Step 4: Chill and Roll Out
Divide your dough in half, wrap each portion in plastic wrap, and chill for at least an hour or overnight if you can. When you’re ready to roll, flour your surface lightly and roll the dough to 1/4 inch thickness. Keep turning the dough as you roll to prevent sticking—trust me, this trick saves so much headache!
Step 5: Cut Shapes and Chill Before Baking
Use your favorite Halloween cookie cutters to cut shapes and transfer them to a baking sheet. Here’s a pro tip: pop those trays back in the fridge for about 15 minutes before baking — this chill step helps the cookies hold their shape instead of spreading out flat.
Step 6: Bake, Cool, and Decorate
Bake in a 350°F oven for 8–11 minutes depending on cookie size, watching for edges to just start browning. After baking, let cookies cool on the sheet a few minutes, then transfer to a wire rack to cool completely. Once cooled, use white and black Betty Crocker cookie icing to decorate. Sprinkle with black sanding sugar or red sprinkles if you want extra flair.
Let ghost cookies dry for at least 4 hours before using the black edible food marker to draw spooky faces. This drying time is crucial to keep your designs perfect and prevent smudging.
Pro Tips for Making Simple Iced Halloween Cookies Recipe
- Keep Dough Chilled: I found chilling both the dough halves and the cut cookies before baking really preserves those perfect shapes.
- Use Good Quality Extracts: Investing in pure vanilla and almond extract truly amps up the flavor, worth every penny for that subtle depth.
- Patience with Icing Drying: I used to rush decorating and ruin the finish — waiting at least 4 hours before drawing faces really makes your art look sharp.
- Avoid Overworking Dough: Handle the dough gently when adding flour to prevent tough cookies; light mixing is key.
How to Serve Simple Iced Halloween Cookies Recipe

Garnishes
I usually top the cookies with black decorating sugar for a subtle sparkle that adds texture without overwhelming the icing. The red round sprinkles are a fun pop when you want to make an eye-catching detail like eyes on ghosts or blood drops for creepiest effect.
Side Dishes
These Halloween cookies pair beautifully with a warm cup of spiced apple cider or hot chocolate. I like setting up a spooky-themed dessert table with these and some pumpkin-shaped cupcakes or caramel popcorn for variety.
Creative Ways to Present
You can get really fun with presentation by placing your cookies in decorative Halloween tins or stacking them on tiered trays adorned with autumn leaves and mini pumpkins. Wrapping individually in clear bags with festive ribbons also makes great party favors or classroom treats.
Make Ahead and Storage
Storing Leftovers
After decorating and letting the icing fully dry, I store these Simple Iced Halloween Cookies in an airtight container at room temperature. They stay fresh and tasty for up to two weeks, which has saved me so many times when prepping ahead for parties.
Freezing
I’ve frozen fully decorated cookies by layering them carefully in a sturdy Tupperware, separated by parchment paper. When thawing, I leave the container closed until cookies reach room temperature to avoid condensation spoiling the icing finish.
Reheating
Because these are decorated and iced cookies, reheating isn’t necessary—just enjoy them soft and fresh at room temperature. If you want a freshly-baked warmth, it’s best to bake a new batch rather than trying to heat leftovers.
FAQs
-
Can I use regular royal icing instead of Betty Crocker icing for this Simple Iced Halloween Cookies Recipe?
Absolutely! Royal icing can give you a harder, more traditional finish, but it takes longer to dry and can be trickier to stack cookies afterward. Betty Crocker icing is great if you want a softer, stackable finish and quicker decorating.
-
How thick should I roll the dough for these Halloween cookies?
Roll the dough to about 1/4 inch (1 cm). This thickness bakes evenly and holds shapes well without being too fragile or too thick for icing.
-
Can I make the dough ahead of time?
Yes! The dough can be prepared, wrapped in plastic, and refrigerated for up to 2 days or frozen for longer storage, which makes prepping super handy for busy schedules.
-
What if I don’t have black edible markers for decorating?
You could use a fine-tipped paintbrush with a small amount of black icing or gel coloring, but edible markers make drawing faces much easier and neater for crisp details.
-
How can I prevent my cookies from spreading during baking?
Chilling the dough before rolling and chilling the cut cookies on the baking sheet before baking are key steps that I always follow. These help keep your shapes sharp and your spooky designs intact.
Final Thoughts
I absolutely love how this Simple Iced Halloween Cookies Recipe combines nostalgia and creativity — it reminds me of baking with my family when I was a kid, and now I get to pass that joy on. You’ll find that these cookies not only taste amazing but bring out your festive spirit with every batch. So grab your cookie cutters, your favorite icing colors, and get ready to wow your friends and family. Happy Halloween baking!
Print
Simple Iced Halloween Cookies Recipe
- Prep Time: 20 minutes (plus 1 hour to overnight chilling)
- Cook Time: 8-11 minutes per batch
- Total Time: 1 hour 30 minutes to overnight (including chilling) plus 4 hours drying time
- Yield: 4 dozen cookies
- Category: Baking
- Method: Baking
- Cuisine: American
Description
These Simple Iced Halloween Cookies are buttery, crisp-edged treats perfect for festive occasions. Made with a soft dough that’s chilled and rolled out to maintain shape, these cookies are decorated with smooth Betty Crocker icing and fun, spooky details like edible markers and colored sugars. Ideal for Halloween parties, they keep well and can be frozen without losing their charm.
Ingredients
Cookie Dough
- 1 cup unsalted butter (softened)
- 1 cup sugar
- 2 eggs
- 1 teaspoon vanilla extract
- 1 teaspoon almond extract
- 1/2 teaspoon salt
- 1 teaspoon baking soda
- 3 cups all-purpose flour
Decoration
- 1-2 containers white Betty Crocker cookie icing
- 1-2 containers black Betty Crocker cookie icing
- Round red sprinkles (optional)
- Black edible food marker
- Black decorating sugar (sprinkles or sanding sugar)
Instructions
- Prepare the dough: In the bowl of an electric mixer or with a hand mixer, beat the softened butter and sugar together until the mixture is light and fluffy, about 3 minutes. Add the eggs and vanilla extract, beating until combined. Mix in the almond extract, salt, and baking soda until well blended. Gradually add the flour, beating until a smooth dough forms. Divide the dough into two halves, wrap each in plastic wrap, and refrigerate for at least one hour or preferably overnight to allow the dough to firm up.
- Preheat your oven: Set the oven temperature to 350°F (175°C) to ensure it reaches the proper baking heat while you prepare the cookies.
- Roll and cut the dough: Take one half of the chilled dough and place it on a lightly floured surface. Roll it out evenly to about 1/4 inch (1 cm) thickness. Keep rotating the dough as you roll to prevent sticking. Use cookie cutters to cut out fun Halloween shapes and transfer them carefully onto baking sheets.
- Chill the cookies before baking: Place the baking sheets with the cut, unbaked cookies into the refrigerator for about 15 minutes. This chilling step helps prevent the cookies from spreading during baking and keeps their shapes sharp.
- Bake the cookies: Bake the chilled cookies in the preheated oven for 8 to 11 minutes, depending on their size, until the edges just begin to turn golden brown. Remove from the oven and allow the cookies to cool on the baking sheet for a few minutes before transferring them to wire racks to cool completely.
- Decorate the cookies: Once fully cooled, frost the cookies using white and black Betty Crocker cookie icing. Sprinkle with black decorating sugar or red sprinkles if desired. Let the icing dry thoroughly for at least 4 hours to reach a stackable, matte finish.
- Add finishing touches: After the frosting has dried, use a black edible food marker to draw spooky faces or designs on the cookies. This final step adds character and makes your Halloween cookies festive and fun.
Notes
- These cookies have a buttery flavor with crisp edges, making them ideal for holiday treats.
- Betty Crocker cookie icing is convenient and dries to a stackable but not crunchy finish, unlike traditional royal icing.
- Fully decorated cookies will keep fresh for up to two weeks when stored properly.
- Cookies can be frozen in airtight containers; allow them to reach room temperature before opening to avoid condensation and preserve icing appearance.
- Chilling the dough and cookies before baking is essential to prevent spreading and achieve the best shape.
Nutrition
- Serving Size: 1 cookie (approx. 1.5 inch diameter)
- Calories: 120 kcal
- Sugar: 7g
- Sodium: 90mg
- Fat: 6g
- Saturated Fat: 3.5g
- Unsaturated Fat: 2g
- Trans Fat: 0g
- Carbohydrates: 15g
- Fiber: 0.3g
- Protein: 1.3g
- Cholesterol: 25mg

