
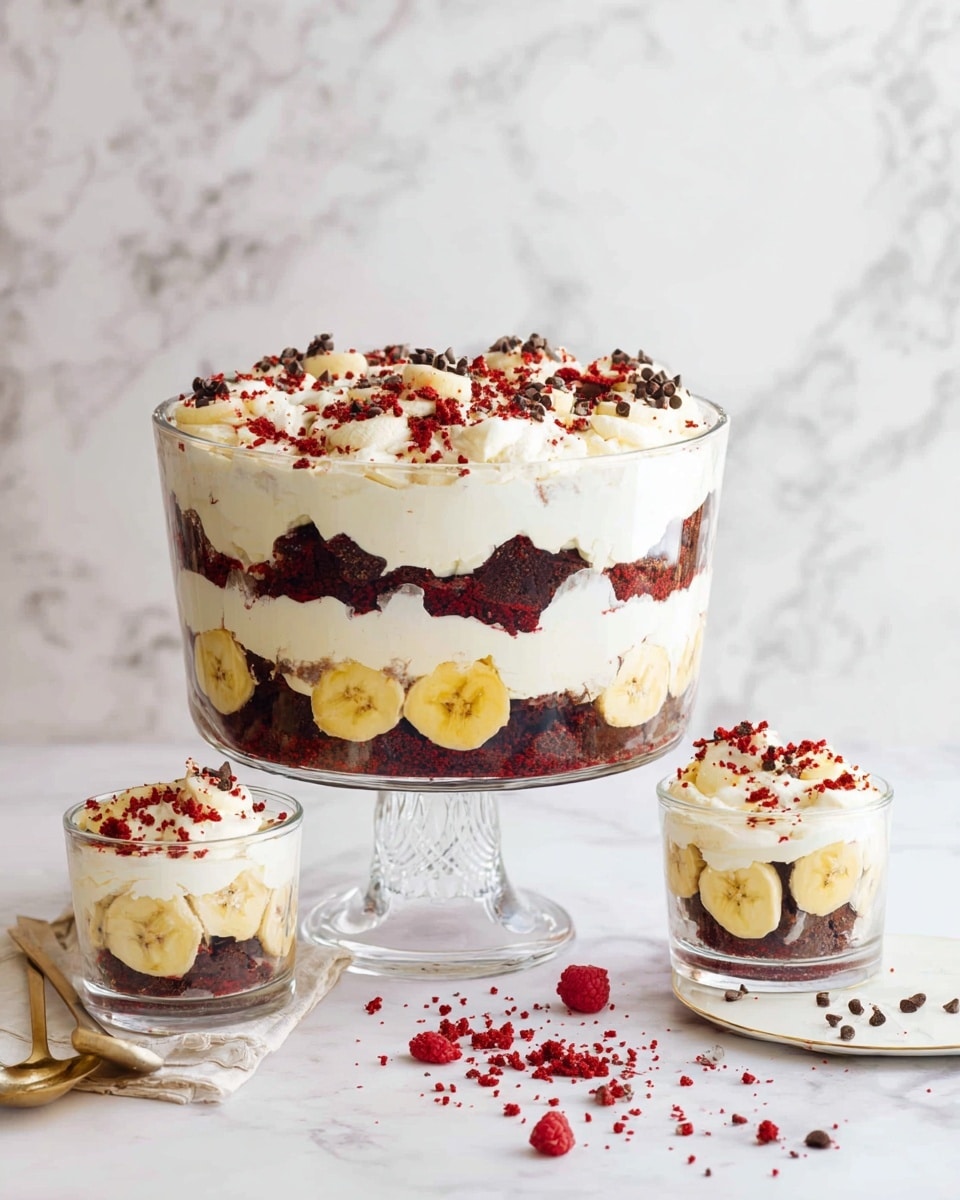
If you’re a fan of both luscious banana pudding and the classic charm of red velvet cake, then this Red Velvet Banana Pudding Recipe is going to feel like a dream come true. I absolutely love how this dessert layers that rich, velvety cake with creamy pudding and fresh bananas—it’s an indulgence that feels both nostalgic and novel at the same time. When I first tried this recipe, I was hooked instantly because it’s not just dessert; it’s an experience, perfect for family gatherings or when you want to impress guests without hours of fuss.
What makes this Red Velvet Banana Pudding Recipe truly special is how it balances texture and flavor so beautifully. You get the softness of the homemade red velvet cake, the smoothness of the classic vanilla banana pudding, and a little crunchy surprise from the mini chocolate chips. Plus, you don’t have to wait forever—the pudding develops while chilling, so you can make it ahead and have a showstopper ready whenever you need it. Honestly, it’s one of those recipes you’ll turn to again and again.
Why You’ll Love This Recipe
- Perfect Layering: Creamy pudding, velvety cake, and ripe bananas come together seamlessly for a luscious bite every time.
- Make-Ahead Friendly: It tastes even better after chilling and can be prepared a day ahead, perfect for busy days or entertaining.
- Family Favorite: My loved ones go crazy for it, and it’s always the star dessert at our celebrations.
- Fun Mix of Textures: Silky pudding, soft cake, and a hint of chocolate chips add a fun crunch to each spoonful.

Ingredients You’ll Need
Each ingredient plays a special role in this Red Velvet Banana Pudding Recipe, ensuring the cake is moist, the pudding silky smooth, and the flavors vibrant. I always recommend using the best-quality cream cheese and fresh bananas for that perfect taste and texture.
- Cake Flour: Gives the cake its delicate crumb; don’t substitute with all-purpose flour for the same light texture.
- Unsalted Butter: Room temperature butter blends smoothly into the batter for that rich cake base.
- Granulated Sugar: Sweetens evenly and helps with the fluffy cake texture.
- Eggs: Bind everything together and add moisture.
- Liquid Red Food Coloring: Key for that iconic vibrant red hue in the cake.
- Unsweetened Cocoa Powder: Adds just a hint of chocolate depth, sifted to avoid lumps.
- Pure Vanilla Extract: Brings warmth and balances flavors.
- Buttermilk: Adds tenderness and a slight tang to the cake batter.
- Cider Vinegar: Reacts with baking soda to keep the cake light and tender.
- Baking Soda: The rising agent for perfect cake lift.
- Sweetened Condensed Milk: Sweet and creamy component in the pudding for richness.
- Ice-Cold Water: Helps dissolve pudding mix and improves the texture.
- Instant Vanilla Pudding Mix: Provides classic banana pudding flavor and thickens the custard.
- Full-Fat Cream Cheese: Adds a luscious tang and creamy body to the pudding filling.
- Heavy Cream: Whipped for that light, airy texture that lifts the pudding.
- Ripe Bananas: Key fresh element that pairs beautifully with the red velvet flavor.
- Mini Chocolate Chips or Chocolate Shavings: Adds a slight crunch and chocolate hit for texture contrast.
Variations
One of the best things about this Red Velvet Banana Pudding Recipe is how easy it is to make your own. I often switch up ingredients based on what’s in season or dietary needs, and it always turns out delicious.
- Dairy-Free Variation: I’ve replaced the heavy cream and cream cheese with coconut cream and vegan cream cheese, and it still tastes amazing and creamy.
- Extra Chocolate: When I’m feeling indulgent, I add an additional layer of chocolate ganache between pudding and cake layers—my family can’t get enough!
- Fresh Fruit Twist: Sometimes I swap bananas for fresh strawberries or raspberries for a tart contrast that brightens up the dessert.
- Mini Portion Cups: For parties, I layer the pudding in individual small glasses which makes serving a breeze and looks so pretty.
How to Make Red Velvet Banana Pudding Recipe
Step 1: Baking the Perfect Red Velvet Cake Base
Preheat your oven to 325°F and prepare a 9×13-inch pan by buttering and flouring it to prevent sticking. Combine your cake flour and salt in a bowl and set this dry mix aside. Using a stand mixer fitted with the paddle attachment, cream the room temperature butter until smooth, then gradually beat in the sugar until the mixture is light and fluffy—this usually takes around 4 to 5 minutes. Add the eggs one at a time, making sure to scrape down the sides of the bowl to keep everything well incorporated. Then carefully whisk the red food coloring with cocoa powder and blend it into the batter on low speed until just combined.
Alternate adding your dry flour mixture and buttermilk to the batter, starting and ending with the dry ingredients, blending gently. Mix vinegar and baking soda separately and stir that in last, which helps the cake rise beautifully. Pour the batter into your pan and bake for 40 to 45 minutes; you’ll know it’s done when the cake springs back lightly to the touch and a toothpick comes out clean. Let the cake cool completely—this is crucial because warm cake will make your pudding runny.
Step 2: Whipping Up the Silky Banana Pudding
In a separate bowl or using your stand mixer’s whisk attachment, beat together sweetened condensed milk and ice-cold water until smooth, about a minute. Add the instant vanilla pudding mix and keep mixing until free of lumps—this step ensures a smooth, velvety custard. Cover the pudding mixture with plastic wrap and refrigerate for at least an hour so it can firm up nicely. Next, blend in the softened cream cheese until silky smooth, then keep it chilled while you prepare the whipped cream.
Step 3: Folding in the Whipped Cream for Lightness
Whip heavy cream on medium to medium-high speed until you see stiff peaks—be careful not to overwhip or it will turn grainy! With the mixer on low, fold the pudding mixture into the whipped cream a spoonful at a time until fully combined and streak-free. This technique keeps the pudding light and airy, making each bite feel fresh and luscious rather than dense.
Step 4: Assembling Your Red Velvet Banana Pudding
Cut your cooled red velvet cake into small rectangles—about 4 by 2 inches—and then slice each piece in half horizontally to create thin layers. Pick a large trifle bowl or wide glass bowl to show off the beautiful layers, or use individual serving cups for a fun presentation. Start with a quarter of the pudding on the bottom, then layer cake pieces, banana slices, and mini chocolate chips. Repeat this layering two more times, finishing with a final pudding layer topped with crumbled cake and a sprinkle of chocolate chips. Cover and chill for at least 4 hours, but overnight is best to let those flavors marry beautifully.
Pro Tips for Making Red Velvet Banana Pudding Recipe
- Don’t Overmix the Batter: When combining flour and liquids, mix just until incorporated to keep your cake tender and light.
- Chill Pudding Thoroughly: Refrigerating your pudding overnight really helps deepen the flavors and thicken the texture.
- Use Fresh Bananas: Ripe but firm bananas work best to prevent sogginess in your layers.
- Layer with Care: Press the cake gently into the pudding to avoid crushing layers but still ensure they soak up flavor.
How to Serve Red Velvet Banana Pudding Recipe
Garnishes
I love topping the final layer with a handful of mini chocolate chips or some delicate chocolate shavings for that pretty finish and a little crunch. Sometimes, I also sprinkle chopped toasted pecans for a nutty twist that adds texture without overpowering. A dollop of lightly whipped cream right before serving also makes it look picture-perfect and gives an extra creamy kiss.
Side Dishes
This dessert is pretty rich on its own, so I usually pair it with lighter sides like fresh berries or a crisp green salad if it’s part of a larger meal. For a cozy night in, it’s perfect just on its own with a hot cup of coffee or tea to balance the sweetness.
Creative Ways to Present
For special occasions, I like to assemble the pudding in clear stemware like wine glasses or mason jars to show off those stunning red velvet layers. You can also create mini parfaits using small glass jars—these are a hit at parties and make individual portions easy to grab and go. Adding edible flowers on top can turn this simple dessert into a show-stopping centerpiece.
Make Ahead and Storage
Storing Leftovers
Once assembled, cover your Red Velvet Banana Pudding tightly with plastic wrap and store it in the fridge. In my experience, it keeps wonderfully fresh for up to 3 days. Because the bananas are fresh, the texture is best enjoyed within that timeframe before the fruit gets overly soft.
Freezing
I’ve tried freezing this pudding before, but because of the fresh bananas, the texture changes a bit once thawed—bananas can get mushy. If you want to freeze it, I recommend storing the cake and pudding separately without bananas, then assembling once thawed for best results.
Reheating
This pudding is best served chilled, so I don’t reheat it. If you want to bring flavors back to life after storing, giving it a gentle stir and letting it sit at room temperature for about 20 minutes helps soften the texture without losing that cool creaminess.
FAQs
-
Can I use boxed cake mix instead of making the red velvet cake from scratch?
While you can technically use boxed red velvet cake mix to speed up the process, I’ve found that making the cake from scratch for this recipe gives a richer flavor and better crumb that works beautifully with the pudding texture. The homemade cake also absorbs pudding and bananas better without getting soggy.
-
How ripe should the bananas be for the pudding?
Go for bananas that are ripe but still firm to the touch—yellow with just a few brown spots. Overripe bananas tend to break down too much and can make the pudding runny or mushy over time.
-
Can I prepare the pudding and cake in advance?
Absolutely! The red velvet cake can be baked up to 3 days ahead and wrapped tightly. The pudding tastes even better after chilling overnight. Just assemble the pudding with bananas right before serving or the same day.
-
What can I use instead of red food coloring?
If you’d prefer to avoid artificial colors, beet juice or powder is a natural alternative. However, it may yield a different shade and slightly alter the flavor. I’ve tried it before and enjoyed the earthiness it adds, but for classic red velvet, the traditional coloring works best.
Final Thoughts
This Red Velvet Banana Pudding Recipe has truly become one of my favorite desserts to make and share because it combines the best of two beloved treats into one unforgettable bite. Whether for a holiday, birthday, or just a cozy weekend treat, it delivers on flavor, texture, and wow factor without being complicated. Trust me, once you try it, you’ll want to keep this recipe in your back pocket for all your dessert emergencies. Go ahead and give it a try—you’ll be so glad you did!
Print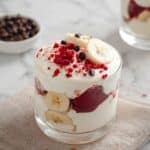
Red Velvet Banana Pudding Recipe
- Prep Time: 25 minutes
- Cook Time: 45 minutes
- Total Time: 5 hours 10 minutes
- Yield: 16 servings
- Category: Dessert
- Method: Baking
- Cuisine: American
Description
This Red Velvet Banana Pudding recipe is a delightful twist on the classic Southern dessert, combining moist homemade red velvet cake with creamy vanilla pudding, fresh bananas, and a luscious whipped cream topping, layered together to create a rich and indulgent treat perfect for gatherings or special occasions.
Ingredients
Red Velvet Cake
- 3 1/2 cups (383 g/13.5 oz) cake flour
- 1 1/2 tsp salt
- 3/4 cup (1 1/2 sticks/170 g/6 oz) unsalted butter, at room temperature
- 2 1/4 cups (450 g/16 oz) granulated sugar
- 3 eggs
- 6 tbsp liquid red food coloring
- 3 tbsp (22.5 g/.75 oz) unsweetened cocoa powder (22-24%), sifted
- 1 1/2 tsp pure vanilla extract
- 1 1/2 cups (240 g/8.5 oz) buttermilk
- 1 1/2 tsp cider vinegar
- 1 1/2 tsp baking soda
Pudding Mixture and Assembly
- 1 (14 oz) can sweetened condensed milk
- 1 1/2 cups (360 g/12.7 oz) ice-cold water
- 1 (3.4 oz) package instant vanilla pudding mix (preferably Jell-O brand)
- 1 (8 oz) package full-fat cream cheese (preferably Philadelphia brand), cut into 8 pieces, at room temperature
- 3 cups (720 g/25.5 oz) heavy cream
- 4 to 5 ripe bananas, sliced
- 1 cup plus 1 tablespoon (160 g/5.6 oz) mini chocolate chips or chocolate shavings
Instructions
- Prepare Oven and Cake Pan: Preheat the oven to 325°F. Butter and flour a 9 × 13-inch pan to ensure the cake does not stick during baking.
- Mix Dry Ingredients: In a medium bowl, whisk together the cake flour and salt. Set this mixture aside to incorporate into the batter later.
- Cream Butter and Sugar: Using a stand mixer fitted with the paddle attachment, cream the unsalted butter on medium speed until smooth. Gradually add the granulated sugar and beat continuously for 4 to 5 minutes until the mixture is very light and fluffy.
- Add Eggs: With the mixer on medium speed, add the eggs one at a time, beating well after each addition. Scrape down the bowl to ensure even mixing.
- Create Red Color Mixture: In a small bowl, whisk together the liquid red food coloring and sifted cocoa powder. With the mixer on low speed, carefully pour this mixture into the batter and blend until fully combined. Scrape down the bowl again.
- Combine Wet and Dry Ingredients: Whisk together the vanilla extract and buttermilk in a liquid measuring cup. Add the dry ingredients from step 2 to the mixer bowl in three parts, alternating with the buttermilk, starting and ending with the dry ingredients. Beat on low speed just until combined after each addition to avoid overmixing. Scrape down the bowl and paddle as needed.
- Activate Leavening: In a small bowl, stir together the cider vinegar and baking soda. Add this mixture slowly to the batter with the mixer on low, and combine well. Scrape down the bowl to ensure even distribution.
- Bake the Cake: Pour the batter into the prepared pan and bake for 40 to 45 minutes, until the top springs back when touched and a cake tester inserted in the center comes out clean.
- Cool the Cake: Let the cake cool in the pan for at least 30 minutes, then transfer it to a cooling rack and cool completely. The cake can be made up to 3 days ahead if wrapped tightly with plastic wrap.
- Prepare Pudding Base: In a stand mixer with the whisk attachment, beat the sweetened condensed milk and ice-cold water on medium speed until well combined, about 1 minute. Add the instant vanilla pudding mix and continue beating until smooth with no lumps, approximately 2 minutes. Transfer to a medium bowl, cover, and refrigerate until firm, at least 1 hour or overnight.
- Incorporate Cream Cheese: Transfer the chilled pudding mixture to the stand mixer bowl, add the softened cream cheese pieces, and mix until fully combined and smooth. Refrigerate the mixture while preparing the whipped cream.
- Whip Heavy Cream: In a clean bowl, whip the heavy cream on medium speed for about 1 minute until it thickens, then increase to medium-high speed and whip until stiff peaks form. Take care not to overwhip to maintain a smooth texture.
- Combine Whipped Cream and Pudding: With the mixer running on low speed, gradually add the pudding mixture to the whipped cream one spoonful at a time, mixing until fully blended with no streaks remaining.
- Slice the Cake: Remove the cooled red velvet cake from the pan and cut into a 4 by 2-inch grid to make 8 rectangular pieces. Cut each piece in half horizontally to create 16 slices approximately ½-inch thick. Set aside.
- Assemble the Pudding: Using a trifle bowl, wide glass bowl (4 to 5 quarts capacity), or individual serving bowls, spread one-quarter of the pudding mixture on the bottom. Layer with enough red velvet cake slices to cover the pudding. Top with one-third of the sliced bananas to cover the cake, then sprinkle with 1/3 cup mini chocolate chips. Repeat the layering two more times, finishing with a final layer of pudding.
- Finish and Chill: Sprinkle the top layer with crumbled red velvet cake pieces and a tablespoon of mini chocolate chips for garnish. Cover with plastic wrap and refrigerate for at least 4 hours or overnight to set before serving. Any leftover cake pieces can be enjoyed as a snack.
Notes
- This recipe is inspired by the famous Magnolia Bakery’s Red Velvet Banana Pudding.
- The red velvet cake can be baked up to three days in advance and stored wrapped to maintain freshness.
- Chilling the pudding mixture for at least one hour improves its texture and makes assembly easier.
- For best results, use full-fat cream cheese and heavy cream to achieve a rich and creamy pudding.
- Adjust the amount of mini chocolate chips to your preference for added texture and chocolate flavor.
Nutrition
- Serving Size: 1 serving
- Calories: 480
- Sugar: 38g
- Sodium: 280mg
- Fat: 28g
- Saturated Fat: 17g
- Unsaturated Fat: 9g
- Trans Fat: 0.5g
- Carbohydrates: 53g
- Fiber: 2g
- Protein: 6g
- Cholesterol: 110mg

