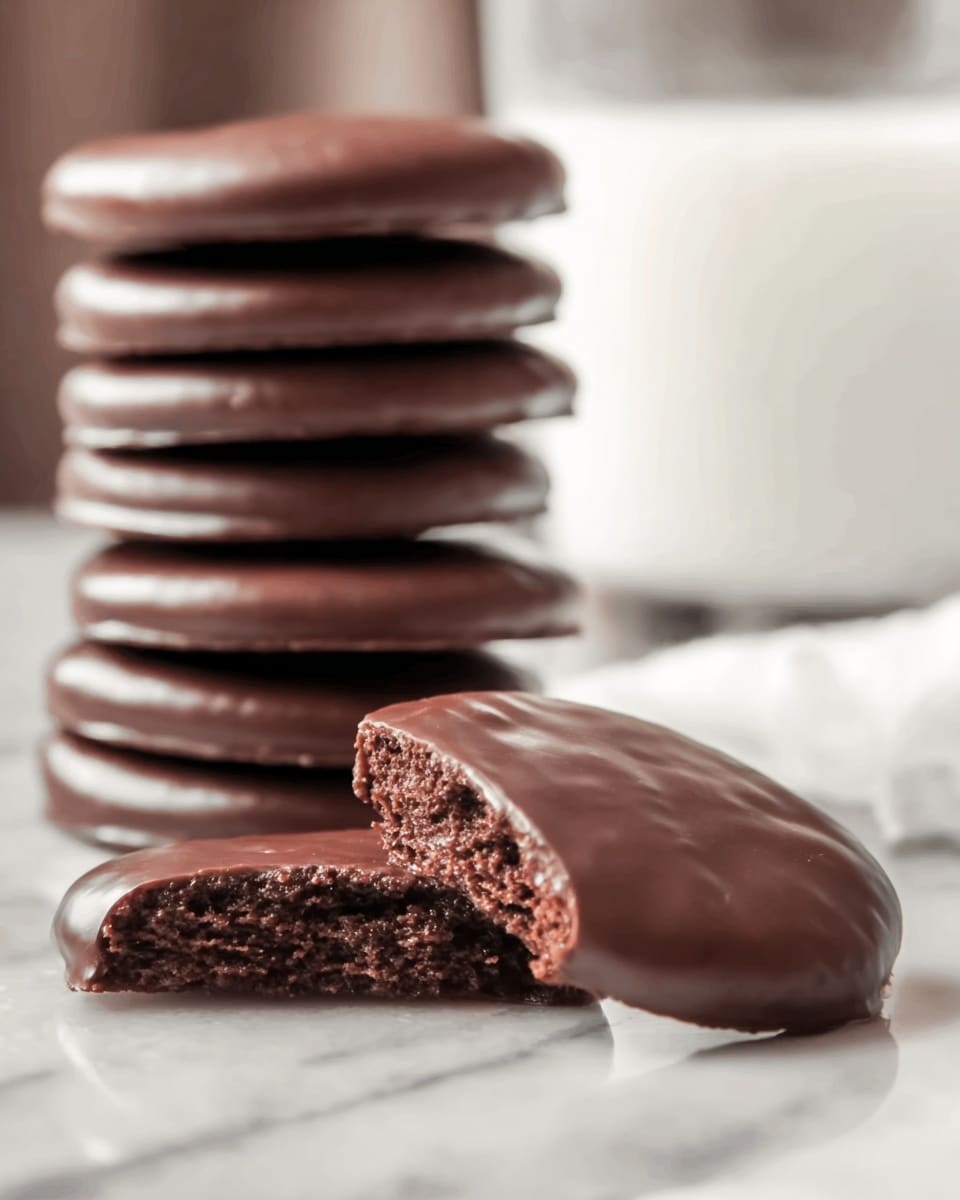
I’ve always been a fan of those classic Thin Mints you find during cookie season, but making a batch of my own has completely changed the game. This Homemade Thin Mint-Inspired Cookies Recipe captures that perfect balance of rich chocolate and refreshing peppermint, right from your own kitchen. It’s a treat that feels fancy but comes together surprisingly easily, which is why I love whipping it up whenever I want something special without making a huge fuss.
What makes this recipe stand out is the texture—you get that delicate crispness with a melt-in-your-mouth quality that’s just so satisfying. Plus, because you control all the ingredients, you can adjust the peppermint to make it just as bold or subtle as you like. Whether it’s for a cozy afternoon snack, a holiday cookie swap, or just a fun weekend project you’ll want to make this Homemade Thin Mint-Inspired Cookies Recipe your new go-to.
Why You’ll Love This Recipe
- Authentic Flavor Blend: Combines rich cocoa with refreshing peppermint to mimic your favorite Thin Mint cookie perfectly.
- Simple Ingredients: Uses straightforward pantry staples you likely already have, making it easy to bake anytime.
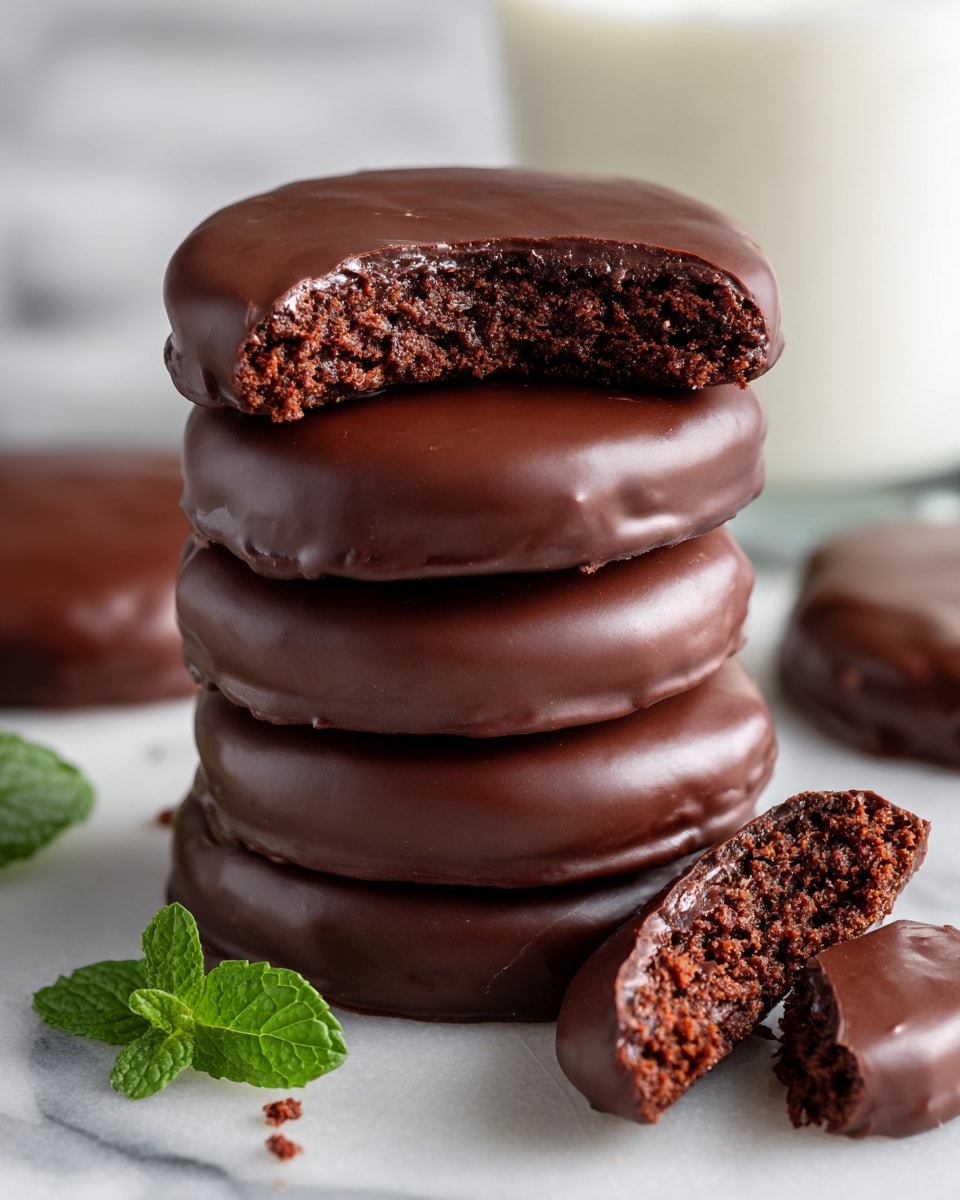
- Perfect Texture: Crispy edges with a smooth chocolate coating for that melt-in-your-mouth bite we all crave.
- Customizable Peppermint Intensity: You control how minty you want these, so everyone ends up happy.

Ingredients You’ll Need
Each ingredient in this Homemade Thin Mint-Inspired Cookies Recipe plays a vital role—from the cocoa bringing that deep chocolate flavor to the peppermint extract that makes these cookies so uniquely refreshing. I always recommend using good-quality unsweetened cocoa and pure peppermint extract for the best flavor.
- Flour: Provides the structure for the cookies, so choose all-purpose for a perfect crumb.
- Unsweetened cocoa powder: This is the heart of the chocolate flavor; Dutch-processed cocoa works beautifully here.
- Baking soda: Helps the cookies rise just the right amount without puffing up too much.
- Salt: Balances the sweetness and enhances the other flavors.
- Unsalted butter: At room temperature, it sifts into the dough smoothly and adds richness.
- Sugar: Adds sweetness and helps create that crisp texture.
- Peppermint extract: The magic ingredient that gives these cookies their signature Thin Mint zing.
- Dark chocolate: For dipping — I always use a good-quality chopped chocolate for melting smoothly.
Variations
I love how flexible this Homemade Thin Mint-Inspired Cookies Recipe is—you can easily tailor it to suit different tastes or dietary preferences. Don’t hesitate to experiment by adjusting the peppermint, playing with the chocolate coating, or even trying gluten-free flour blends.
- Extra Minty: When I want a strong peppermint kick, I bump up the peppermint extract in both the dough and the chocolate dip—it’s like a candy cane in cookie form!
- Vegan Friendly: You can swap the butter for a plant-based alternative and use vegan dark chocolate to make these treats vegan without losing flavor.
- Nutty Twist: Adding finely chopped toasted almonds into the dough adds a subtle crunch and a lovely nutty depth.
- Spiced Variation: A pinch of cinnamon mixed into the cocoa powder brings a warm, cozy layer to these mint-chocolate delights—especially nice in winter.
How to Make Homemade Thin Mint-Inspired Cookies Recipe
Step 1: Get Your Oven and Baking Sheets Ready
Preheat your oven to 350°F (175°C) and line two baking sheets with parchment paper or nonstick mats. This simple step saves you a ton of cleanup hassle later, and ensures your cookies don’t stick or burn.
Step 2: Mix Dry Ingredients
In a medium bowl, whisk together the flour, unsweetened cocoa powder, baking soda, and salt. This helps distribute everything evenly so your cookies bake perfectly consistent every time.
Step 3: Cream Butter, Sugar, and Peppermint Flavor
Using a stand mixer or hand mixer, beat the room temperature butter and sugar until the mixture is light and fluffy—about five minutes. This aerates the dough for a tender cookie. Once that’s done, scrape down the sides and add in your peppermint extract, mixing until just combined.
Step 4: Incorporate Dry Ingredients
Add the flour mixture in two batches, mixing gently after each addition until the dough is just combined but still a bit crumbly. Don’t over mix here; you want to keep that delicate texture. Once mixed, gather the dough into a ball, flatten it slightly, and wrap it in plastic wrap before chilling for 30 minutes—this step makes rolling out easier and helps the cookies keep their shape.
Step 5: Roll and Cut Your Cookies
Sprinkle your work surface with flour and roll the chilled dough out to about 1/4-inch thickness. Grab a small round cutter—fluted edges if you want the classic Thin Mint look—and cut out your cookies. Don’t worry about the scraps; just gather them, re-flour lightly if needed, and roll again. You should end up with roughly two dozen cookies.
Step 6: Bake and Cool
Place the cookies on your prepared sheets and bake for 20 minutes. They might seem a bit fragile when you pull them from the oven, but that’s normal—they’ll firm up as they cool. Make sure to let them cool completely on the sheets before moving to the next step.
Step 7: Melt and Peppermint-Flavor Your Chocolate
Set up a double boiler or a heatproof bowl over simmering water and melt your chopped dark chocolate until smooth. Stir in the peppermint extract to taste—this is where you control how minty that final coating will be.
Step 8: Dip and Dry Your Cookies
Using a fork, dip each cooled cookie into the melted chocolate, coating both sides well. Let the excess drip off before transferring them to a wire rack to set. Once the chocolate firms up, your homemade Thin Mint-inspired bites are ready to enjoy!
Pro Tips for Making Homemade Thin Mint-Inspired Cookies Recipe
- Butter Temperature Matters: Using softened, not melted, butter makes your dough lighter and easier to work with.
- Chill the Dough: I discovered chilling helps prevent spreading and makes rolling out way simpler.
- Don’t Overmix: To keep those cookies tender, mix dry ingredients in slowly and avoid overbeating.
- Chocolate Dipping Tip: Use a fork to dip and allow excess chocolate to drip off, so you get a nice even coating without clumps.
How to Serve Homemade Thin Mint-Inspired Cookies Recipe
Garnishes
I usually keep it simple by serving these cookies plain, letting that glossy chocolate shine. But for a festive twist, I sprinkle crushed candy canes or a tiny pinch of sea salt on top of the wet chocolate. It adds a beautiful pop of color and a little extra flavor boost I swear you’ll love.
Side Dishes
These cookies go perfectly with a cold glass of milk or a hot cup of coffee or peppermint tea. I also like pairing them with light fruit desserts or a scoop of vanilla ice cream for an indulgent treat.
Creative Ways to Present
For holiday parties, I arrange the cookies on decorative platters, alternating with fresh mint leaves for a pop of green. Wrapping them in festive cellophane bags tied with a ribbon makes a sweet gift that everyone appreciates. I’ve even dipped half the batch in white chocolate swirls for a striking two-tone effect—always a crowd-pleaser!
Make Ahead and Storage
Storing Leftovers
I keep these cookies in an airtight container at room temperature, and honestly, they usually don’t last more than a few days because we can’t resist! But if you do have leftovers, they stay fresh up to one week without losing their crispness or flavor.
Freezing
If I want to make a big batch ahead of time, I freeze the baked, cooled cookies (without chocolate dip) in a single layer on a baking sheet, then transfer them to a freezer-safe bag. When I’m ready to enjoy, I dip them in chocolate and let them set. This method saves me time and keeps them tasting fresh.
Reheating
Once dipped in chocolate, I don’t recommend reheating since it can affect the texture. But if you have plain cookies frozen, warming them in a low oven for a few minutes helps regain a bit of that fresh-baked crispness before dipping.
FAQs
-
Can I use regular chocolate chips instead of chopped chocolate for dipping?
Absolutely! Regular chocolate chips will work fine for melting, but sometimes they contain stabilizers that can make the chocolate a bit thicker after melting. If you’re aiming for the smoothest coating, high-quality chopped baking chocolate or couverture chocolate is best. If you do use chips, consider adding a tiny bit of coconut oil to thin the chocolate slightly.
-
What if I don’t have peppermint extract? Can I substitute it?
Peppermint extract gives that classic Thin Mint flavor, but if you don’t have any, you can use spearmint extract or even a drop of mint-flavored liqueur. Just be cautious with amounts since liqueurs can add extra liquid. If you’d like to skip the mint flavor altogether, try vanilla extract instead for a chocolate cookie with a different twist.
-
How do I prevent my cookies from spreading too much during baking?
There are a few tricks: chilling the dough before rolling helps it hold its shape, as does making sure your baking soda quantity is accurate. Also, using cold baking sheets can minimize spreading. Avoid flattening the dough balls too thin before baking, and don’t open the oven unnecessarily during baking, as temperature drops can affect cookie structure.
-
Can I make these cookies gluten-free?
Yes! I’ve swapped in a gluten-free all-purpose flour blend, making sure it contains xanthan gum for structure, and the cookies still turn out fantastic. Just watch the dough consistency—it might need an extra tablespoon or two of flour if it feels too sticky.
Final Thoughts
Honestly, this Homemade Thin Mint-Inspired Cookies Recipe holds a special place in my kitchen because it brings that nostalgic Girl Scout cookie magic home—without waiting for the season. It’s one of those recipes you’ll find yourself coming back to when friends drop by or you need a little chocolate-and-mint pick-me-up. Give it a try, trust me, you’ll be amazed how easy it is to make something so delicious—and you’ll love sharing it as much as I do!
Print
Homemade Thin Mint-Inspired Cookies Recipe
- Prep Time: 15 minutes
- Cook Time: 20 minutes
- Total Time: 1 hour 5 minutes
- Yield: 24 small cookies
- Category: Dessert
- Method: Baking
- Cuisine: American
Description
These Homemade Thin Mint-Inspired Cookies are a delightful treat combining rich cocoa-flavored, crisp cookies with a refreshing peppermint-infused dark chocolate coating. Perfectly replicating the classic Thin Mints, these cookies are baked to a delicate crumbly texture and dipped in smooth, minty chocolate for an irresistible dessert or holiday snack.
Ingredients
For the cookies:
- 1 3/4 cups all-purpose flour
- 3/4 cup unsweetened cocoa powder
- 1/2 teaspoon baking soda
- 1 teaspoon salt
- 1 cup unsalted butter, at room temperature
- 1/2 cup granulated sugar
- 2 teaspoons peppermint extract
For dipping:
- 12 ounces dark chocolate, chopped
- 1 to 2 teaspoons peppermint extract (adjust to taste)
Instructions
- Preheat Oven and Prepare Baking Sheets: Preheat your oven to 350° F (175° C). Line two baking sheets with parchment paper or nonstick baking mats to prevent sticking and ensure even baking.
- Mix Dry Ingredients: In a medium bowl, whisk together the all-purpose flour, unsweetened cocoa powder, baking soda, and salt. This ensures the dry ingredients are evenly distributed for uniform texture and flavor.
- Cream Butter and Sugar: Using a stand mixer, beat the room-temperature butter and granulated sugar together until the mixture is light and fluffy, about five minutes. This step incorporates air for tender cookies. Scrape down the bowl sides to mix thoroughly.
- Add Peppermint Extract: Add the peppermint extract to the creamed butter and sugar, mixing until well combined, infusing the dough with minty freshness.
- Combine Dry and Wet Ingredients: Gradually add the flour and cocoa mixture to the butter mixture in two additions, beating until just combined. The dough will remain slightly crumbly. Scrape the bowl sides as needed to incorporate all ingredients evenly.
- Chill the Dough: Gather the dough into a ball, flatten it slightly into a disc, and wrap tightly with plastic wrap. Refrigerate for at least 30 minutes to firm up the dough, making it easier to roll and cut.
- Roll and Cut Cookies: On a well-floured surface, roll out the chilled dough to about 1/4-inch thickness. Use a small round cookie cutter, preferably with fluted edges, to cut out approximately two dozen cookies. Reroll scraps, adding a little flour if needed, and continue cutting until dough is used.
- Bake the Cookies: Place the cut cookies on the prepared baking sheets and bake in the preheated oven for 20 minutes. They will appear crumbly immediately out of the oven but will firm up as they cool completely on the baking sheets.
- Melt Chocolate and Add Peppermint: While cookies cool, melt the chopped dark chocolate in a double boiler over simmering water until smooth. Stir in 1 to 2 teaspoons peppermint extract, adjusting the amount to your taste preference.
- Dip Cookies in Chocolate: Using a fork, carefully dip each cooled cookie into the melted chocolate, coating both sides evenly. Allow excess chocolate to drip off, then place the cookies on a wire rack to dry completely.
- Store: Once the chocolate has set and dried, store the cookies in an airtight container. They stay fresh for up to one week, making them perfect for sharing or gifting.
Notes
- For best results, ensure the butter is at room temperature to easily cream with sugar.
- Adjust the amount of peppermint extract in the chocolate dip to suit your taste preferences.
- If the dough becomes too sticky while rolling, chill it again or lightly flour the surface and rolling pin.
- Store the finished cookies in a cool place to prevent the chocolate coating from melting.
- Use high-quality dark chocolate for a richer taste that complements the mint flavor well.
- You can add a pinch of espresso powder to the dough to enhance the chocolate flavor if desired.
Nutrition
- Serving Size: 2 cookies
- Calories: 160
- Sugar: 11g
- Sodium: 120mg
- Fat: 10g
- Saturated Fat: 6g
- Unsaturated Fat: 3g
- Trans Fat: 0g
- Carbohydrates: 18g
- Fiber: 2g
- Protein: 2g
- Cholesterol: 30mg


