
I absolutely love sharing this Aussie Crunch – Chocolate Coconut Slice Recipe with you because it’s one of those nostalgic treats that brings back warm memories of family gatherings and afternoon teas. It’s a perfect balance of crunchy, chewy, and chocolatey, which means it never stays around for long in my kitchen! Whether you’re after an easy bake for a bake sale, a quick afternoon pick-me-up, or just a classic homemade slice, this recipe hits the spot every time.
When I first tried making the Aussie Crunch – Chocolate Coconut Slice Recipe, I was amazed at how simple it was to pull together with everyday ingredients. The crushed cornflakes add an unexpectedly delightful crunch, and the luscious chocolate topping finishes it off beautifully. You’ll find this slice works incredibly well for lunchbox treats or as a sweet snack anytime you need a little indulgence without fuss.
Why You’ll Love This Recipe
- Simple Ingredients: Uses pantry staples you likely already have on hand, making it quick and convenient.
- Perfect Texture: The combination of crushed cornflakes and coconut gives that signature Aussie Crunch you don’t want to miss.
- Family Favorite: This slice has been a hit at my house, with everyone asking for seconds (and thirds!).
- Versatile Snack: Great for packed lunches, afternoon tea, or a chewy dessert anytime.

Ingredients You’ll Need
These ingredients come together beautifully to create that distinct chocolate coconut slice with a nice crunch. I recommend using fresh, high-quality butter and chocolate for the best flavor. When buying cornflakes, go for the plain variety so the slice isn’t overly sweet or flavored.
- Butter: Salted butter adds a lovely depth and balance to the sweetness, but you can use unsalted if preferred.
- Caster Sugar: Provides a smooth sweetness; superfine sugar dissolves neatly in the mixture.
- Golden Syrup: This is key to that caramelized flavor, but you can swap it with honey or brown sugar if needed.
- Desiccated Coconut: Adds chewiness and nuttiness; fresh is best for texture.
- Cornflakes: Crushing them just right is crucial for the crunch, so don’t overdo it.
- Self-Raising Flour: Helps give the base a light crumb; if you don’t have it, combine all-purpose flour with a little baking powder.
- Cocoa Powder: Adds the chocolate flavor to the base without overpowering it.
- Milk Chocolate: Cadbury milk chocolate works beautifully for the topping – melt it slowly for a silky finish.
Variations
I love playing around with this Aussie Crunch – Chocolate Coconut Slice Recipe to keep it fresh and suit different occasions or dietary needs. Feel free to swap out the cornflakes or experiment with different chocolate toppings – you’ll be surprised how forgiving this recipe is!
- Nutty Twist: Adding chopped toasted almonds or macadamias to the base adds a satisfying texture and extra flavor – my family goes crazy when I toss a handful in.
- Gluten-Free Version: Sub out the self-raising flour for a gluten-free blend and use gluten-free cornflakes – it works beautifully without losing any crunch.
- Dark Chocolate Top: Sometimes I melt dark chocolate instead of milk for a richer, less sweet finish – perfect for chocolate lovers.
- Seasonal Flavors: A dash of cinnamon or orange zest in the base adds a festive touch that’s great for holidays.
How to Make Aussie Crunch – Chocolate Coconut Slice Recipe
Step 1: Prepare your base mixture
Start by preheating your oven to 180°C (360°F). In a large saucepan over low heat, melt the butter gently – I find swelling the butter slowly helps avoid burning. Once melted, add the caster sugar and golden syrup, stirring until everything combines into a glossy mix. Then stir through the desiccated coconut, cocoa powder, and self-raising flour until well mixed. Finally, fold in the crushed cornflakes carefully, so you keep as much crunch as possible but distribute them evenly.
Step 2: Bake the base
Pour your mixture into a lined 20x30cm (8×12-inch) slice tray. Use the back of a spoon or spatula to press it down firmly and evenly – especially pushing it into the corners so it bakes uniformly. Bake in the oven for about 25 minutes until it’s set but still a little soft to touch. Don’t worry if it looks slightly wobbly, it firms up as it cools.
Step 3: Melt and spread the chocolate top
Once your base is cooled completely, break your milk chocolate into pieces and melt it gently in the microwave in 30-second bursts, stirring in between to prevent burning. When fully melted and glossy, spread it evenly over the base with a spatula. Pop the tray into the fridge to set the chocolate – at least 15 minutes will do.
Step 4: Slice and serve
After the chocolate has firmed up, remove the slice from the tray by lifting the baking paper. Slice into triangles (a fun Aussie tradition, but squares work too if you prefer!) and enjoy. These keep well in an airtight container in the fridge, perfect for snacks throughout the week.
Pro Tips for Making Aussie Crunch – Chocolate Coconut Slice Recipe
- Crushing Cornflakes: Use a ziplock bag and the back of a spoon to gently crush the cornflakes – avoid pulverizing them into dust for that perfect crunch.
- Melting Chocolate: Melt chocolate slowly in intervals to maintain a smooth texture and prevent scorching.
- Pressing the Base Firmly: Don’t be shy about pressing the base down; this helps it hold together nicely after baking and cooling.
- Avoiding Soggy Slice: Make sure your base has cooled thoroughly before adding the chocolate or it can melt unevenly and get messy.
How to Serve Aussie Crunch – Chocolate Coconut Slice Recipe
Garnishes
I usually keep it simple with this recipe, but a light dusting of shredded coconut on top of the melted chocolate before it sets adds a lovely texture contrast and looks beautiful. If you’re feeling fancy, a drizzle of white chocolate can create a nice swirl effect!
Side Dishes
This slice pairs wonderfully with a cup of strong black coffee or a refreshing glass of milk, which balances the sweetness. For gatherings, I like serving it alongside fresh fruit to cut through the richness.
Creative Ways to Present
I’ve found cutting the slice into fun shapes with cookie cutters adds a playful touch for kids’ parties. For a special occasion, setting slices on decorative parchment paper and stacking them on a tiered stand makes an impressive dessert display.
Make Ahead and Storage
Storing Leftovers
I always store leftover slices in an airtight container in the fridge. This keeps them fresh and prevents the chocolate topping from melting or getting sticky. They usually keep well for up to a week, though they rarely last that long in my house!
Freezing
Freezing is a fantastic option if you want to make a big batch ahead. I cut the slice into bite-sized pieces before freezing, then pack them in a freezer-safe container or bag. When you want a quick treat, just thaw a piece or two at room temperature or pop them in the fridge to defrost overnight.
Reheating
I generally enjoy the slice cold for that satisfying crunch, but if you want to warm it up slightly, pop it in the microwave for 10-15 seconds. This softens the chocolate a bit without making the base soggy, perfect if you like your slice a little gooey.
FAQs
-
Can I use other cereals instead of cornflakes in the Aussie Crunch – Chocolate Coconut Slice Recipe?
Absolutely! I’ve successfully swapped cornflakes for rice bubbles or crushed weetbix. Just keep an eye on the texture — some cereals absorb liquid differently, so you might want to slightly reduce the flour or adjust baking time if needed.
-
What’s the best way to crush cornflakes without making them too fine?
I recommend placing the cornflakes in a sealed plastic bag and using the back of a spoon or rolling pin to gently crush them until they’re broken into pieces but not powder. This keeps the crunch that makes the slice so special.
-
Can I make the chocolate topping with dark chocolate instead of milk chocolate?
Definitely! Dark chocolate creates a richer, less sweet topping. Just melt it the same way in short bursts to prevent burning. It’s a lovely alternative if you prefer your slice a bit more intense.
-
How long will the Aussie Crunch – Chocolate Coconut Slice keep?
Stored in an airtight container in the fridge, it will keep for up to one week. For longer storage, freezing is a great option and the slice maintains its texture well.
Final Thoughts
Honestly, this Aussie Crunch – Chocolate Coconut Slice Recipe has become a go-to for me whenever I want a no-fuss but delicious treat. It’s one of those recipes I keep coming back to because it’s just so reliably scrumptious and simple to make. Give it a try—you’ll love how quickly it comes together and how quickly it disappears! Next time you want to impress with little effort, you’ll have this winning slice at your fingertips.
Print
Aussie Crunch – Chocolate Coconut Slice Recipe
- Prep Time: 5 minutes
- Cook Time: 25 minutes
- Total Time: 45 minutes
- Yield: 12 triangles
- Category: Dessert
- Method: Baking
- Cuisine: Australian
Description
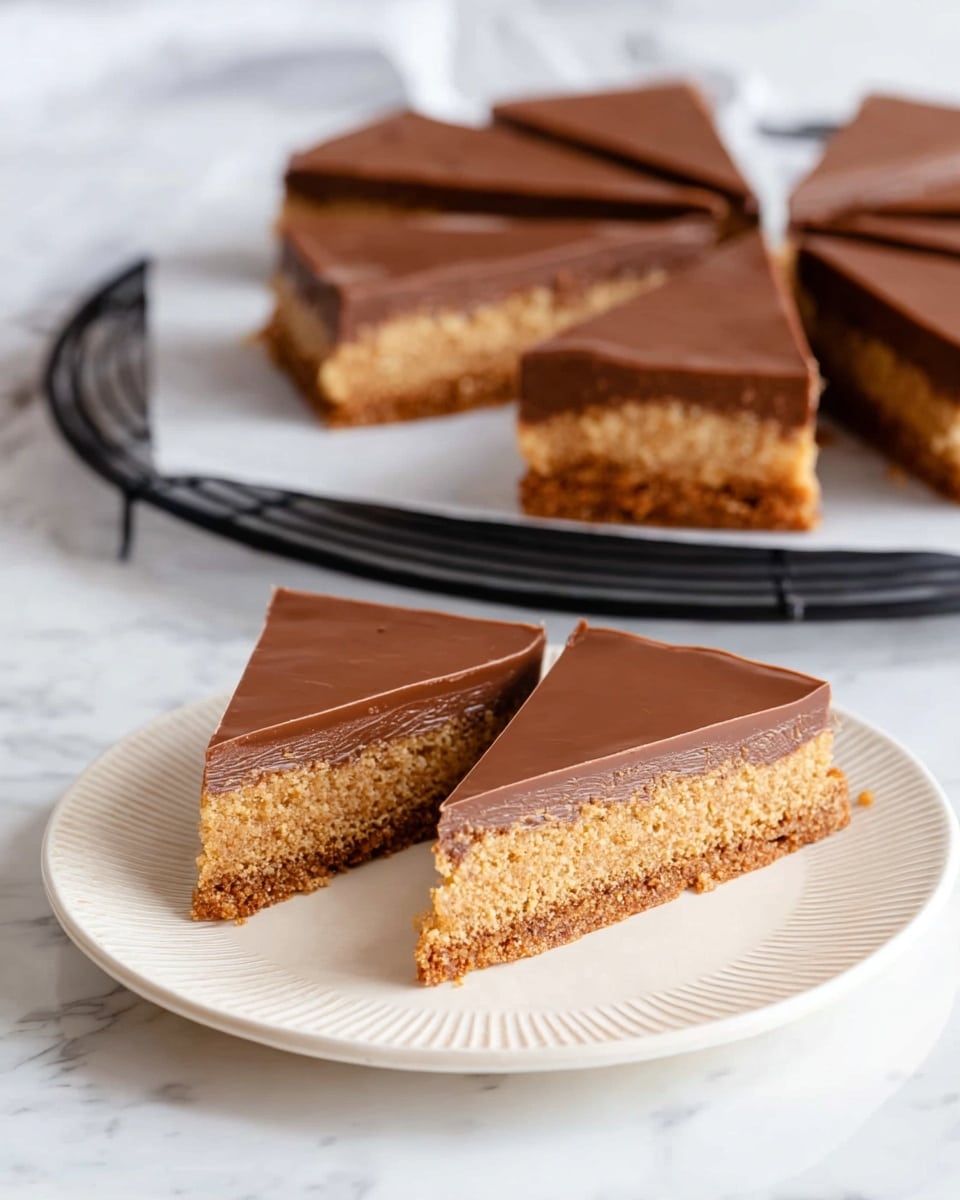
Aussie Crunch – Chocolate Coconut Slice is a deliciously crunchy and chocolatey treat featuring a buttery base with desiccated coconut, crushed cornflakes, and cocoa, topped with smooth melted milk chocolate. Perfect for snacks or lunch boxes, this slice offers a delightful combination of textures and flavors with a classic caramelized taste from golden syrup.
Ingredients
Slice Base
- 200 g salted butter
- 1/2 cup caster sugar (100 g)
- 2 tbsp golden syrup
- 1 cup desiccated coconut (80 g)
- 3 cups crushed cornflakes (90 g)
- 1 cup self raising flour (150 g)
- 1.5 tbsp cocoa powder
Chocolate Topping
- 1 block Cadbury milk chocolate (180 g)
Instructions
- Preheat Oven: Preheat your oven to 180°C (360°F) to prepare for baking the slice base.
- Prepare Base Mixture: In a large saucepan on low heat, melt the butter. Add caster sugar, golden syrup, desiccated coconut, cocoa powder and self-raising flour. Mix thoroughly until combined. Then fold in the crushed cornflakes last to maintain crunch.
- Press into Tray: Pour the mixture into a 20 x 30 cm (8 x 12 inch) slice or glass baking tray. Use the back of a spoon or spatula to press firmly, ensuring the mixture is evenly flattened into all corners.
- Bake: Bake the base in the preheated oven for around 25 minutes until set and firm.
- Cool: Remove the tray from the oven and allow the base to cool completely.
- Melt Chocolate: Break up the milk chocolate into a bowl and melt in 30-second intervals in the microwave, stirring between each session until smooth.
- Spread Chocolate Topping: Spread the melted chocolate evenly over the cooled slice base using a spatula.
- Set the Slice: Place the tray in the refrigerator to allow the chocolate topping to set firmly for a minimum of 15 minutes.
- Serve: Once set, cut the slice into your preferred shapes such as triangles, squares, or long slices and serve. Store leftovers in the fridge or freeze for longer storage.
Notes
- Storage: Keep slices in an airtight container in the fridge for up to one week. For longer storage, cut into bite-sized pieces and freeze.
- Crushing Cornflakes: Use a spoon or place cornflakes in a bag and crush by hand for best texture.
- Shape Ideas: Traditionally cut into triangles, but squares or long slices work equally well.
- Butter: Salted butter is used here but unsalted or margarine can be substituted.
- Flour Substitute: Use all-purpose flour with 1 tsp baking powder and ½ tsp baking soda if self-raising flour is unavailable.
- Golden Syrup Alternatives: Honey, brown sugar, or molasses can be used to replicate the caramelized flavor.
- Sugar Substitutes: White sugar or brown sugar can be used instead of caster sugar.
- Cereal Variations: Crushed cornflakes can be swapped for rice bubbles or weetbix for different textures.
Nutrition
- Serving Size: 1 triangle
- Calories: 275
- Sugar: 13 g
- Sodium: 173 mg
- Fat: 18 g
- Saturated Fat: 13 g
- Unsaturated Fat: 5 g
- Trans Fat: 0 g
- Carbohydrates: 27 g
- Fiber: 2 g
- Protein: 3 g
- Cholesterol: 36 mg


