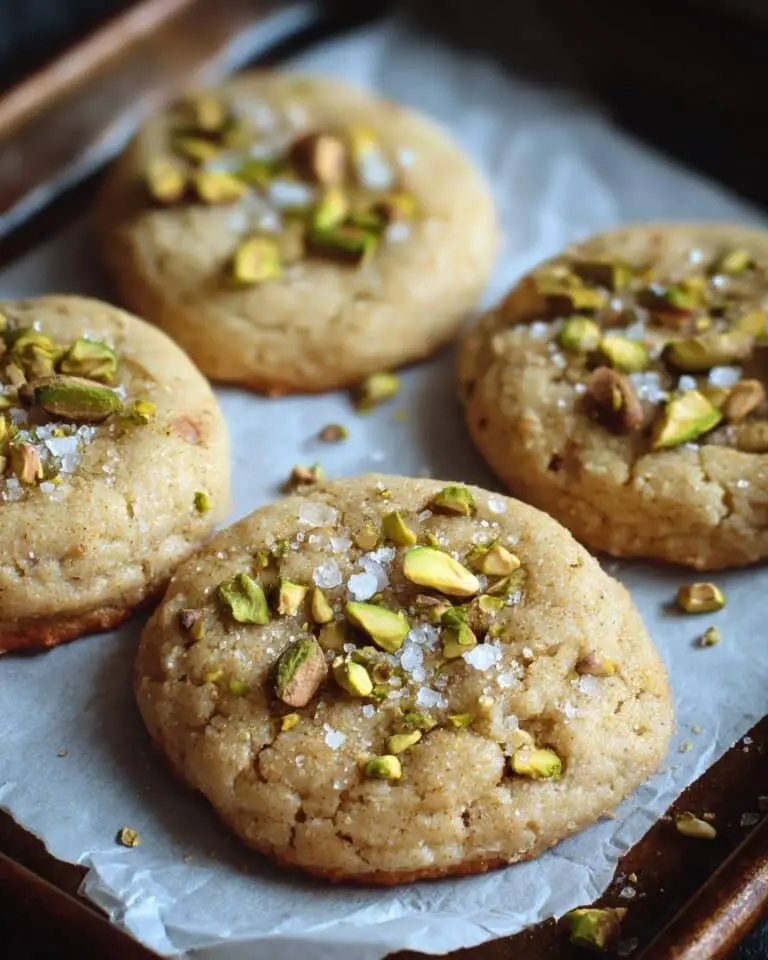
I absolutely love sharing this Mongolian Chicken Recipe because it’s one of those dishes that tastes like you ordered takeout, but it’s actually made in your own kitchen—without all the wait or mystery ingredients. When I first tried making this at home, I was blown away by just how crispy and flavorful the chicken turned out, all coated in that addictive, sticky sauce you can’t stop dipping into. Whether you’re cooking for a busy weeknight or prepping a weekend dinner for friends, this recipe works like a charm every single time.
You’ll find that this Mongolian Chicken Recipe is both straightforward and customizable, which means it fits perfectly into your routine, even when you’re running short on time. Plus, the mix of garlic, ginger, hoisin, and a touch of sweetness from brown sugar makes it feel like a special treat without any fuss. Trust me, once you’ve cooked this, it’ll become one of your go-to favorites!
Why You’ll Love This Recipe
- Crispy and Tender Chicken: Coating the chicken in cornstarch gives it a perfectly crispy outside while keeping the inside juicy and tender.
- Quick Sauce with Big Flavor: The sauce comes together fast using pantry staples like hoisin and soy sauce but delivers a complex, savory-sweet punch.
- Flexible Cooking Methods: You can fry the chicken for that classic texture or air fry for a lighter, less oily option.
- Family-Friendly and Crowd-Pleasing: My family goes crazy for this dish, and I love how it pleases a variety of tastes — you can easily dial up or down the spice.

Ingredients You’ll Need
Each ingredient in this Mongolian Chicken Recipe complements the others beautifully. I like using dark meat chicken thighs for extra flavor, but you can switch it up based on what you have. Also, a little tip—fresh ginger and garlic really make a difference in this dish, so don’t skip them!
- Skinless, boneless chicken thighs: They stay juicy and tender even after frying, perfect for absorbing sauce.
- Cornstarch (or potato starch): Essential for that crispy exterior that sticks to the chicken like magic.
- Vegetable oil (or neutral oil): Great for frying without adding extra flavors that might compete.
- Garlic: Freshly minced adds the perfect aromatic punch.
- Red chili peppers (optional): Adds a nice heat if you like it spicy—feel free to adjust.
- Ginger slices: I love how fresh ginger brightens the whole dish with a subtle warmth.
- Hoisin sauce: This is the heart of the sauce, balancing sweet and savory notes.
- Regular soy sauce: Provides that salty umami kick.
- Brown sugar: Adds depth and just enough sweetness to balance the soy.
- Sesame oil: A little drizzle elevates the aroma and flavor profile.
- Cornstarch slurry: Helps thicken the sauce perfectly so it clings to the chicken.
- Green onions (for garnish): Adds fresh color and a mild onion crunch.
Variations
I like to switch things up with this Mongolian Chicken Recipe depending on what’s in my fridge or how much time I have. It’s such a flexible recipe that you can easily make it milder, spicier, or swap proteins without any hassle. Feel free to make it your own!
- Chicken Breast Variation: I’ve made this with chicken breasts when I wanted a leaner option, just watch the cooking time so it doesn’t dry out.
- Vegetarian Twist: Try swapping chicken with crispy tofu—just coat and fry the tofu the same way for a delicious plant-based version.
- Spice Level Adjustment: I sometimes add extra red chili slices or a pinch of chili flakes for more heat; if kids are eating, I skip the peppers entirely.
- Air Fryer Friendly: Using the air fryer saves oil and cleanup, and you still get that satisfying crunch.
How to Make Mongolian Chicken Recipe
Step 1: Prep Your Chicken and Slurry
Start by making the cornstarch slurry—just mix 2 tablespoons of cornstarch with 1 cup of water until smooth and set it aside. Then dice your chicken thighs into bite-sized pieces, about 1.5 inches each. Don’t pat the chicken dry; the moisture actually helps the cornstarch stick better, which is key to that crispy finish.
Step 2: Coat the Chicken in Cornstarch
Toss your diced chicken with about ½ cup cornstarch in a large bowl until each piece is nicely coated. If some pieces need a bit more, don’t hesitate to add extra cornstarch—you want a nice even layer to get that golden crust. I usually do this step by hand to make sure everything is evenly covered.
Step 3: Cook the Chicken Your Way
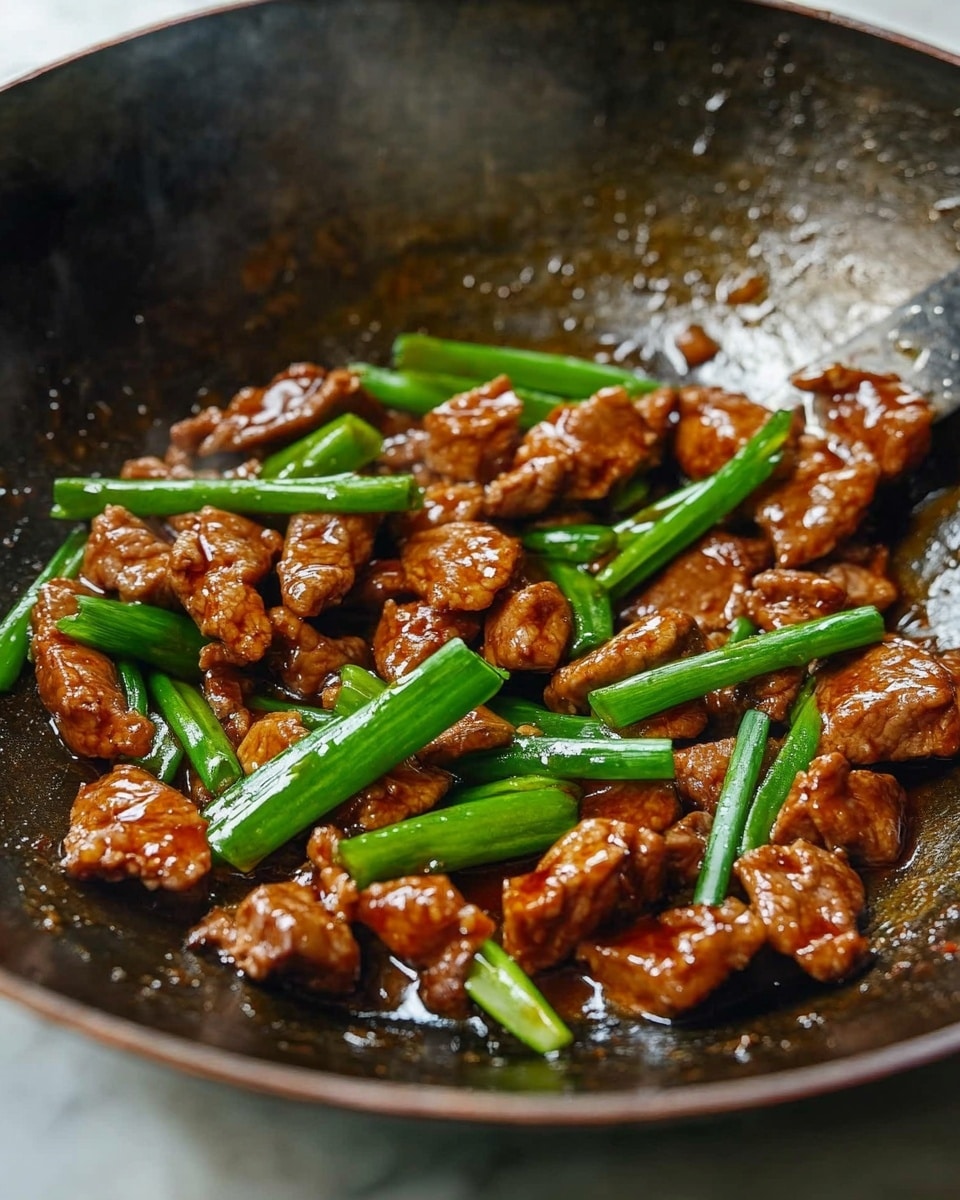
If you’re frying on the stovetop, heat your vegetable oil in a large pan over medium-high heat. Fry the chicken in batches for about 6 to 8 minutes until it’s golden brown and cooked through. Drain on a rack or paper towels to get rid of excess oil. If you’re using an air fryer like I do sometimes, lightly spray the basket with oil, place the chicken pieces without overlapping, spray them lightly again, and air fry at 400°F for 10 to 14 minutes, shaking halfway through for even crispness.
Step 4: Whip Up the Sauce
After removing the chicken, reduce the heat to medium in the same pan. Add the ginger slices, minced garlic, and red chili slices if using. Sauté for about 10 seconds until everything smells amazing—trust me, that aroma sets the mood! Next, stir in the hoisin sauce, soy sauce, brown sugar, and sesame oil. Give your cornstarch slurry a quick stir then pour it in. Stir continuously as the sauce simmers to thicken up and become glossy — this usually takes just a minute or two.
Step 5: Combine and Serve
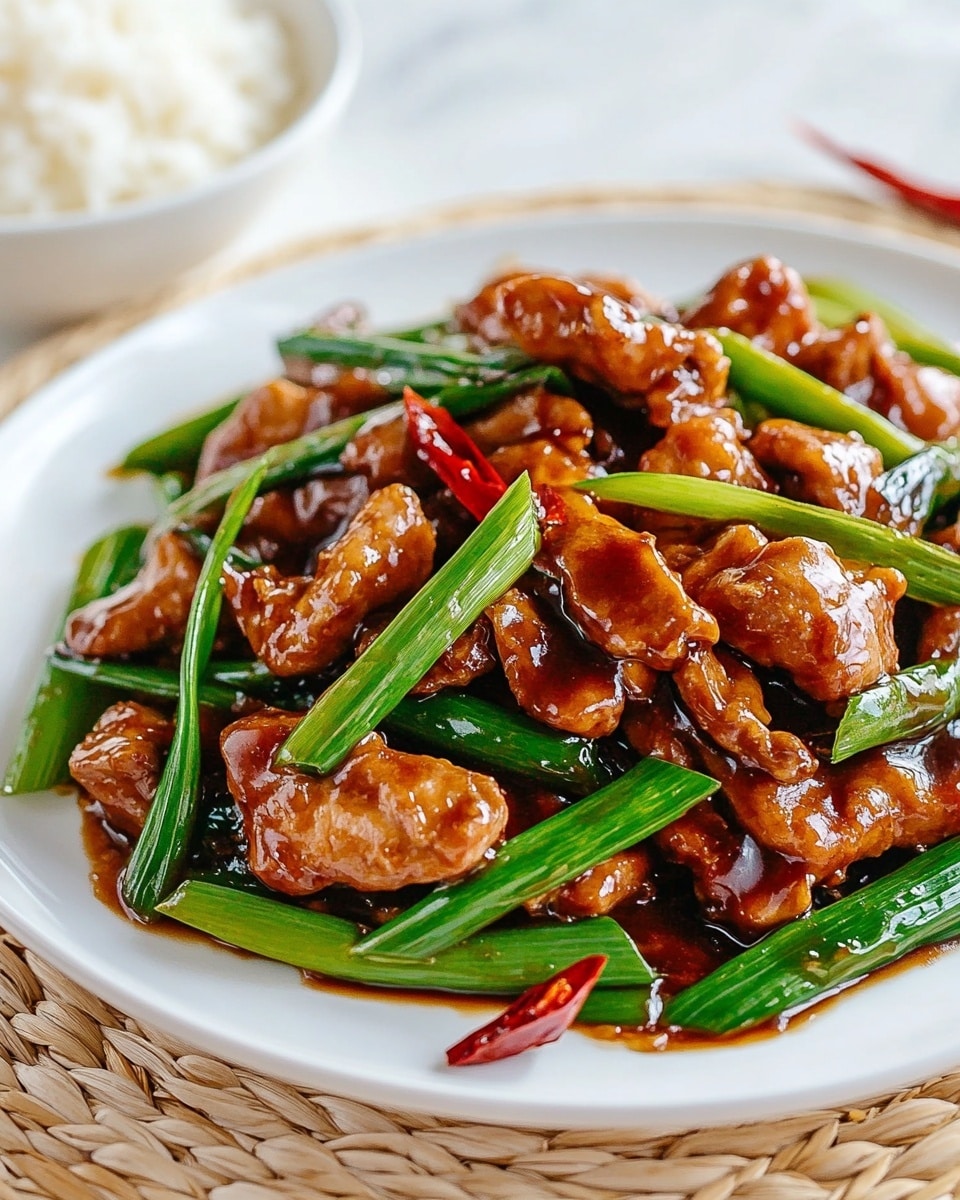
Add the crispy chicken back to the pan and toss it gently to coat every morsel in that luscious sauce. Once everything is evenly covered and heated through, transfer to your serving dish. Add a sprinkle of chopped green onions and a few red chili slices if you like to brighten the plate with some color and texture. Then dig in!
Pro Tips for Making Mongolian Chicken Recipe
- Don’t Overcrowd the Pan: When frying, cook the chicken in batches so the pieces get crispy instead of steaming.
- Fresh Ginger Boosts Flavor: I discovered this trick when I added extra fresh ginger slices—it makes a huge difference in depth and aroma.
- Stir the Slurry Before Adding: Cornstarch settles quickly, so give it a quick stir before pouring it into the sauce to avoid lumps.
- Avoid Making the Sauce Too Thick: If your sauce becomes too gloopy, just add a splash of water or soy sauce to loosen it up—it’ll coat the chicken better.
How to Serve Mongolian Chicken Recipe
Garnishes
I always add chopped green onions and some sliced red chilies on top—it brightens the dish visually and gives a burst of fresh flavor with each bite. Sometimes, I sprinkle a few toasted sesame seeds for extra crunch and nutty notes. These little touches make the dish feel like something special without any extra hassle.
Side Dishes
My go-to pairing is steamed jasmine rice, which soaks up the sauce beautifully. Sometimes I serve it alongside garlic stir-fried broccoli or snap peas to add some crunch and vibrant greens to the plate. For a fun twist, I’ve also served this Mongolian Chicken over noodles with a drizzle of sesame oil—delicious and comforting every time.
Creative Ways to Present
For special occasions, I like presenting mongolian chicken in a big decorative bowl with a garnish of fresh herbs like cilantro and sliced red chilies for that pop of color. You could also serve it family-style, letting everyone scoop from a central platter, which feels cozy and communal. If you’re feeling fancy, serve with carved cucumber ribbons or a side of pickled vegetables to add some brightness and balance.
Make Ahead and Storage
Storing Leftovers
I usually store leftover Mongolian Chicken in an airtight container in the fridge for up to 3 days. The sauce stays sticky and flavorful, though the chicken can soften a bit after sitting, so reheating properly is key to keeping it tasty.
Freezing
Freezing works well if you want to save leftovers longer. I recommend freezing the chicken and sauce together in a freezer-safe container. It’s best to eat frozen Mongolian Chicken within 2 months for optimal flavor and texture. Just thaw overnight in the fridge before reheating.
Reheating
To reheat, I prefer warming it up in a skillet over medium heat with a splash of water or broth to loosen the sauce and prevent drying. This helps the chicken regain some crispiness and ensures the sauce stays smooth. Microwaving works in a pinch but can make the chicken soggy.
FAQs
-
Can I use chicken breasts instead of thighs in this Mongolian Chicken Recipe?
Absolutely! Chicken breasts can be used if you prefer leaner meat, but keep an eye on them while cooking because they can dry out faster than thighs. Cutting them into uniform pieces and not overcooking ensures they stay juicy.
-
Is it necessary to coat the chicken with cornstarch?
Yes, the cornstarch coating is key to achieving the signature crispy texture that Mongolian Chicken is known for. It also helps the sauce stick beautifully to the chicken pieces.
-
Can I make this recipe gluten-free?
You can make it gluten-free by using gluten-free soy sauce and hoisin sauce, which are widely available now. Just double-check your labels to be safe.
-
How spicy is this Mongolian Chicken Recipe?
The spice level depends on the amount of red chili peppers you add. It’s easy to customize—skip the chilies for a mild version or add extra if you love heat.
-
What’s the best way to reheat the leftovers without losing flavor?
Reheating in a skillet with a splash of water or broth over medium heat helps retain that flavorful sauce and brings back a bit of crispiness. Avoid microwaving if you want to keep the texture.
Final Thoughts
This Mongolian Chicken Recipe has become such a staple in my kitchen because it manages to feel special while still being incredibly easy to pull off. I love how the crispy chicken coated in that luscious, sticky sauce brings my family running to the table, no matter what else we’re having. Give it a try—you’ll be amazed at how restaurant-quality flavors can come from just a few simple ingredients. It’s one of those dishes I’m excited to keep making and sharing, and I think you will be too!
Print
Mongolian Chicken Recipe
- Prep Time: 15 minutes
- Cook Time: 10 minutes
- Total Time: 25 minutes
- Yield: 6 servings
- Category: Main Dish
- Method: Frying
- Cuisine: Asian, Chinese
Description
This Mongolian Chicken recipe features tender, crispy chicken thighs coated in a flavorful, glossy sauce made with hoisin, soy sauce, brown sugar, and sesame oil. You can prepare it either by frying on the stovetop or using an air fryer for a lighter version. It’s an easy and delicious meal perfect served over rice or noodles, garnished with green onions and chili peppers for an extra kick.
Ingredients
Chicken and Coating
- 2 lb skinless, boneless chicken thighs
- 1/2 cup cornstarch (or as needed, or substitute with potato starch)
- 2/3 cup vegetable oil (or any neutral oil)
Sauce and Aromatics
- 4 cloves garlic, minced
- 2 red chili peppers, sliced (optional)
- 10 slices ginger
- 8 tablespoons hoisin sauce
- 4 tablespoons regular soy sauce
- 4 tablespoons brown sugar
- 4 teaspoons sesame oil
Cornstarch Slurry
- 2 tablespoons cornstarch (or substitute with potato starch)
- 1 cup water
Optional Garnishes
- 2 green onions, finely chopped
- 2 red chili peppers, sliced
Instructions
- Make the cornstarch slurry: In a small bowl, whisk together 2 tablespoons cornstarch and 1 cup water until smooth. Set aside for later use to thicken the sauce.
- Prepare the chicken: Dice the chicken thighs into approximately 1.5-inch pieces (about 4-6 pieces per thigh). Do not pat dry, as the moisture helps the cornstarch coating adhere.
- Coat the chicken: Toss the diced chicken with ½ cup cornstarch in a large bowl until each piece is evenly coated. Add a little extra cornstarch if necessary to ensure full coverage.
- Cook the chicken: Option 1 – Stovetop: Heat vegetable oil in a large pan or wok over medium-high heat. Fry the chicken in batches, cooking for 6-8 minutes until golden brown on all sides. Remove and drain on a wire rack or paper towels. Option 2 – Air Fryer: Lightly spray the air fryer basket with oil. Place the coated chicken pieces in a single layer, spacing them out. Lightly spray chicken with oil. Air fry at 400°F for 10-14 minutes, shaking halfway through to ensure even cooking, until crispy and golden.
- Make the sauce: Reduce heat to medium in the same pan (or use a clean pan if air frying). Add ginger slices, minced garlic, and sliced red chili peppers (if using). Sauté for about 10 seconds until fragrant.
- Combine the sauce ingredients: Stir in hoisin sauce, soy sauce, brown sugar, and sesame oil. Stir well to combine. Quickly stir the cornstarch slurry to recombine and pour it into the pan. Mix continuously until the sauce smooths out and begins to simmer and thicken.
- Combine chicken and sauce: Add the cooked chicken back to the pan and toss everything together thoroughly, coating the chicken evenly with the glossy sauce. Remove from heat.
- Serve: Transfer the Mongolian chicken to a serving dish and garnish with finely chopped green onions and additional sliced red chili peppers if desired. Serve immediately with rice, noodles, or vegetables of choice.
Notes
- You can substitute boneless, skinless chicken breasts for thighs if preferred, but thighs remain juicier.
- Cornstarch can be replaced with potato starch if unavailable.
- Adjust the amount of red chili peppers to control the spice level to your taste.
- This dish pairs wonderfully with steamed rice, fried rice, noodles, or stir-fried vegetables for a complete meal.


