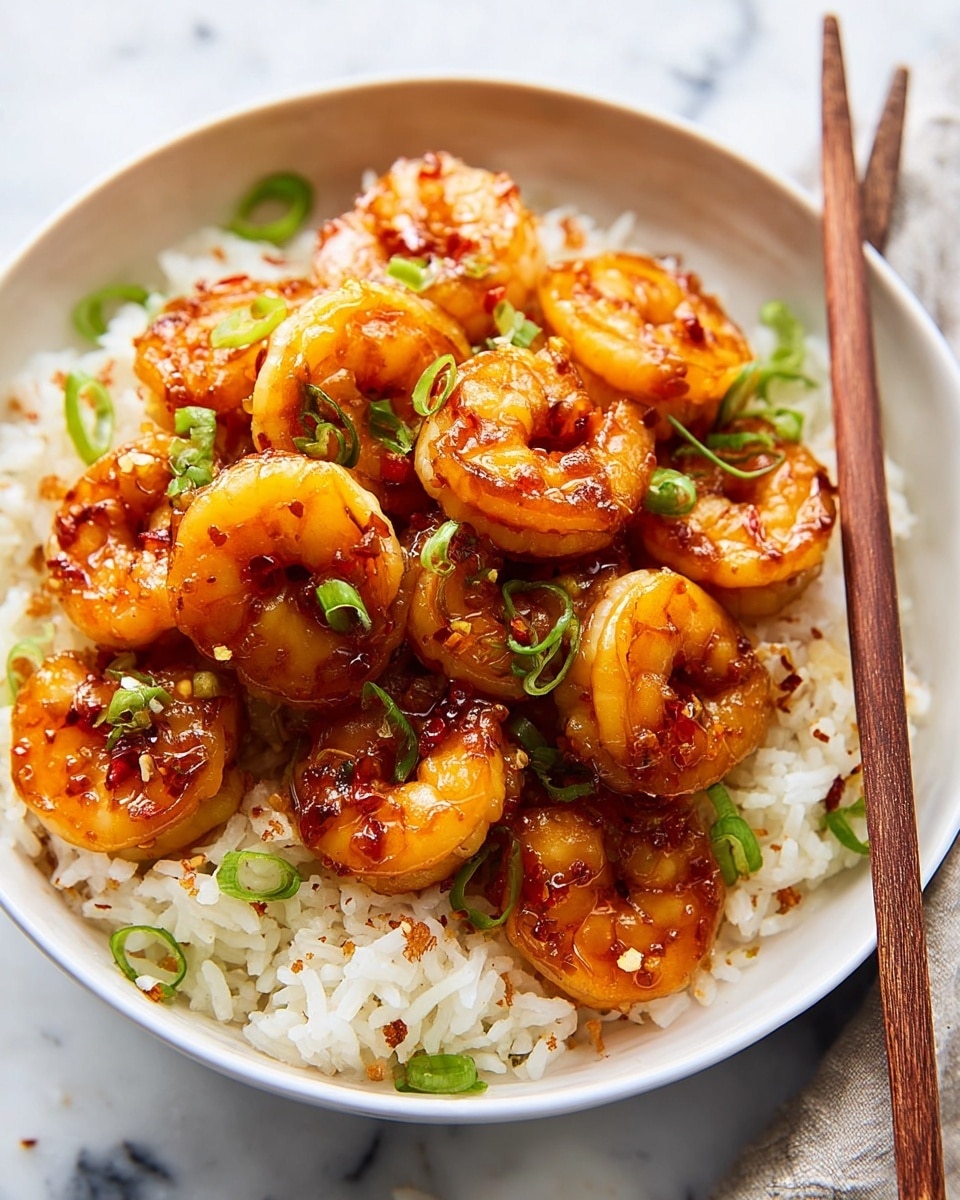
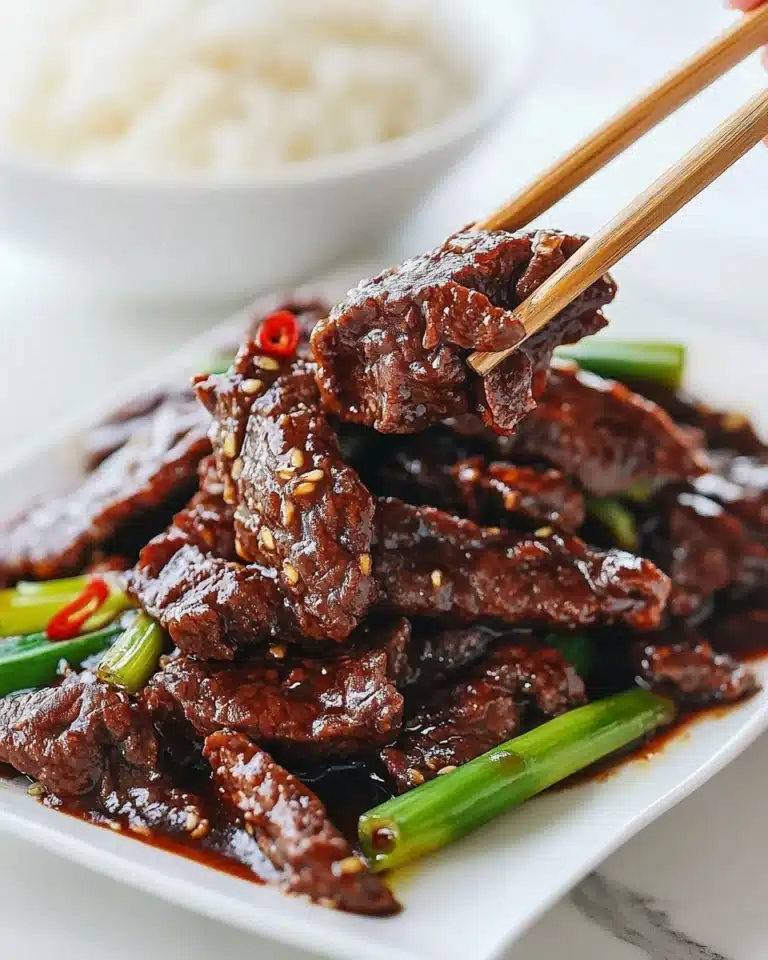
I absolutely love this 10 Minute Honey Garlic Shrimp Recipe because it feels like a restaurant-quality dish with barely any effort. When I first tried it, the balance of sweet honey and punchy garlic blew me away — plus, it’s ready in no time, making it perfect for hectic weeknights or last-minute guests. You’ll find that the velveting technique keeps the shrimp incredibly tender, which is a game-changer if you’ve ever struggled with rubbery shrimp before.
Whether you’re pairing it with rice or enjoying it as a flavorful appetizer, this 10 Minute Honey Garlic Shrimp Recipe consistently impresses. I used to think quick shrimp dishes meant sacrificing flavor, but this one proved me wrong. Once you try it, you’ll want it on repeat for busy dinners, easy lunches, or even when you want to wow someone without hours in the kitchen.
Why You’ll Love This Recipe
- Quick and Simple: Ready in just 10 minutes, it fits perfectly into any busy schedule.
- Tender & Juicy Shrimp: Velveting with soy sauce and cornstarch locks in moisture for a texture that’s hard to beat.
- Flavor-Packed Sauce: Honey and garlic create a sweet-spicy kick that your whole family will crave.
- Versatile Serving: It’s great over rice, noodles, or even wrapped in lettuce for a lighter meal.

Ingredients You’ll Need
The ingredients for this 10 Minute Honey Garlic Shrimp Recipe are simple but purposeful, delivering a punch of flavor without fuss. I always keep these basics on hand because they come together so quickly and taste amazing.
- Shrimp: Fresh or thawed frozen shrimp work best — peeled and deveined to save prep time.
- Light Soy Sauce: Adds saltiness and umami, balancing the sweetness.
- Cornstarch: This little trickvelvets the shrimp for tender, juicy bites.
- Vegetable Oil: Use a neutral oil with high smoke point for perfect searing.
- Garlic: Freshly minced garlic is non-negotiable for that signature honey-garlic flavor.
- Ginger Paste or Grated Ginger: Adds warmth and a subtle zing that complements garlic beautifully.
- Honey: The star here, for natural sweetness and glaze.
- Chilli Flakes (optional): I add a pinch to give it a little heat, but you can leave it out for mild flavor.
- Green Onions: Fresh green tops for garnish bring a pop of color and freshness.
Variations
I love tinkering with this 10 Minute Honey Garlic Shrimp Recipe to suit whatever mood we’re in — feel free to make it your own! Adding or swapping a few ingredients can give you exciting new flavors without losing that quick and tasty vibe.
- Add some veggies: Toss in snap peas or bell peppers for a bit of crunch and color — my kids love this colorful version.
- Make it spicy: I sometimes up the chili flakes or add a dash of Sriracha if I want more heat.
- Swap honey for maple syrup: For a different kind of sweetness, maple syrup works beautifully and adds depth.
- Use lime juice: A squeeze of fresh lime brightens the dish and balances the honey’s sweetness if you prefer tangy notes.
How to Make 10 Minute Honey Garlic Shrimp Recipe
Step 1: Velvet the Shrimp Like a Pro
Start by mixing the light soy sauce and cornstarch in a bowl. Add your peeled and deveined shrimp and toss well to coat. This technique, called velveting, is what keeps the shrimp juicy and tender when cooking fast over heat. Let it sit while you prep the rest — it only takes a minute, but makes a huge difference in texture.
Step 2: Sizzle the Garlic and Ginger
Heat your vegetable oil in a non-stick pan over medium heat and add the minced garlic along with the ginger. Stir constantly for no more than 30 seconds to avoid burning — this step releases those mouthwatering aromatic flavors that kick off the dish. You’ll smell it instantly, and that’s when you know it’s time to add the shrimp.
Step 3: Cook the Shrimp Quickly
Place the shrimp in the pan in a single layer. Depending on their size, cook each side for 1 to 2 minutes until they turn pink and curl up. Don’t overcook — shrimp go from perfect to rubbery quickly, and you want to keep them tender. Toss them gently while cooking to ensure even heat and that garlic-ginger flavor clings to every bite.
Step 4: Sweeten and Spice It Up
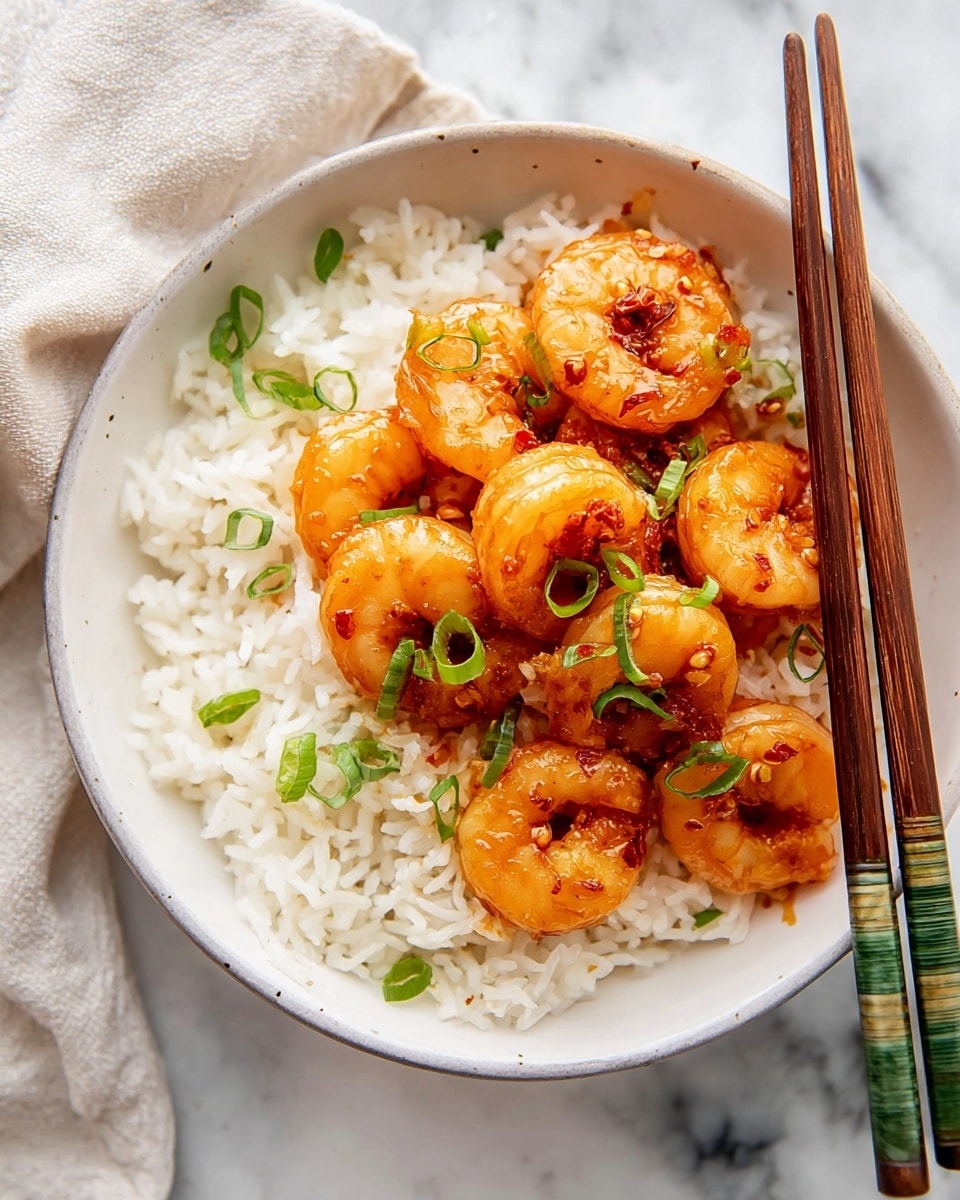
Once the shrimp are almost done, Pour in the honey and sprinkle the optional chili flakes. Toss everything gently to coat the shrimp with the glossy, sticky sauce. The heat from the pan will thicken the honey just enough to cling perfectly without burning. Then, take the pan off the heat — your 10 Minute Honey Garlic Shrimp is ready to shine!
Step 5: Garnish and Serve
Finish by sprinkling thinly sliced green onions on top for freshness and a nice contrast in texture. Serve it over steamed rice, noodles, or even a leafy green salad—whatever you prefer. You’ll love how this dish tastes as good as it looks and comes together faster than you thought possible.
Pro Tips for Making 10 Minute Honey Garlic Shrimp Recipe
- Don’t Skip Velveting: This trick keeps shrimp juicy — I learned that cooking shrimp straight without it made my dishes tough every time.
- Use Medium Heat: Too hot and you’ll burn the garlic; too low and shrimp won’t sear properly, so medium heat strikes the perfect balance.
- Add Honey Last: Adding honey at the end lets the sauce stick without caramelizing too much or burning.
- Prep Ingredients Ahead: I always have garlic minced and ginger ready to speed up the quick cooking — it saves precious seconds.
How to Serve 10 Minute Honey Garlic Shrimp Recipe
Garnishes
I always top this recipe with sliced green onions for that fresh crunch and bright color. Sometimes, I sprinkle a few toasted sesame seeds for nutty depth. Both add great texture contrasts and elevate the dish from tasty to restaurant-worthy in seconds.
Side Dishes
This shrimp pairs wonderfully with steamed jasmine or basmati rice, which soaks up all that honey garlic sauce. Alternatively, I love serving it alongside lightly sautéed green beans or a crisp cucumber salad for a refreshing balance. Noodles tossed with a little sesame oil work great too — it turns dinner into a complete meal effortlessly.
Creative Ways to Present
For a special dinner, I like to serve the shrimp in lettuce cups with a drizzle of extra sauce and some finely chopped peanuts on top. It’s a fun and elegant way to snack or eat without utensils. I’ve also tried layering it on skewers for a party platter—your guests will love the combination of sticky-sweet shrimp and colorful garnishes.
Make Ahead and Storage
Storing Leftovers
I keep leftover honey garlic shrimp in an airtight container in the refrigerator for up to two days. To prevent the sauce from getting too thick or sticky, I add a splash of water before reheating. It reheats nicely without losing that lovely glaze or becoming rubbery.
Freezing
Freezing this shrimp isn’t my first choice because it loses some texture, but if you need to, flash freeze the cooked shrimp on a tray before transferring to a freezer bag. Thaw overnight in the fridge and gently reheat to enjoy. Just know fresh is best for this quick-cooking recipe.
Reheating
I recommend reheating leftover shrimp over low-medium heat in a skillet with a splash of water or broth to loosen the sauce. Avoid the microwave because it tends to overcook shrimp and make them rubbery. Gently warming preserves the tender texture and the delicious honey garlic flavor.
FAQs
-
Can I use frozen shrimp for this 10 Minute Honey Garlic Shrimp Recipe?
Absolutely! Just make sure to thaw the shrimp completely and pat them dry before starting. This helps the shrimp cook evenly and absorb the velveting mixture, ensuring that tender texture we’re aiming for.
-
What’s the purpose of velveting the shrimp?
Velveting with soy sauce and cornstarch creates a protective coating that keeps the shrimp moist and tender during quick cooking. It’s a Chinese cooking technique that makes a big difference, especially when cooking seafood which can dry out easily.
-
Can I make this recipe gluten-free?
Yes! Use a gluten-free soy sauce alternative like tamari, and ensure your cornstarch and other ingredients are gluten-free. This way, you keep all the flavor without any gluten concerns.
-
Can I double the recipe?
Definitely. Just make sure to cook the shrimp in batches if your pan isn’t big enough. Crowding the pan lowers the temperature and can cause the shrimp to steam instead of sear, which affects the texture and flavor.
-
What can I serve with this shrimp recipe?
Steamed rice, noodles, or a crisp salad are my go-to sides for this dish. For something a little different, serve with lettuce wraps or stir-fried veggies to round out the meal.
Final Thoughts
This 10 Minute Honey Garlic Shrimp Recipe has become a staple in my kitchen because it answers the call for fast, flavorful, and fuss-free meals. I love sharing it with friends because it wins over shrimp skeptics every time and feels special without making things complicated. I hope you give it a try soon — once you taste that perfect balance of honey sweetness and garlic punch wrapped around tender shrimp, you’ll be hooked like I am!
Print
10 Minute Honey Garlic Shrimp Recipe
- Prep Time: 5 minutes
- Cook Time: 5 minutes
- Total Time: 10 minutes
- Yield: 4 servings
- Category: Main Course
- Method: Frying
- Cuisine: Chinese
Description
A quick and delicious 10-minute honey garlic shrimp recipe featuring tender shrimp coated in a flavorful honey garlic sauce with a hint of ginger and chili flakes, perfect for a weeknight dinner or appetizer.
Ingredients
Shrimp Marinade
- 450g/1 lb shrimp, peeled and deveined
- 1 tbsp light soy sauce
- 1 tbsp cornstarch
Sauce and Cooking
- 2 tbsp vegetable oil
- 3-4 cloves garlic, minced
- 1 tbsp ginger paste or grated ginger
- 4 tbsp honey
- 1/4 tsp chili flakes (optional)
- 2 green onions, sliced for garnish
Instructions
- Marinate the shrimp: In a medium bowl, combine the soy sauce and cornstarch, then add the peeled and deveined shrimp. Toss well to coat and set aside to let the shrimp absorb the marinade. This step, known as ‘velveting’, helps protect the shrimp from drying out during cooking.
- Cook the aromatics: Heat the vegetable oil in a non-stick frying pan over medium heat. Add the minced garlic and ginger and cook for no longer than 30 seconds until fragrant, being careful not to burn the garlic.
- Cook the shrimp: Add the marinated shrimp to the pan and cook for 1-2 minutes on each side depending on the shrimp size, until the shrimp turn opaque and are cooked through.
- Add honey and seasoning: Pour in the honey and sprinkle the chili flakes if using. Toss gently to evenly coat the shrimp with the sticky honey garlic sauce, then immediately remove from heat to prevent burning the honey.
- Garnish and serve: Sprinkle the sliced green onions over the shrimp for a fresh bite. Serve the honey garlic shrimp over steamed rice or as a flavorful starter.
Notes
- Velveting the shrimp with cornstarch and soy sauce helps keep the shrimp moist and tender during cooking.
- Do not overcook the shrimp to avoid rubbery texture; cooking for 1-2 minutes per side is sufficient.
- Adjust chili flakes to taste for desired level of spiciness or omit for a milder dish.
- Use fresh ginger paste or freshly grated ginger for the best flavor.
- This recipe pairs well with steamed rice or a light vegetable stir fry.
Nutrition
- Serving Size: 1/4 of recipe
- Calories: 256 kcal
- Sugar: 17 g
- Sodium: 1138 mg
- Fat: 9 g
- Saturated Fat: 6 g
- Unsaturated Fat: 3 g
- Trans Fat: 0 g
- Carbohydrates: 21 g
- Fiber: 1 g
- Protein: 24 g
- Cholesterol: 286 mg


